

FNT X1 Stackable for AMS buildplate holder


FNT X1 Stackable for AMS buildplate holder
Read first, then print
please read this article, which explains the structure of the FNT model family and details the compatibility of each version with different 3D printers.
FNT X1 Stackable for AMS buildplate holder
(FNT X1/P1 Stackable for AMS buildplate holder with button)
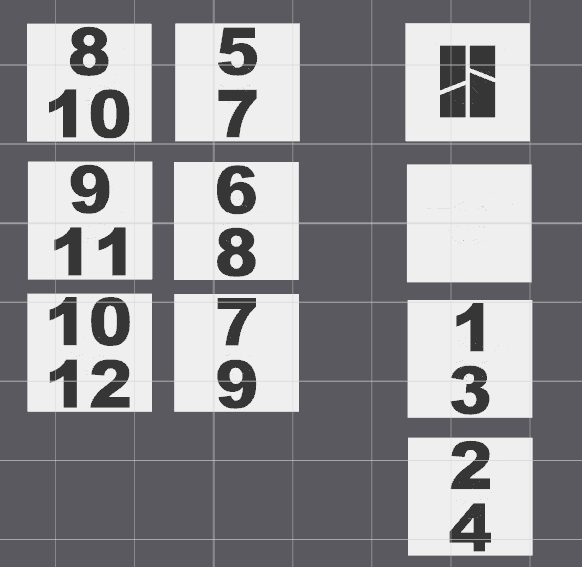
logoplates with more numbers added.
Hello!
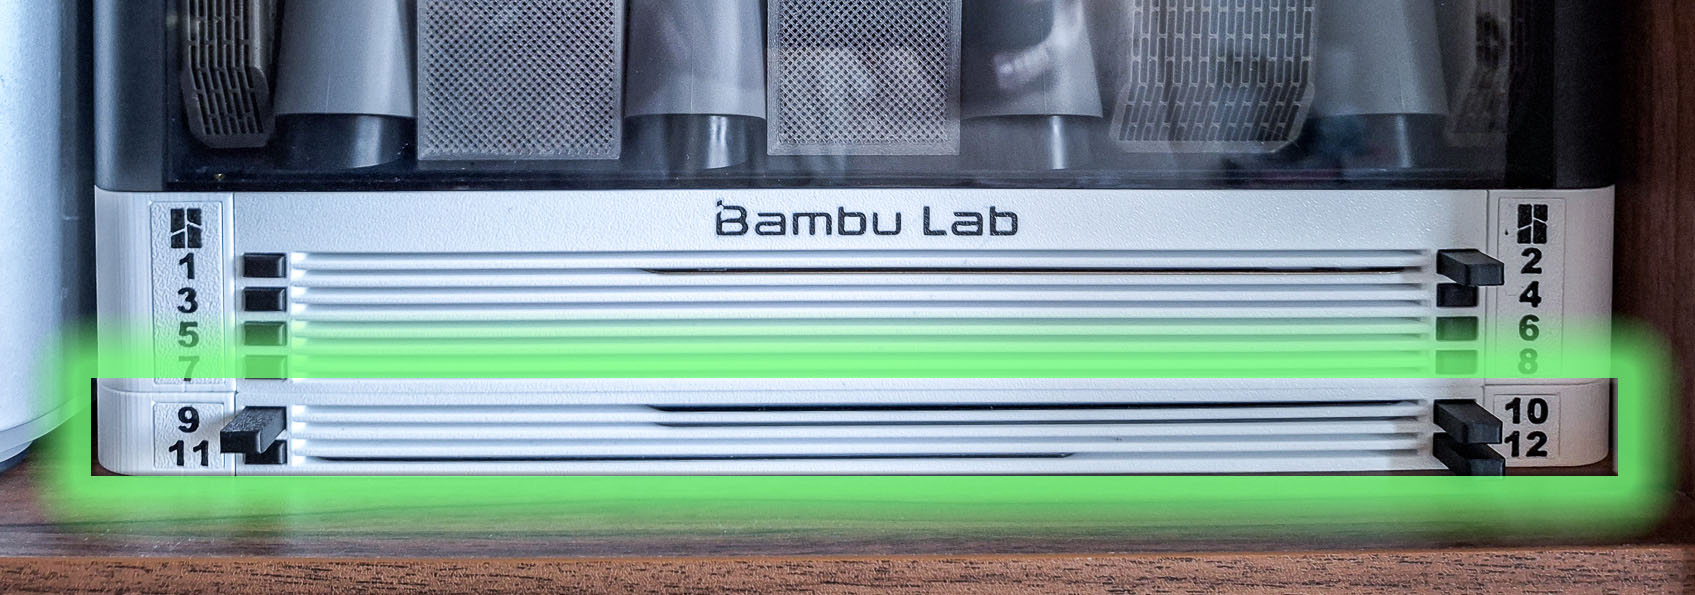
Following the success of my original plate holder designed as a base for the AMS, I am excited to introduce the next step in modular storage: the Stackable / Standalone FNT buildplates holder, now joining the FNT family. The Stackable holder is currently for 4 or 8 buildplates!
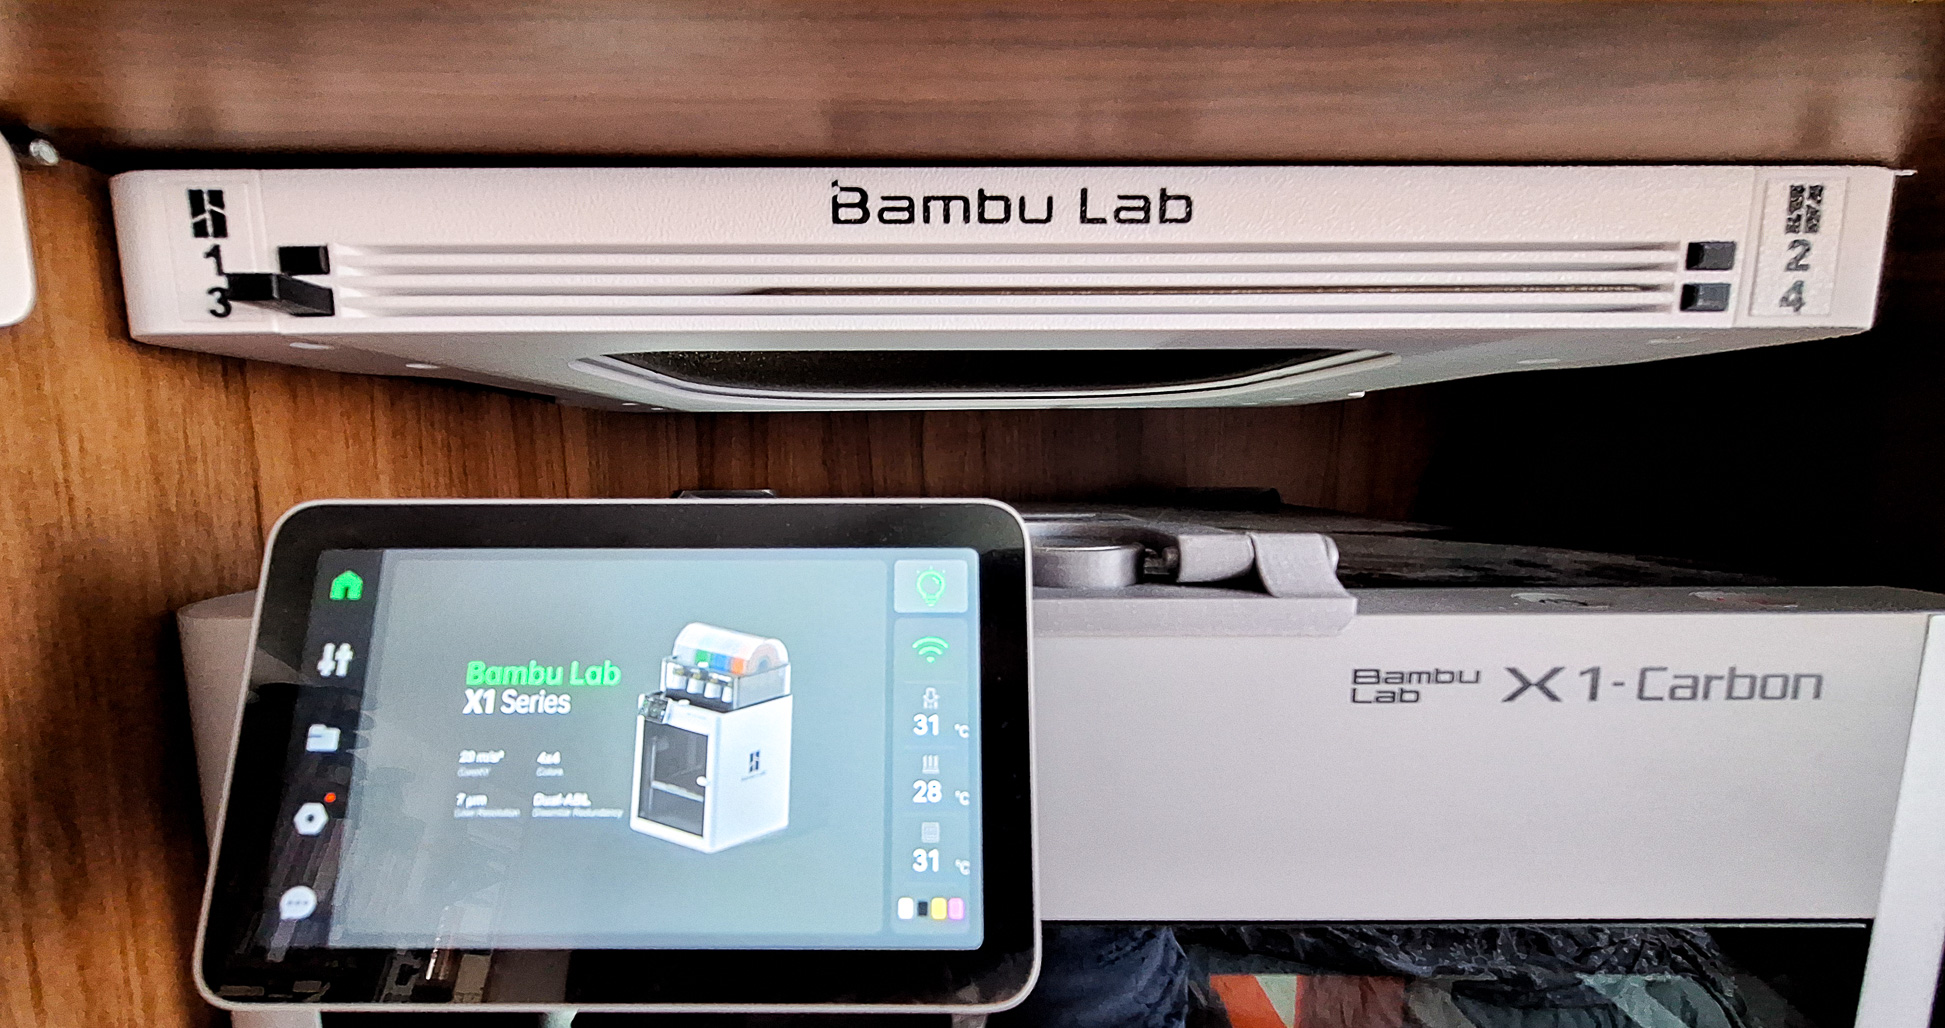
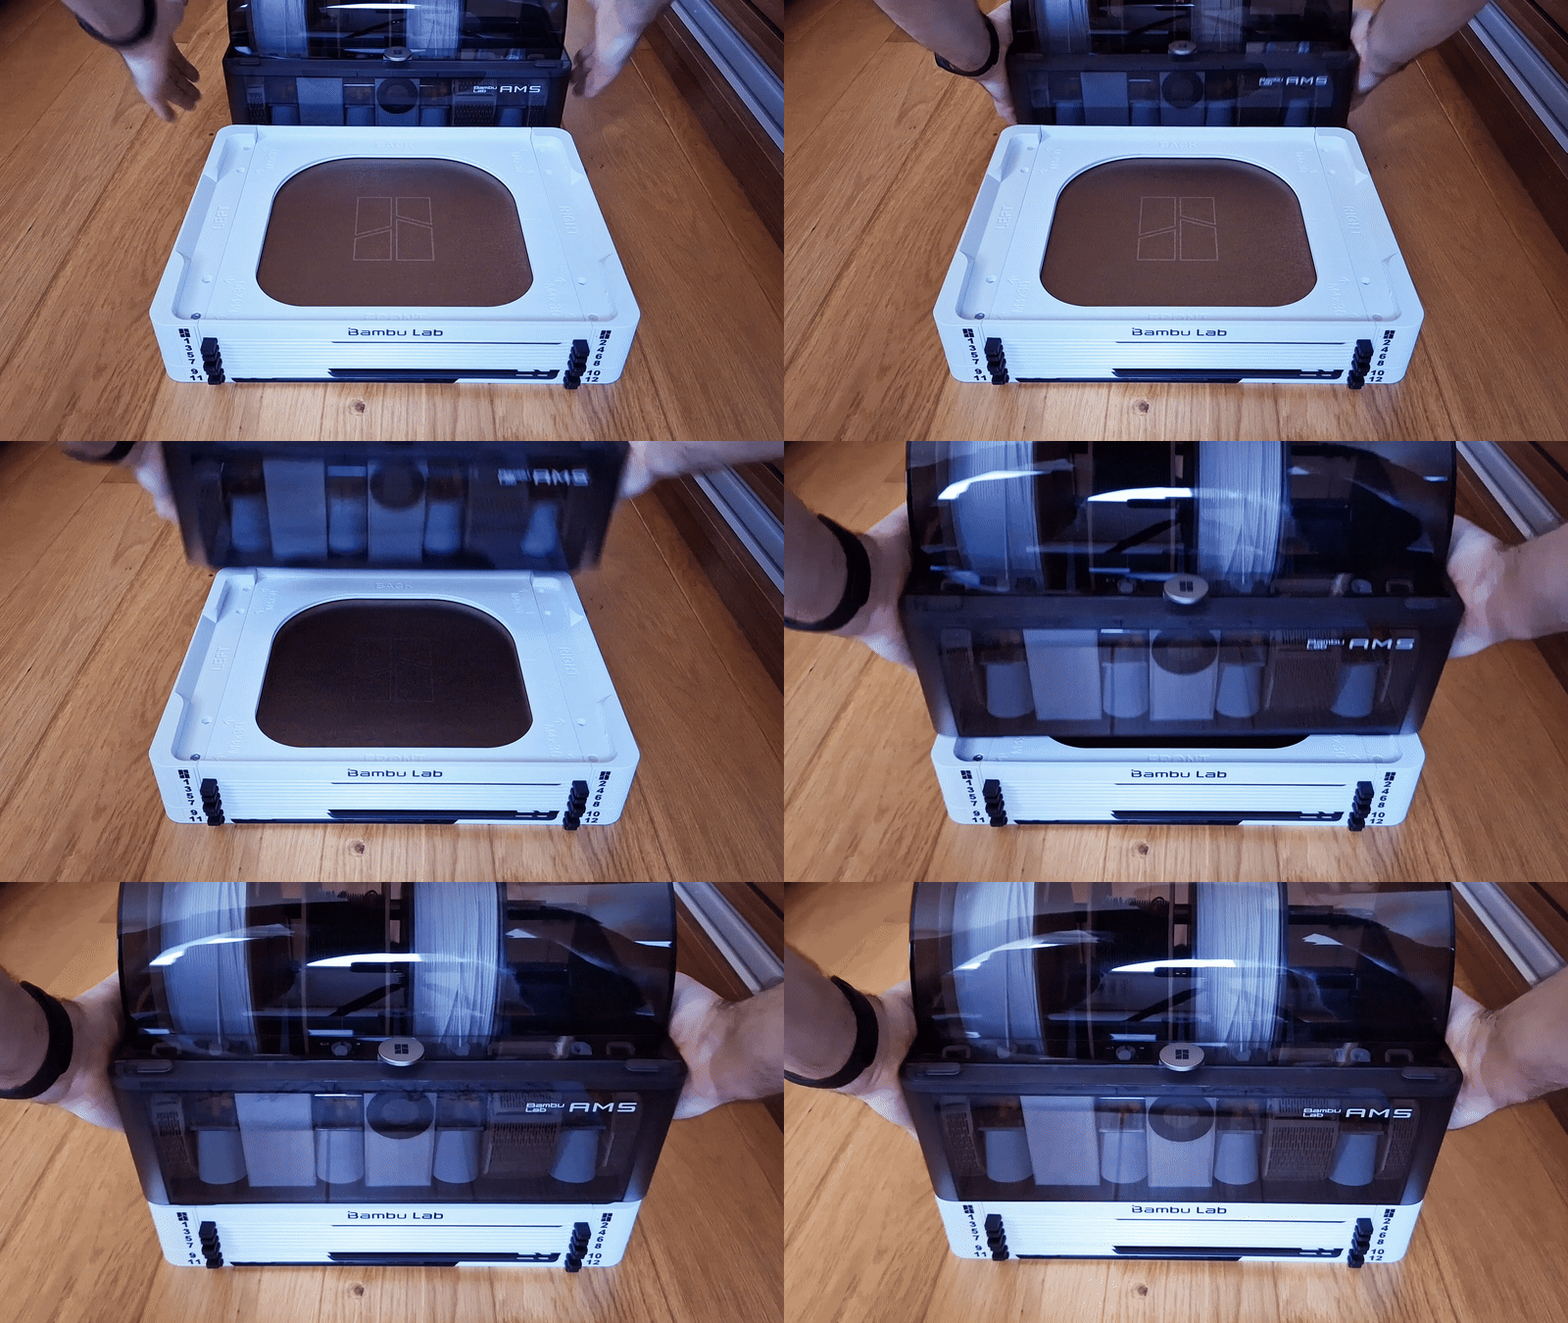
Whether you're expanding your current setup with AMS FNT plates holder or starting fresh, this versatile holder offers multiple configuration options. Use it as an extension of the stackable system, as a standalone plate holder, or even mount it underneath a shelf — the choice is yours.
How many buildplates can you stack? Just try it!
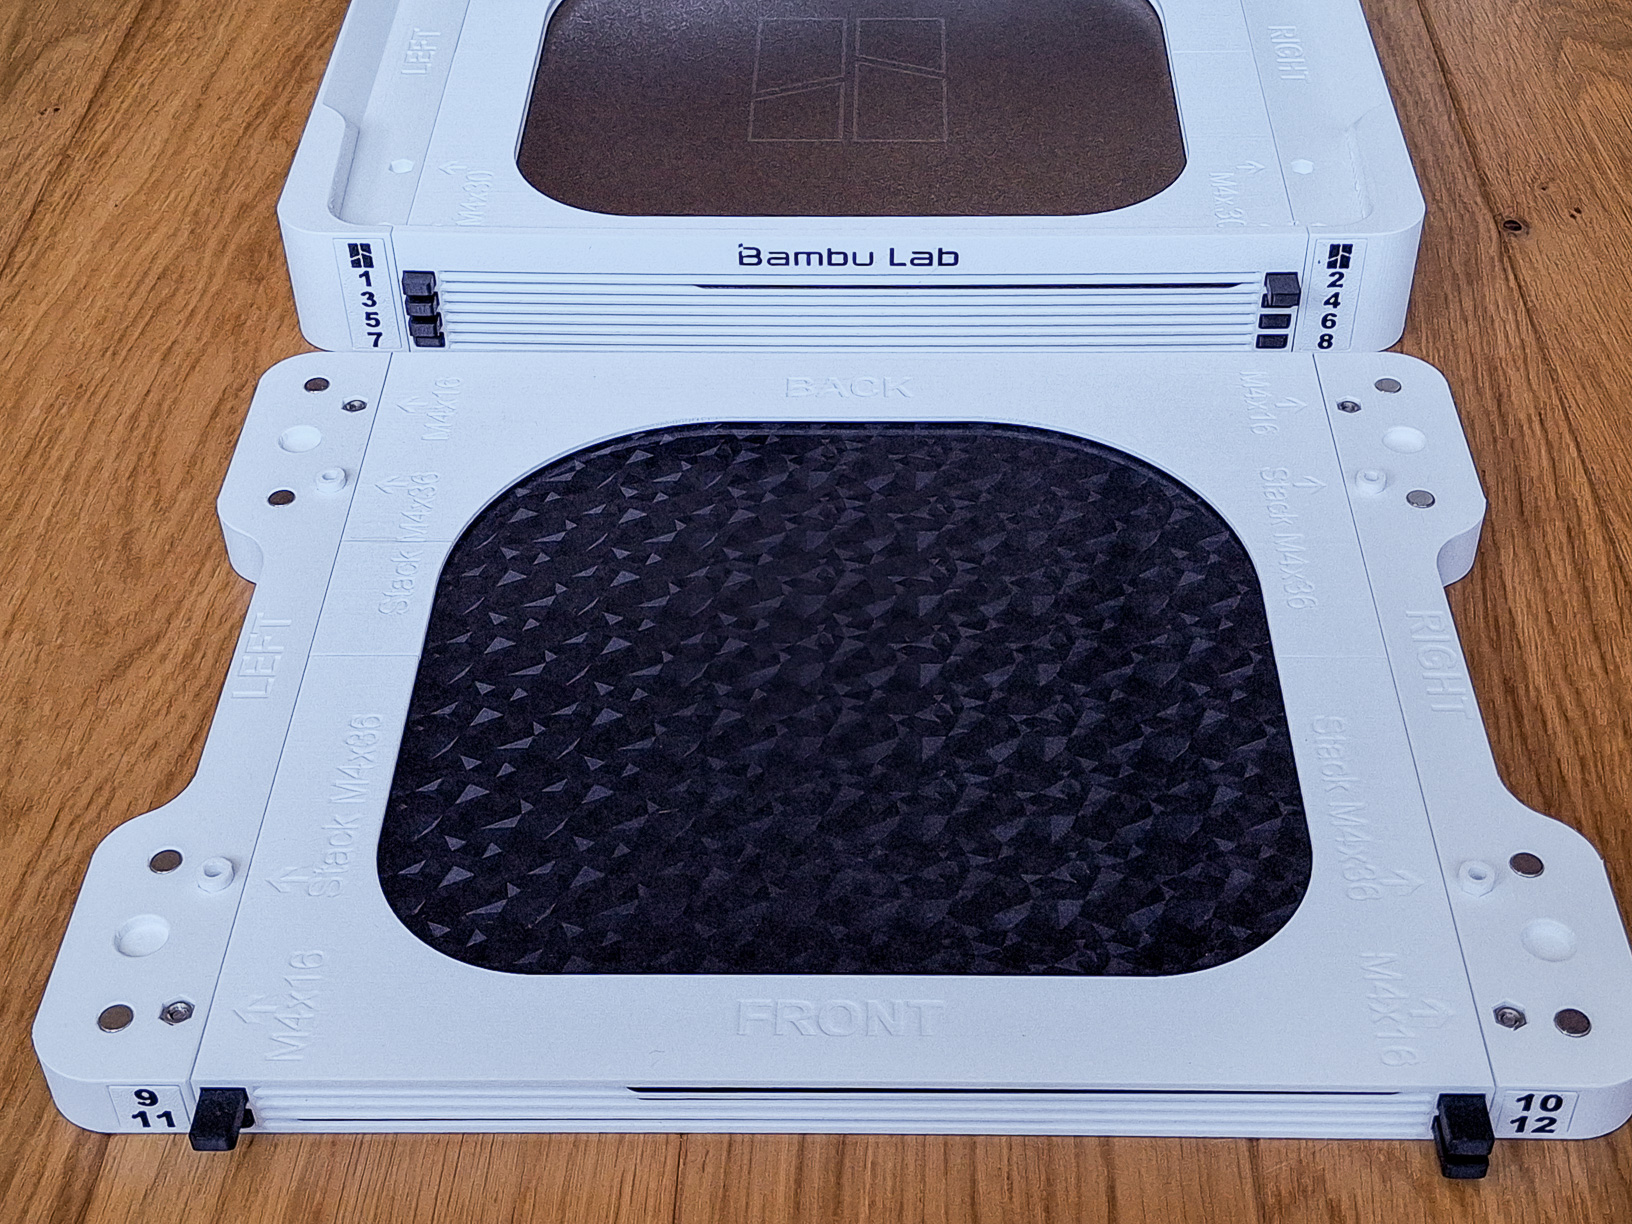
Discover the full FNT buildplates holder family here and explore all the ways you can build your perfect setup. Here you will find other models and accessories that fit the holder.
Stackable / Standalone FNT buildplates holder for X1 P1 A1 with button
Efficient storage for your build plates — designed with usability in mind.
Managing multiple build plates for Bambu printers can quickly become a challenge, especially when space is limited. To solve this, I designed a dedicated build plate holder with an integrated eject button, offering both practical functionality and a clean aesthetic.
The holder ensures smooth insertion and removal of build plates, minimizing direct contact and reducing the risk of contaminating the print surface with fingerprints or oils.
Key features:
- Eject button releases the build plate approximately 3 cm for easy access
- Automatic release of the button when a plate is inserted
- Versatile mounting options — can be used vertically or attached to the side of your printer
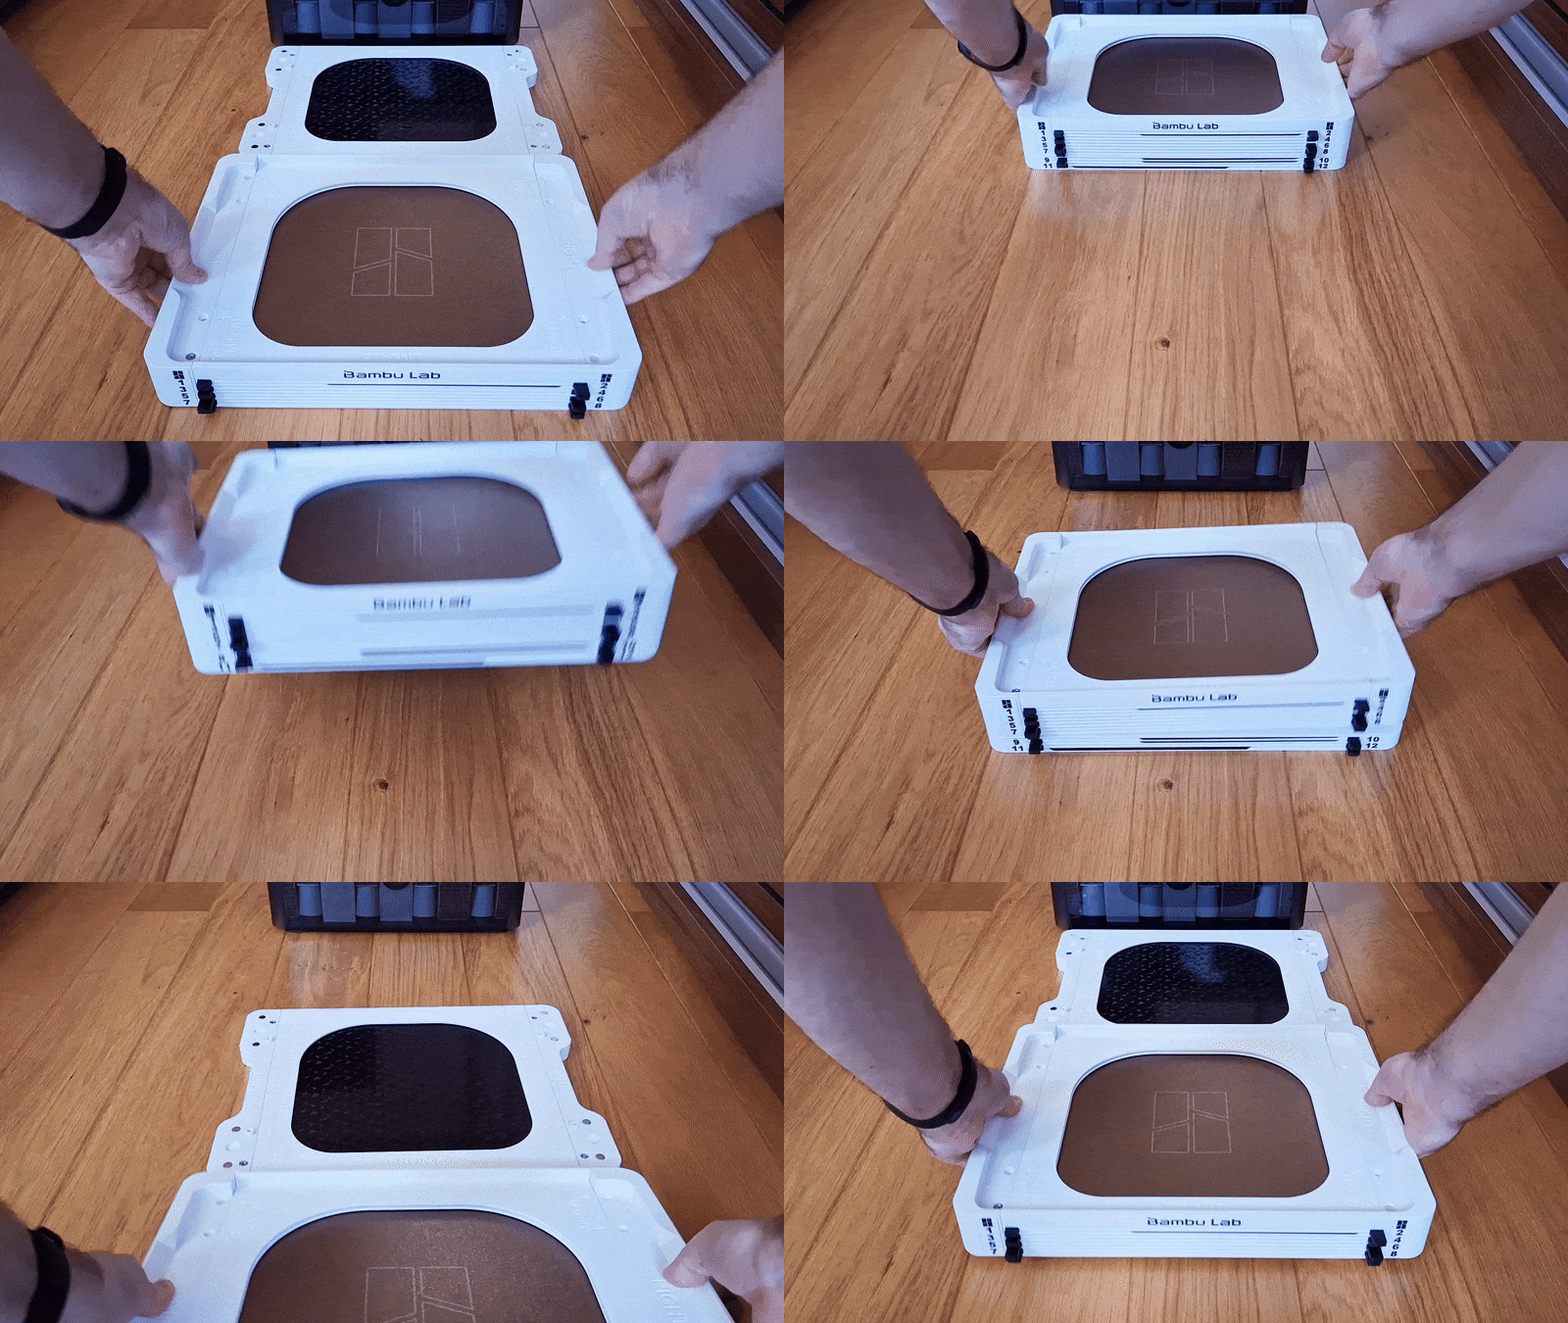
Flexible stacking, your way:
- Effortlessly stack using spacers
- Secure with 8x3mm neodymium magnets (4 for a firm hold, 8 for extra strength)
- Bolt it directly to another holder for maximum stability
Smart, modular and customizable, take your build plates to the next level of storage!
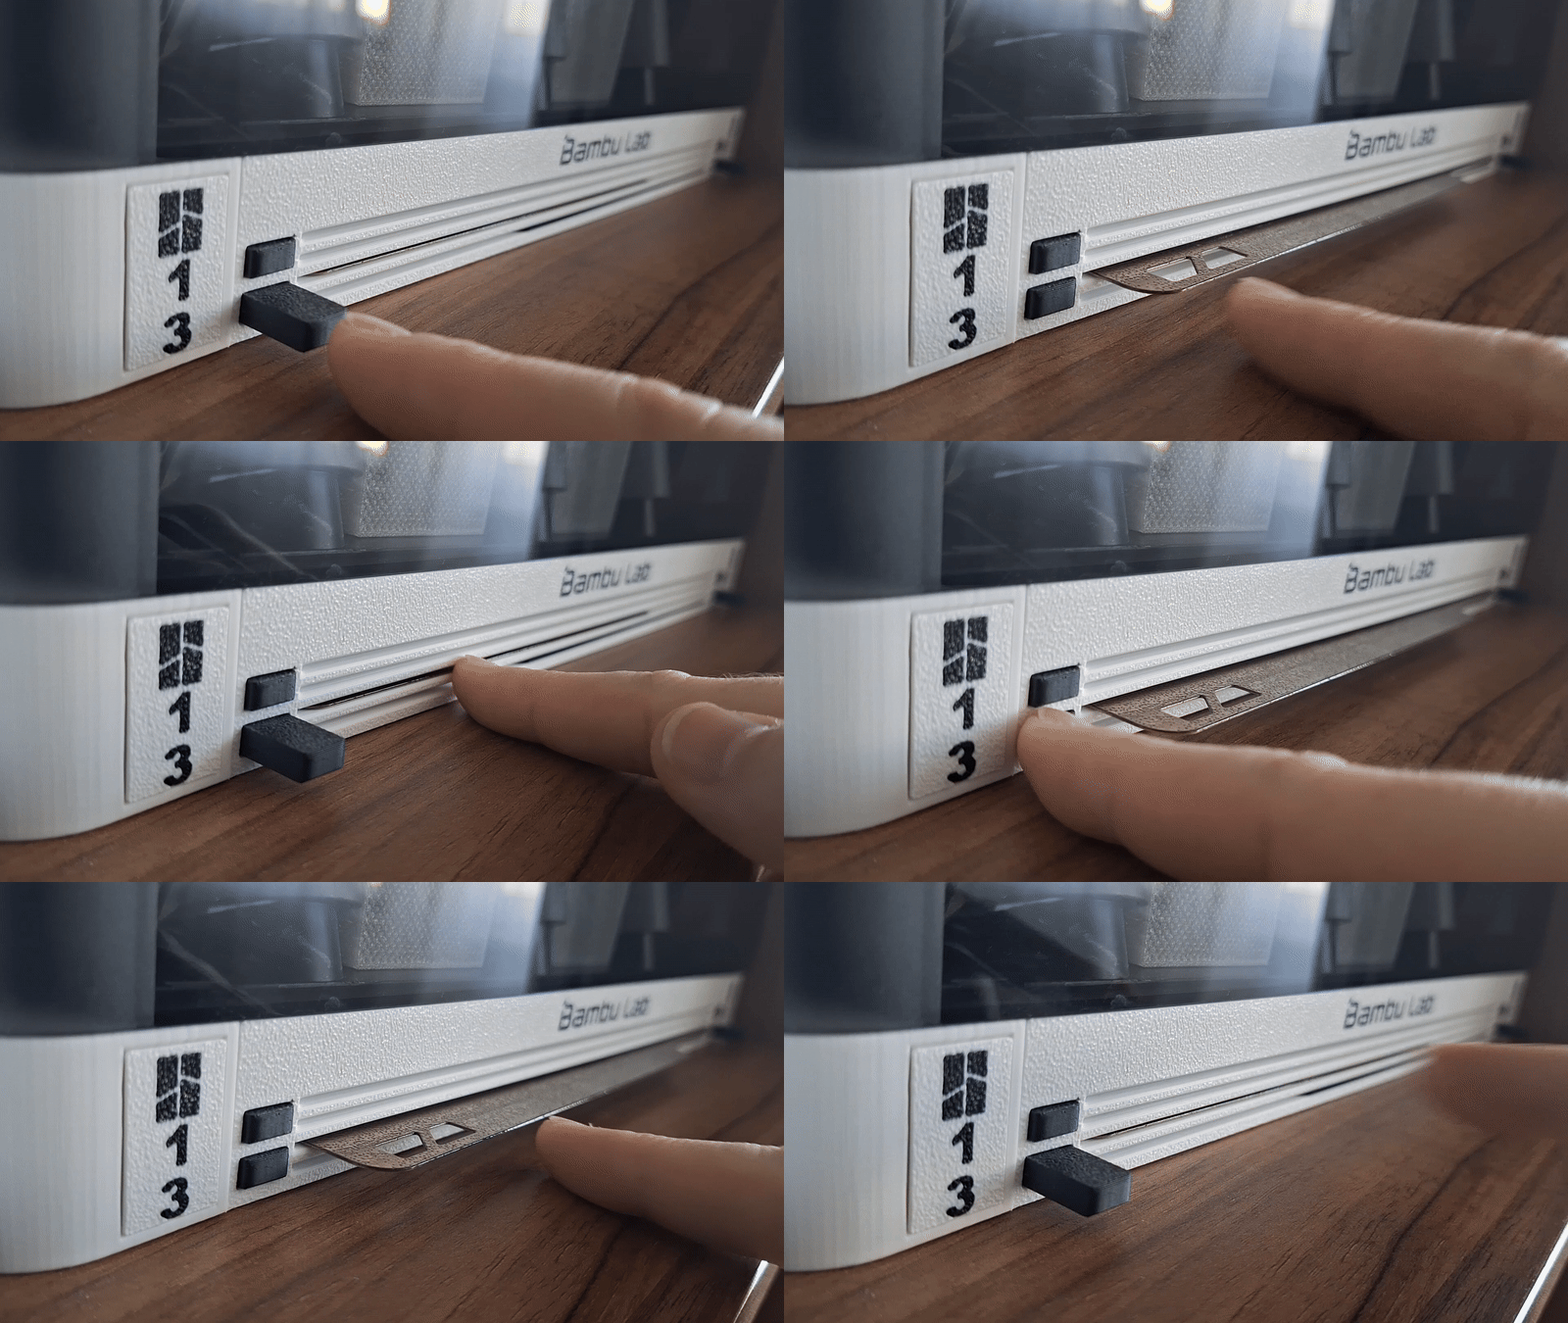
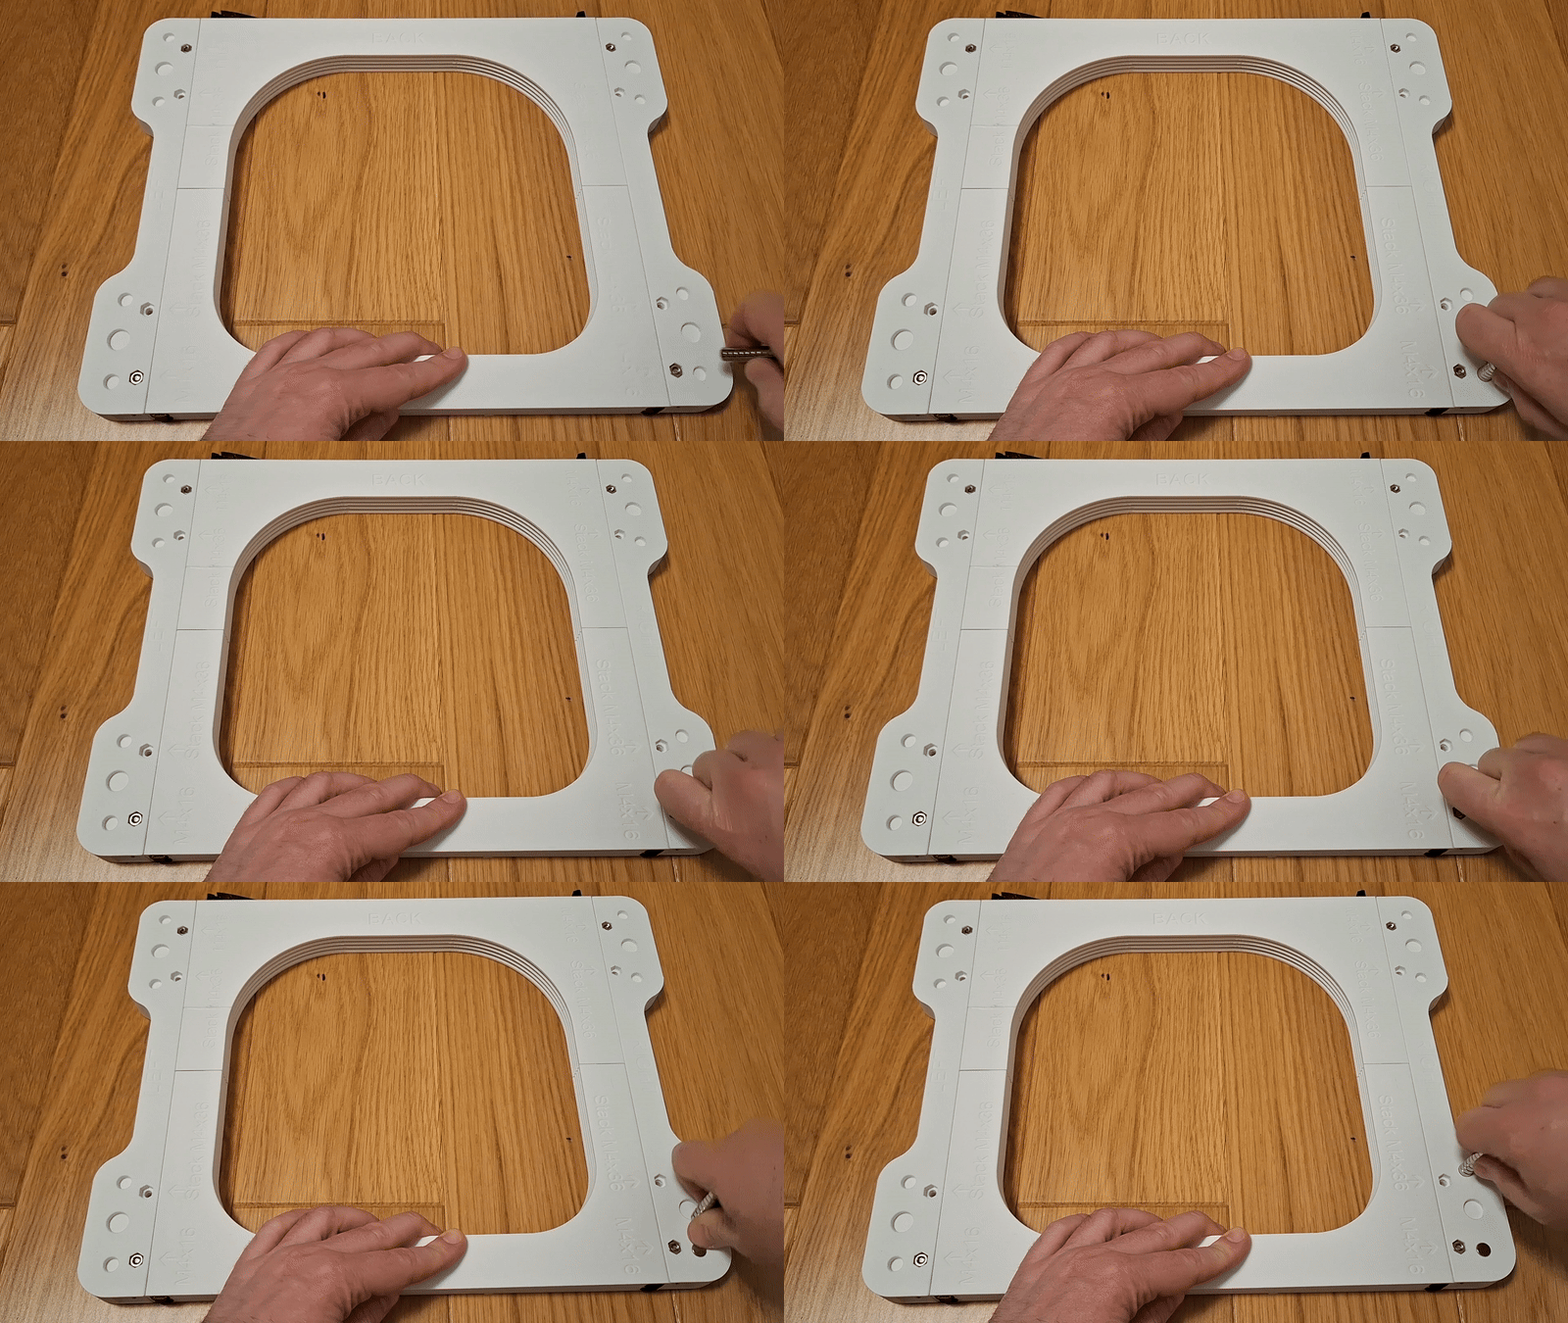
What non 3D-printed parts will you need?
- 4 or 8 pieces of M4 nuts
- 4 or 8 pieces of screws M4x16 (4-plates) or M4x30 (8-plates) type DIN7985 or simmilar (If you use countersunk screws, don't forget to use the included washers.)
- Depending on the use, you will also need other parts.
-
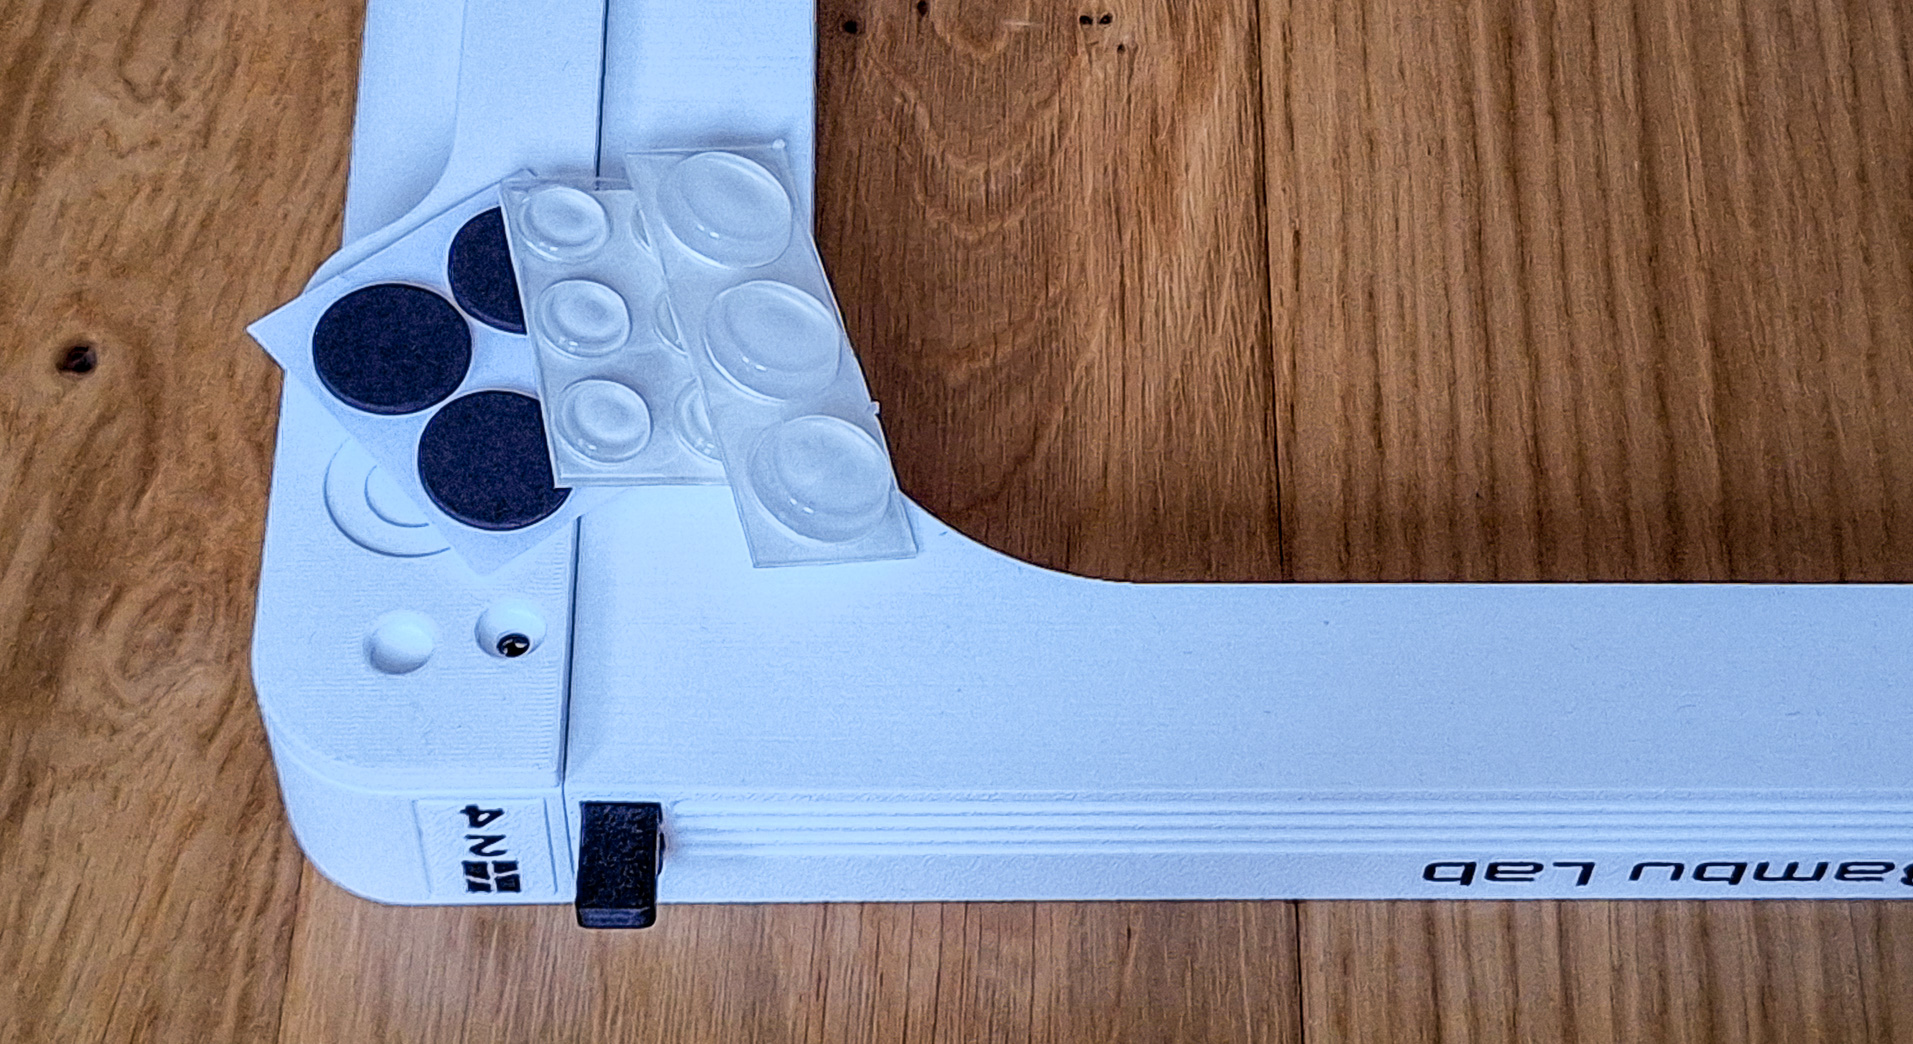
Separately placed holder - I recommend non-slip pads
- Silicone - round up to 12x3.5 mm
- Foam/rubber - round up to 22x2.5 mm
- TPU printed pads
-
Stacked holder to the FNT AMS holder
- stack using spacers (printed in profile)
- 8x3mm neodymium magnets + glue (4 for a firm hold, 8 for extra strength) You'll need double the amount of magnets if the counterpart doesn't have any installed. I recommend sticking the magnets to the holder with a suitable adhesive so that they hold better. Pay attention to the correct polarity.
-
Holder under the shelf
- 4 pcs of wood screws (max. 4 mm in diameter) with a length suitable for the selected holder
-
Separately placed holder - I recommend non-slip pads
The holder offers several smart features designed for flexibility and convenience:
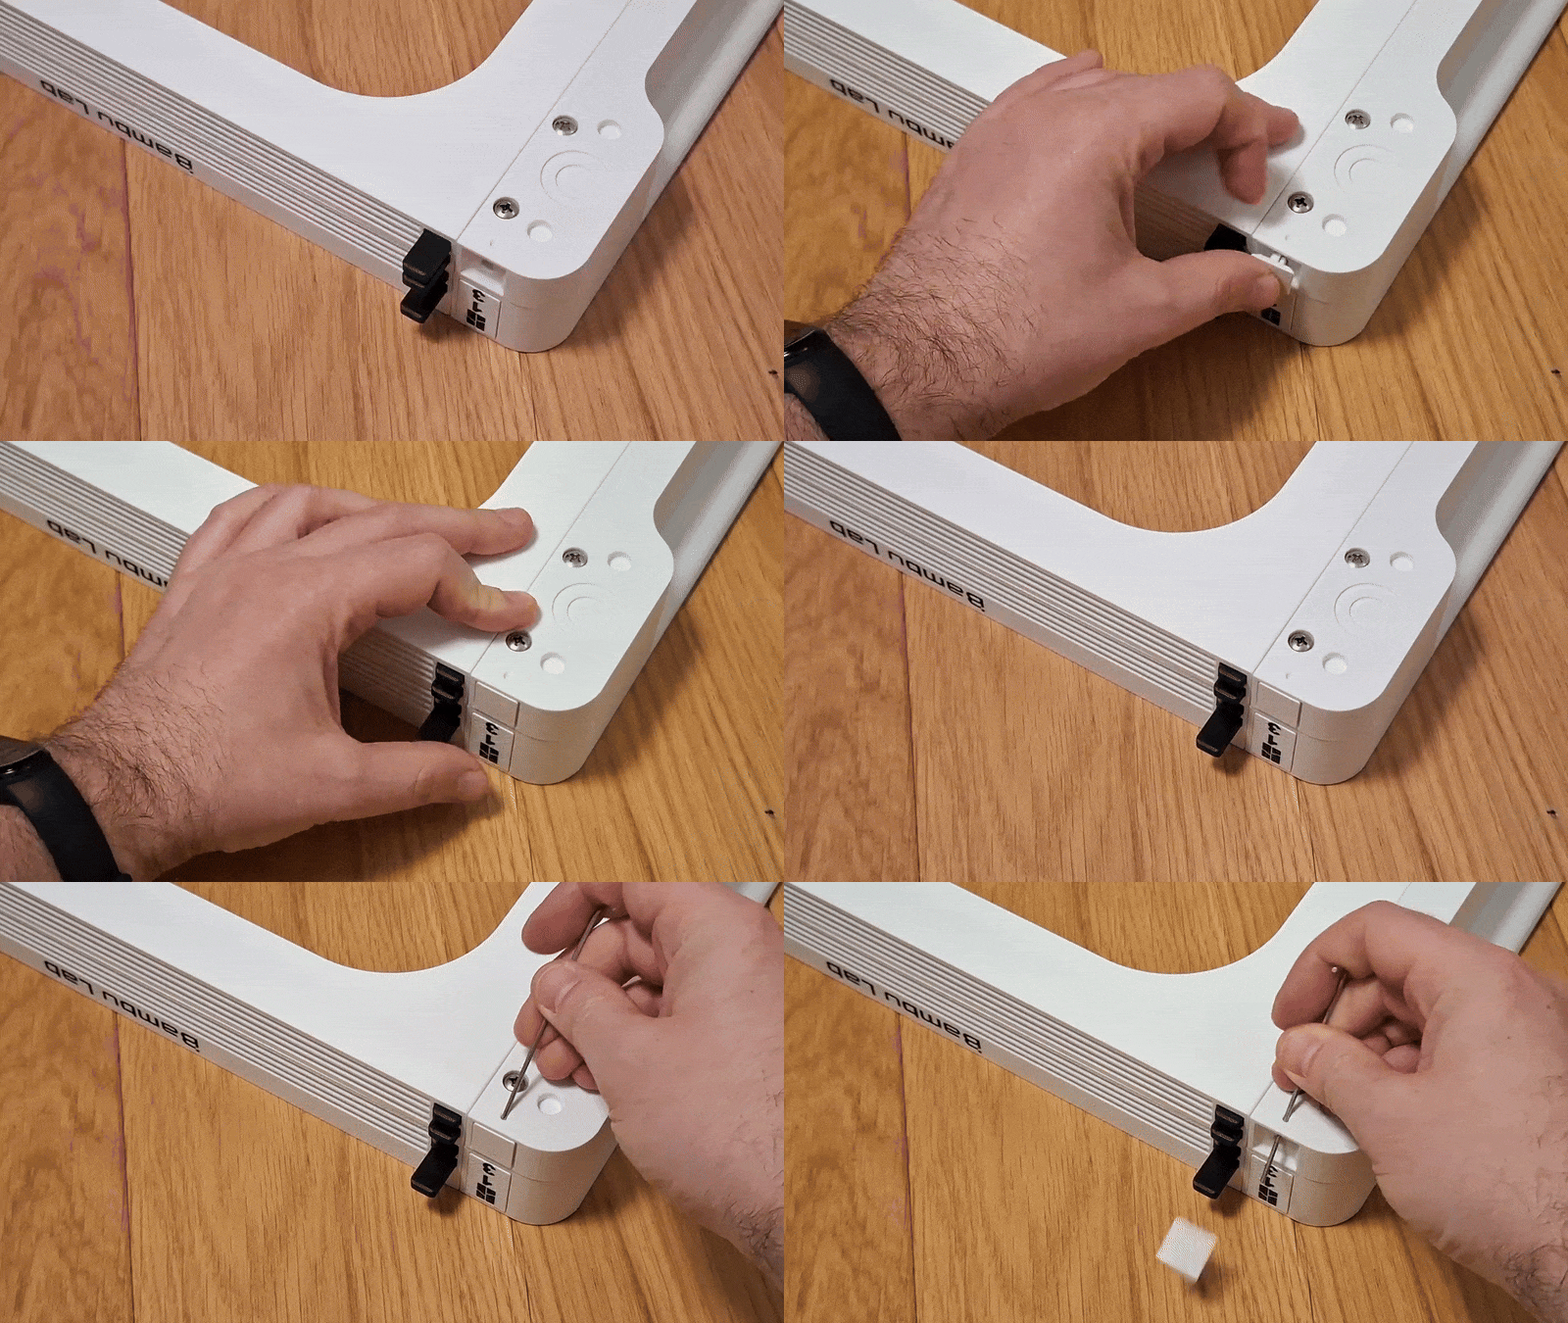
- Interchangeable side labels – Labels can be easily clicked into place, and removed via a small hole on the opposite side. A customizable template is included (LogoPlate.step), allowing you to add your own image or text.
- Optional underside mounting – If you don't wish to use it as a stand for AMS, you can attach it under a table or shelf using the pre-drilled holes and standard screws.
- Integrated side handles (AMS version only)– For comfortable and easy carrying.
- 4 mounting points for anti-slip pads – Located on the bottom for added stability.
- 8 slots for neodymium magnets (8x3 mm) – For secure, magnetic stacking or mounting.
- Labeled parts for easy orientation – All parts are clearly marked to make printing and assembly more straightforward.
⚠️ Important Safety Warning:
If you plan to use theholder on top of the printer, make sure to apply non-slip rubber feet. Dust on the glass surface can significantly reduce grip, and the printer's movement may cause the holder to slide, leading to a potential accident.
Do not leave the printer unattended until you’ve confirmed that the holder stable and the stand stays firmly in place during operation.
Printing Instructions
To achieve the best possible results, please follow these guidelines:
- Use the included print profile – It has been thoroughly tuned and tested for optimal performance.
- Printer requirements – This model is intended for closed printers such as the Bambu X1C or P1S.
- Build plate preparation – Make sure the plate is clean and degreased with IPA before printing. If there's any risk of the model lifting, apply a bit of 3DLac in the corners of the build plate. I’ve had no issues with textured build plates when following these steps.
- Filament quality matters – Don't use low-quality filament to prevent warping or non-functional button mechanisms caused by poor layer adhesion. Bambu PLA Basic works well.
-
Print settings:
- Layer height: 0.2 mm
- Supports: Yes
- Brim: Yes
- Speed/layer height: Do not modify – follow the provided profile for best fit and function
- Surface & temperature – I personally use a textured build plate at 60 °C with PLA on a Bambu X1C, and it works flawlessly.
- Warning – When using SuperTack at the recommended 45 °C, I experienced warping/peeling.
🧩 Assembly Instructions
-
Print the required parts (based on the selected version):
- Holder body components: Front, Back, Left + Right
- Buttons
-
Arms
-
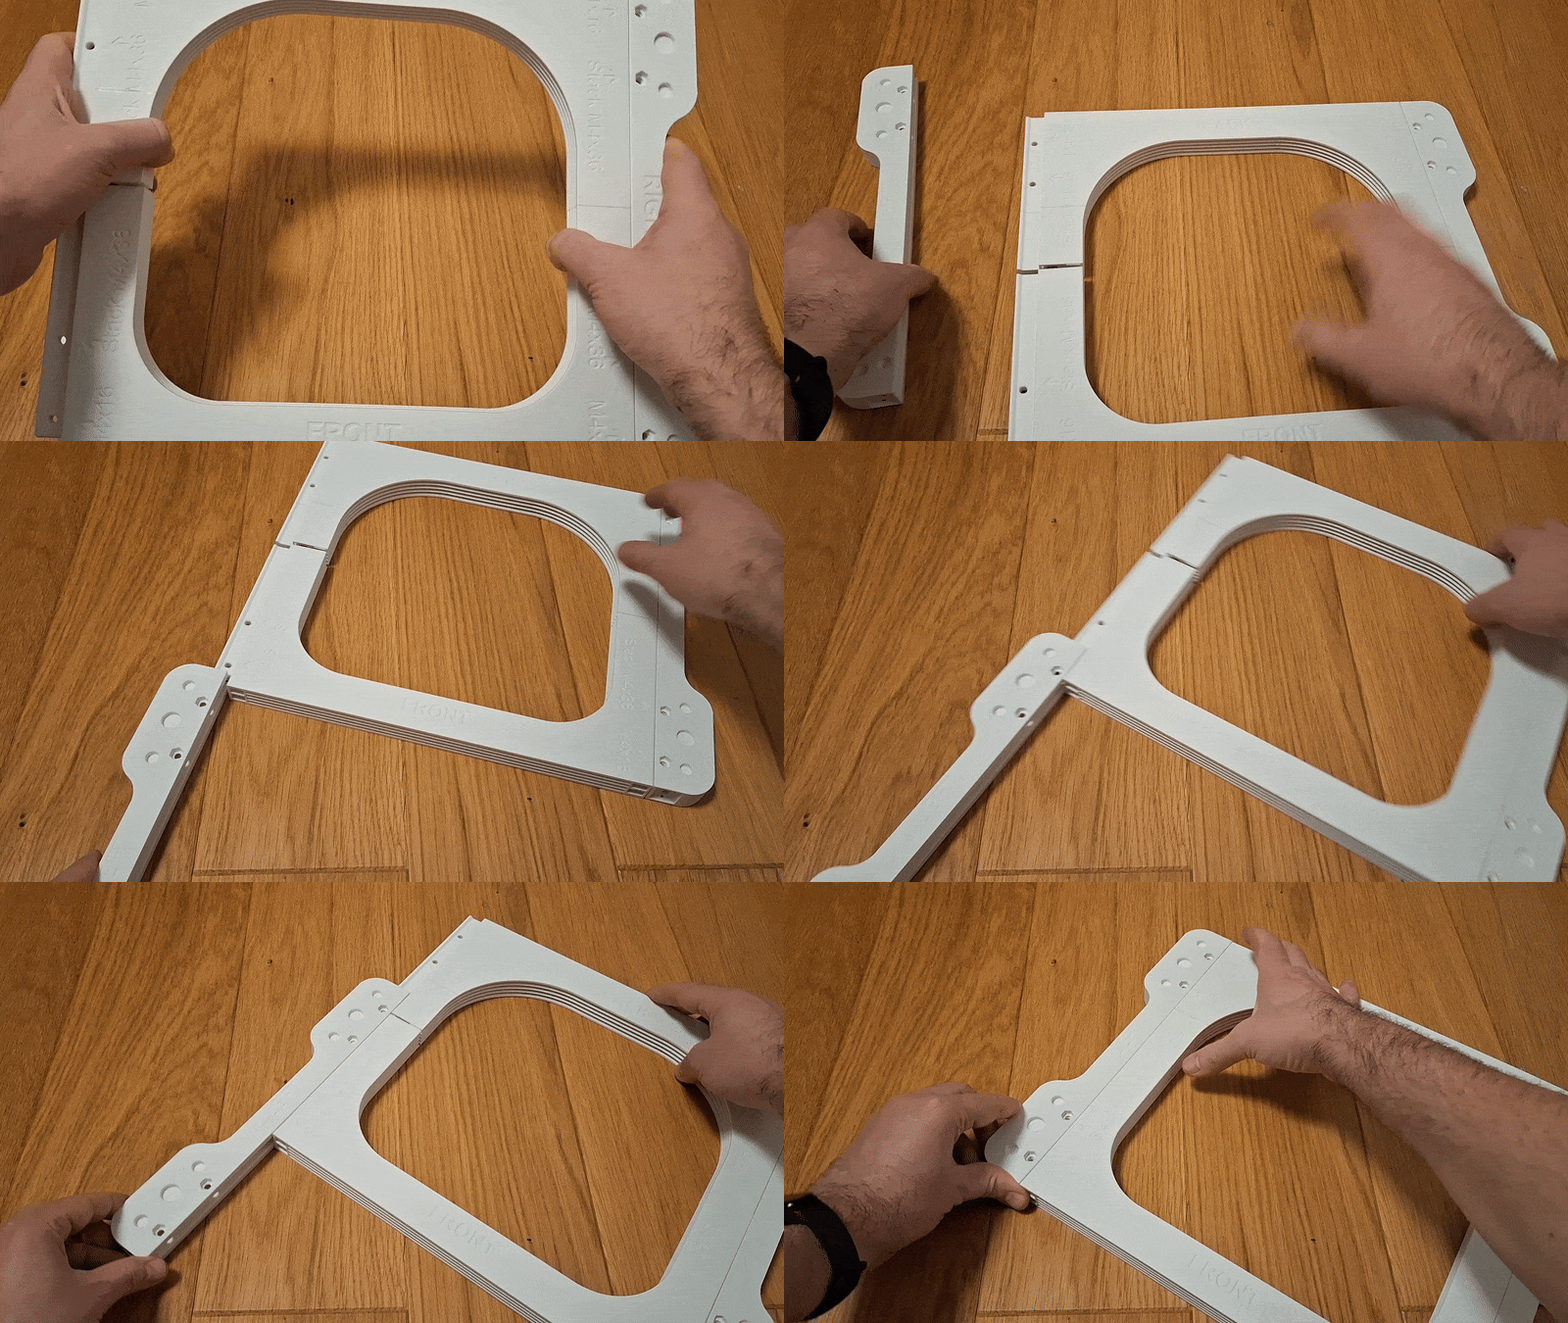
Assemble the holder body:
- Slide the Left part into the Front and Back parts.
- Slide the Right part into the Front and Back parts to form the body.
- Insert at least 4 M4 nuts into the corner slots.
- Use M4 screws (DIN 7985 or similar) to securely fix the body together.
-
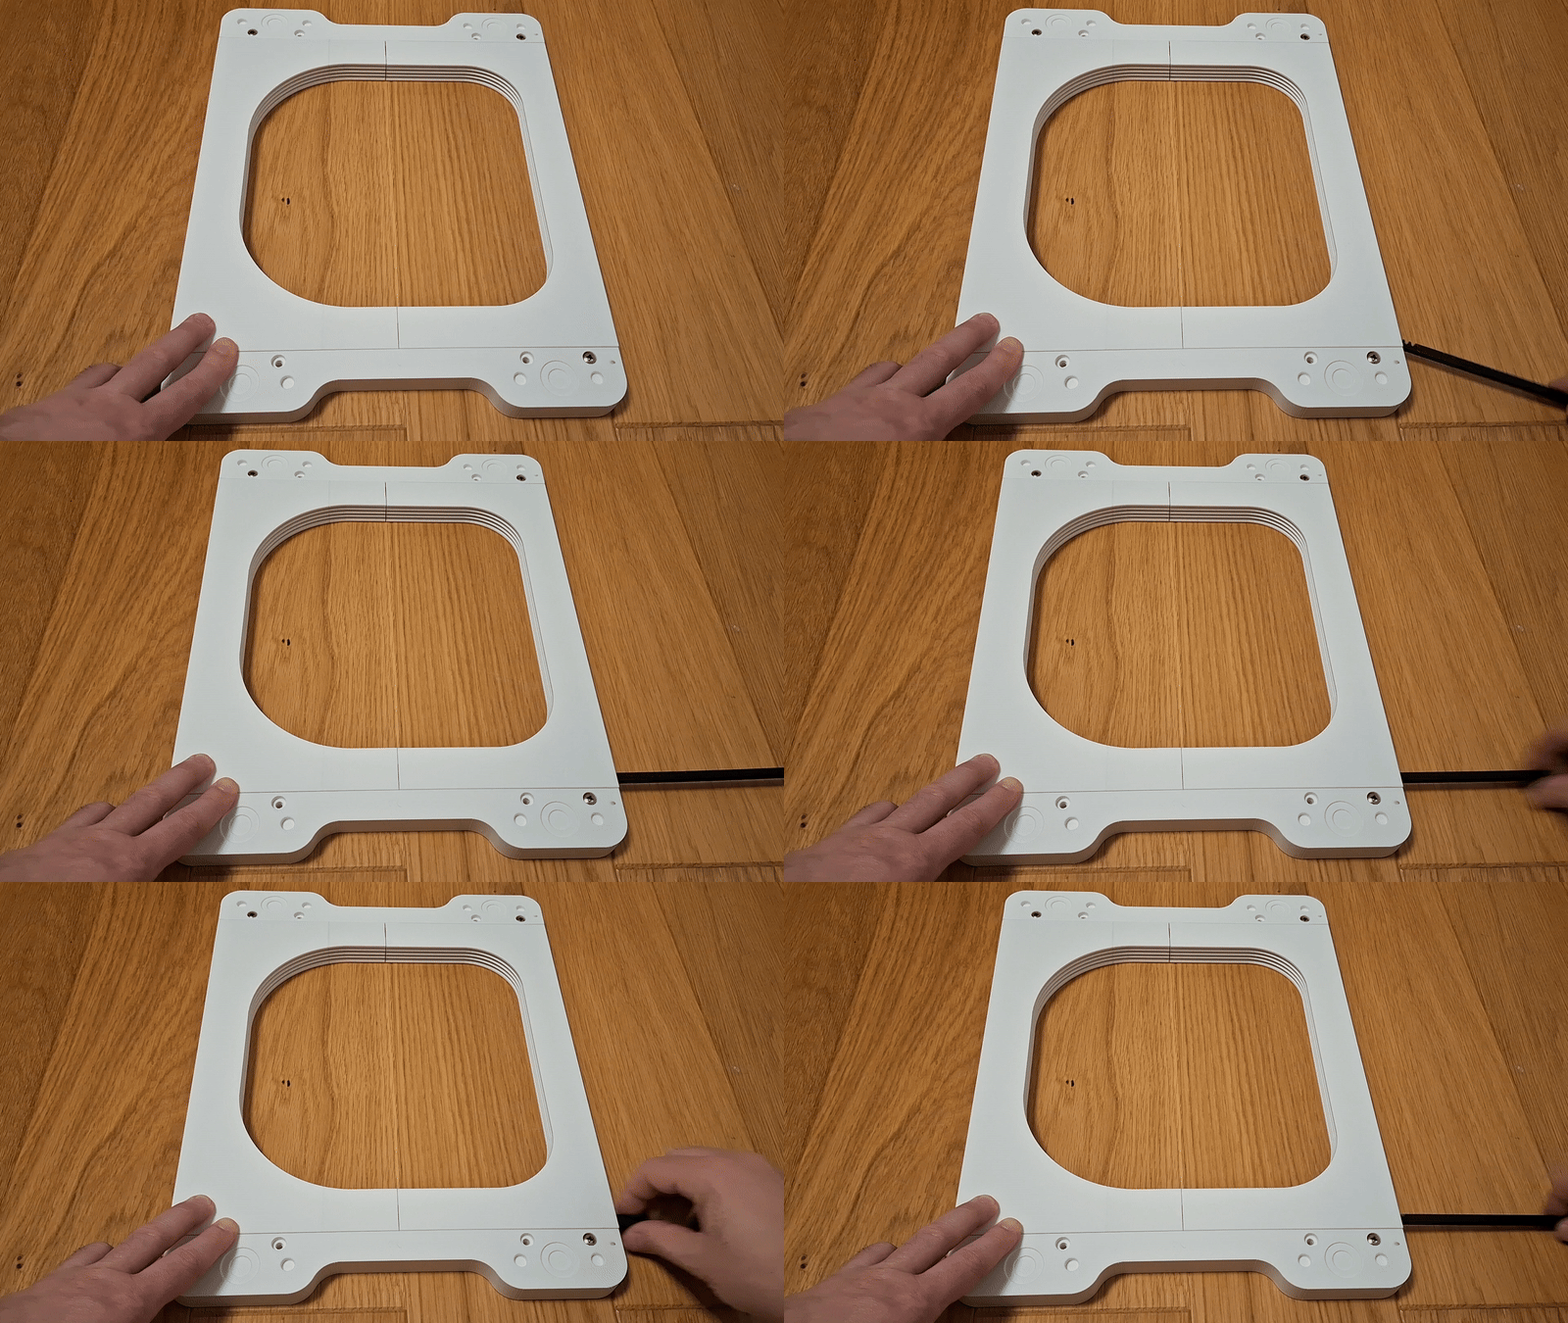
Install the button:
- Insert the button into its slot.
- Slide it in and out several times to smooth out any printing imperfections in the slot or button bar.
-
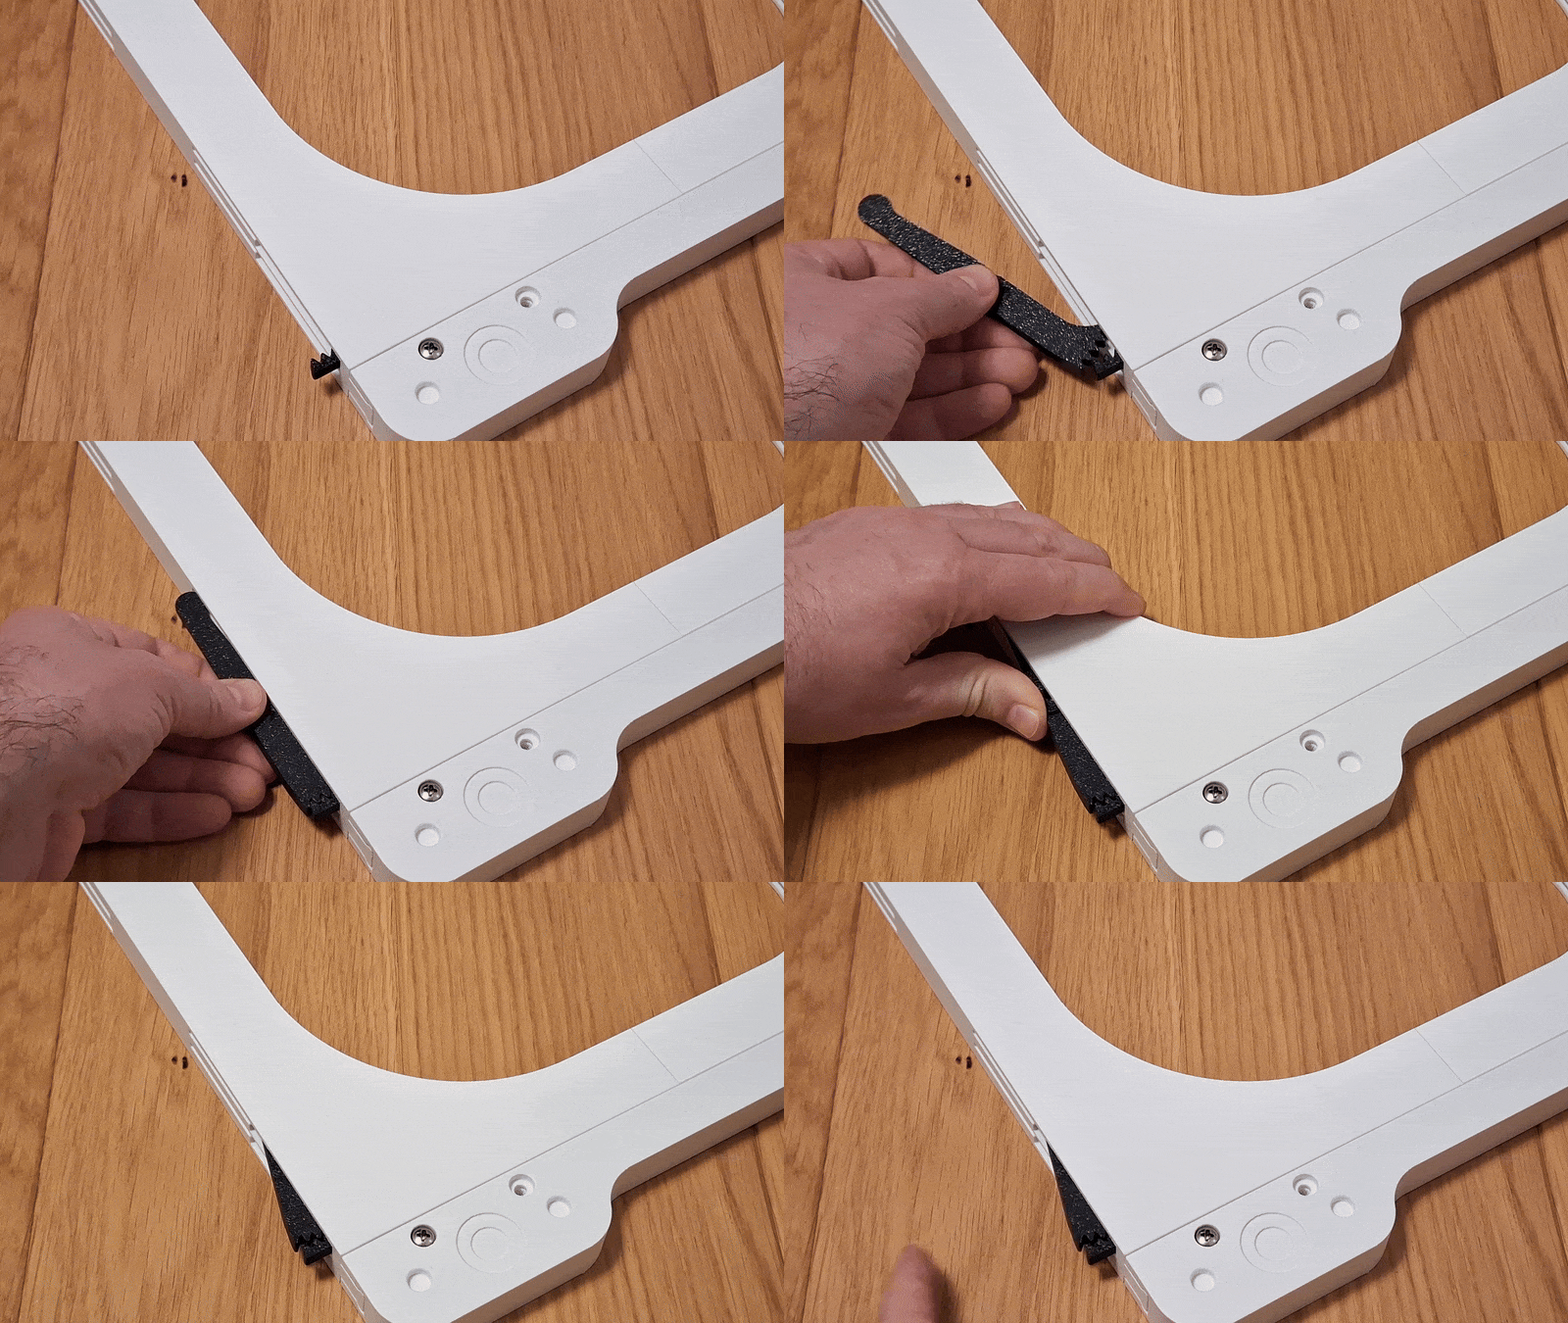
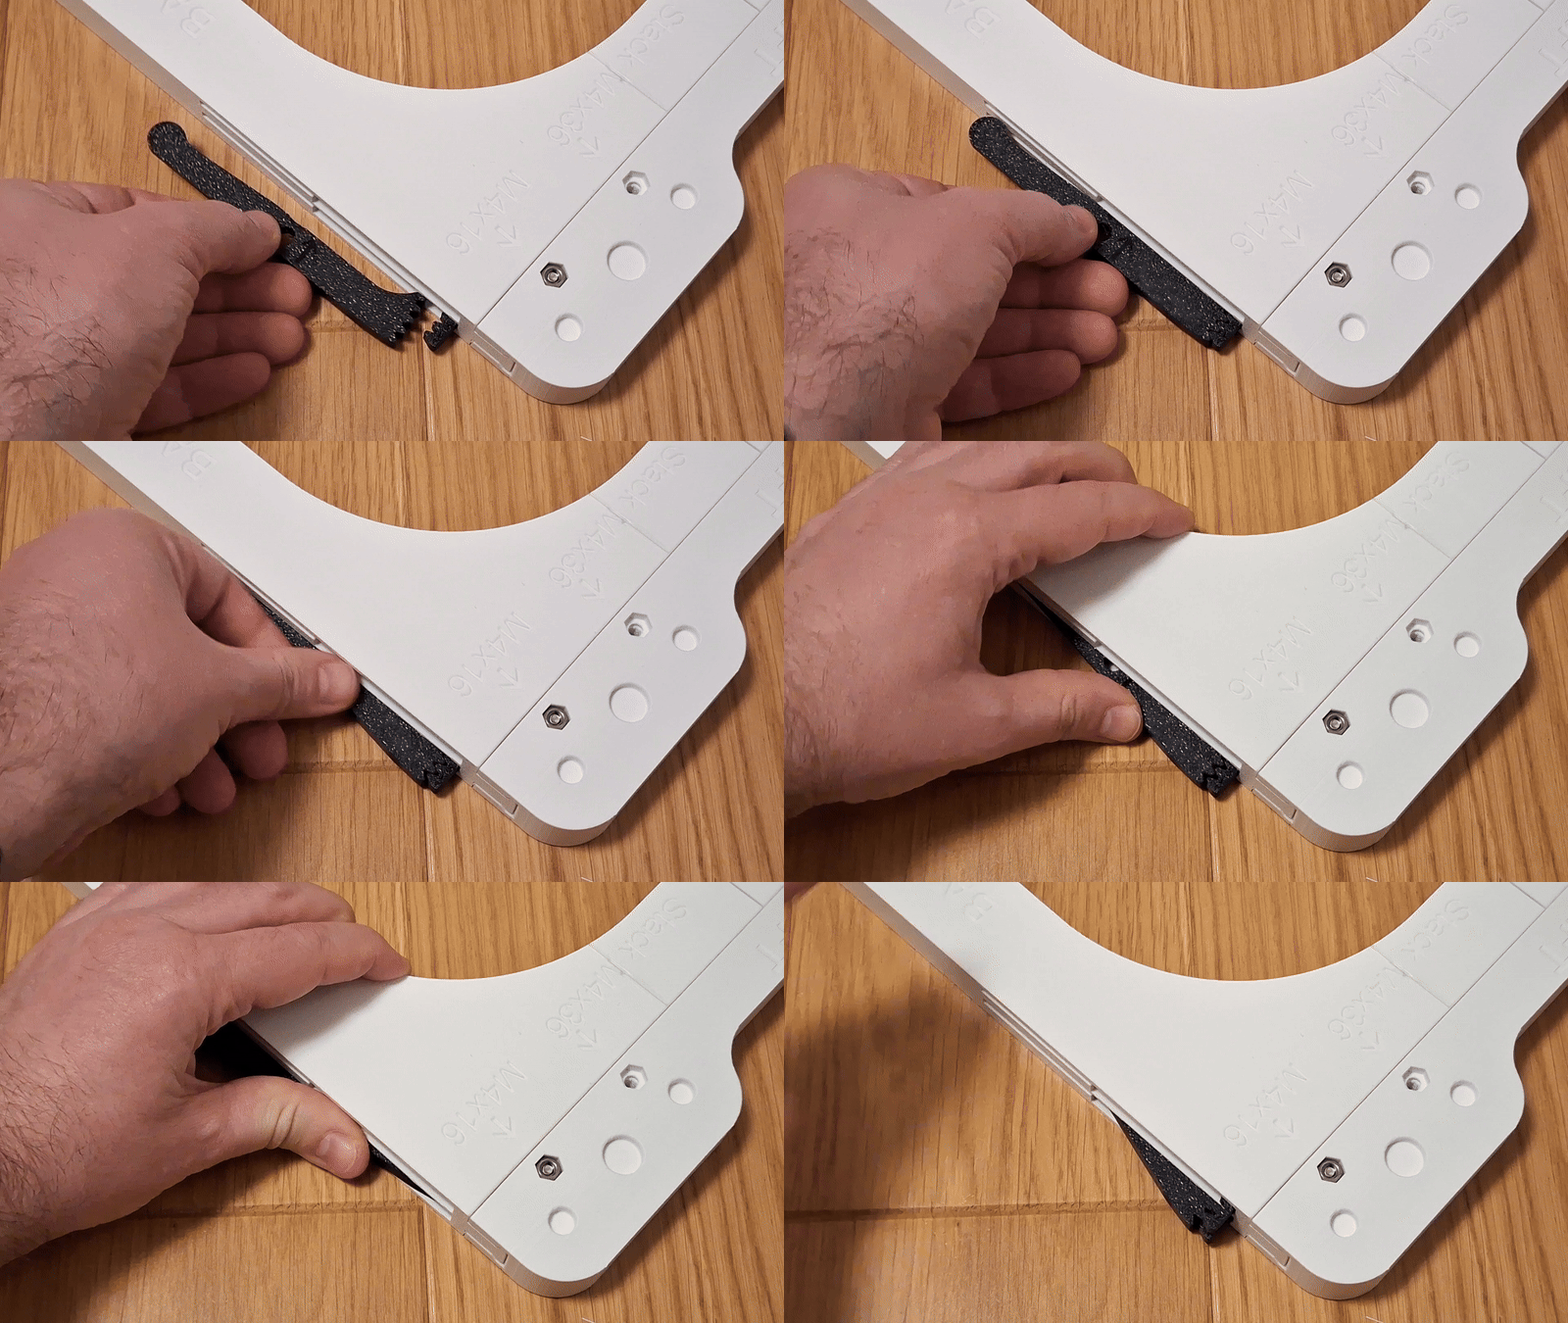
Attach the arms:
- Rotate the holder body to access the mounting points.
- Align the button teeth and arm teeth as shown in the reference image.
- Firmly push the arms into the holder.
- Install the upper arms first (positions 1 and 2), then the lower arms (3 and 4).
-
Test the mechanism:
- Make sure the button and arms move freely and smoothly.
-
Add finishing touches:
- Insert the labels into the designated slots.
- Mount the holder wherever suits your setup.
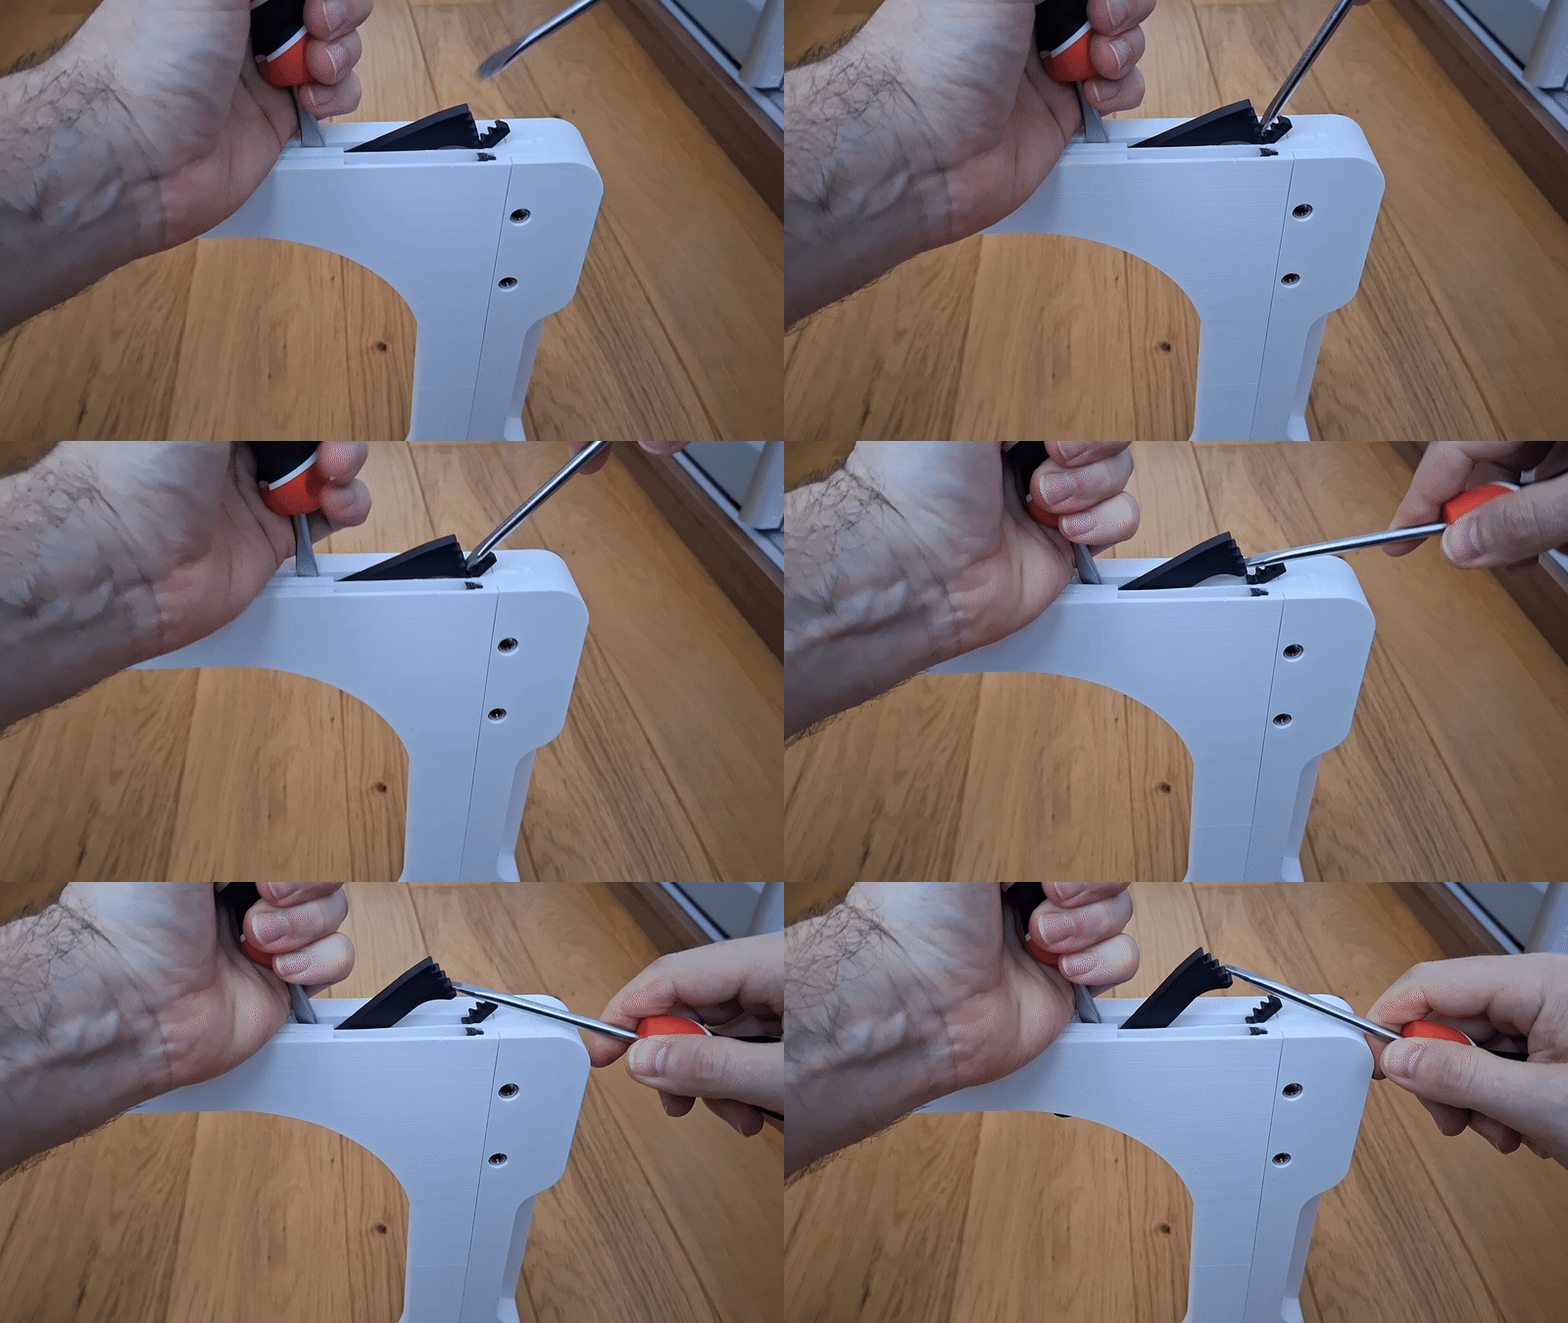
🛠️ Emergency Button / Arm Removal Procedure
In case the button or arm needs to be removed after full assembly, the following emergency procedure can be used.
Please note:
This method is designed to allow removal without damaging the main body of the holder. However, the button and/or arm may be damaged in the process and might require reprinting.
Proceed with care, and only use this option if standard disassembly is not possible.
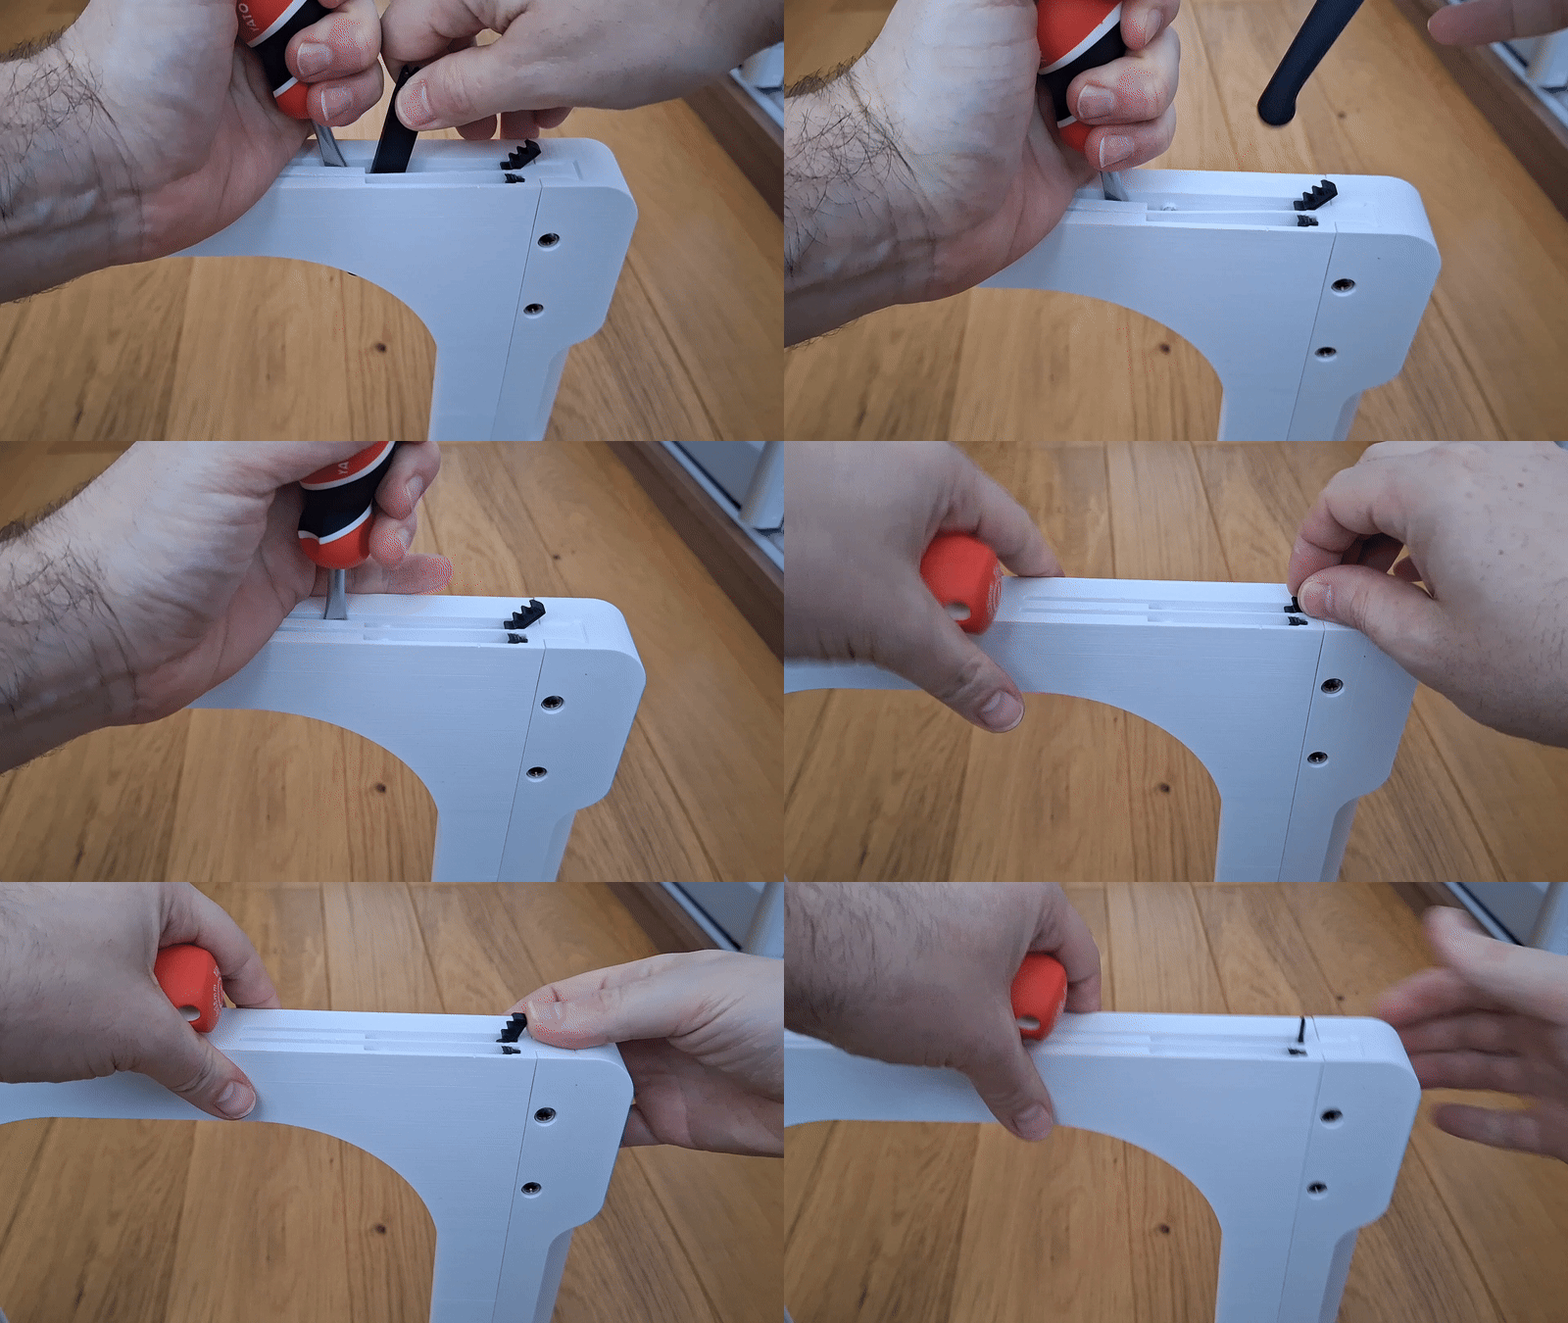
Happy printing!
Design by Frantisek23 on MakerWorld (license: BY-SA).