

FNT Custom logo plates - how to modify


FNT Custom logo plates - how to modify
- Made to order — 3D printed after you buy
- Free shipping on orders over $25
- Quality checked before it ships
- Questions? Contact us · Returns
Read first, then print
please read this article, which explains the structure of the FNT model family and details the compatibility of each version with different 3D printers.
FNT Custom logo plates - how to modify
Update 21.2.2026 - AMS 2 Pro logoplates style added
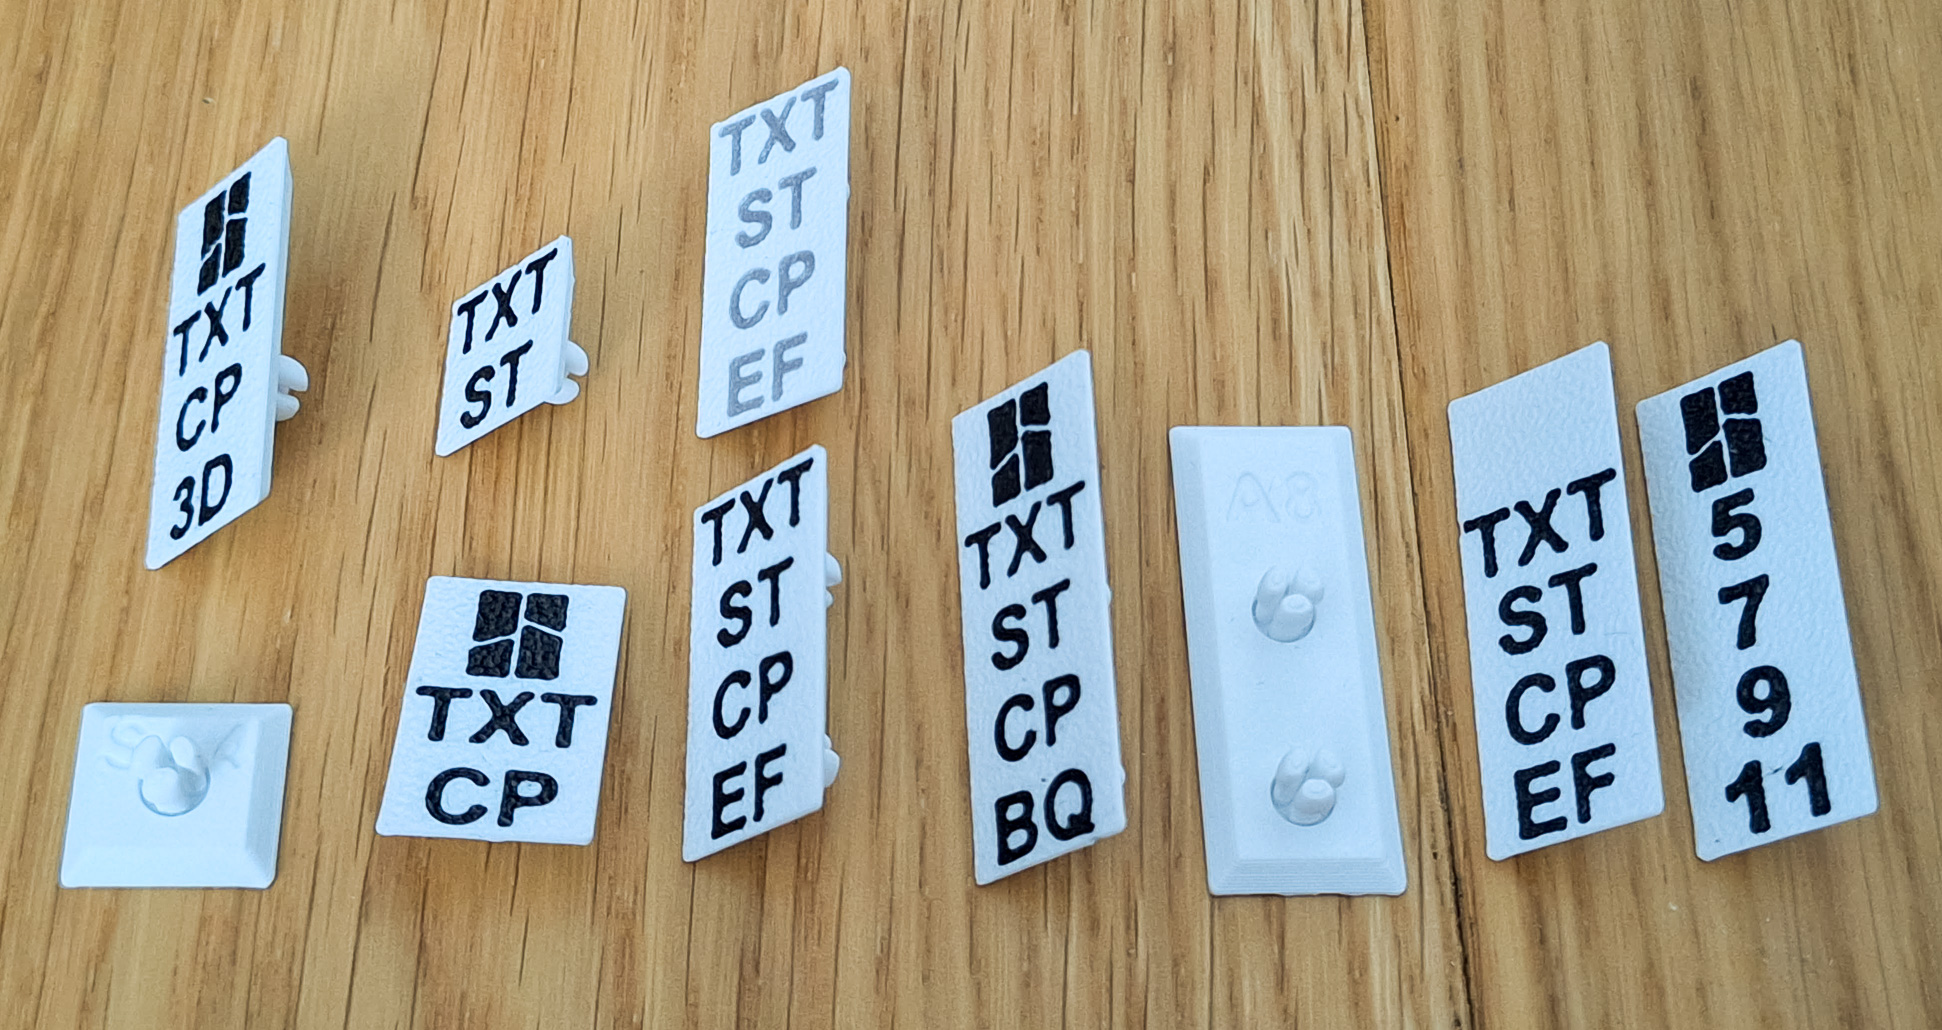
The FNT family includes:
– AMS plates holders for 4, 6, or 8 build plates
– “Stack” or standalone mountable holders for 4 or 8 plates
– customizable plate logos
– TPU feet
– adapters for AMS Raisers
FNT Custom logo plates - how to modify
I know that when using a larger number of build plates in the FNT holder, the numbers on the LogoPlates can become a bit confusing.
A better solution would be to use abbreviations for the different types of build plates, for example:
- TXT - Textured Plate
- ST - SuperTack
- CP - CoolPlate
Due to the wide range of options and combinations, it's not feasible to create a universal logo design for everyone
On this page, I provide a guide on how to easily customize LogoPlates in Bambu Studio.
Customizing a single LogoPlate takes about 5 minutes — it's simple. As always, the instructions are very detailed so you can follow them step by step
Instructions
- In the print profile of your holder, locate the object named LogoPlate_Custom. Or download correct .stl file - Designation:
- A4/A6/A8 - version for AMS
- S4/S8 - version for Stack/Standalone
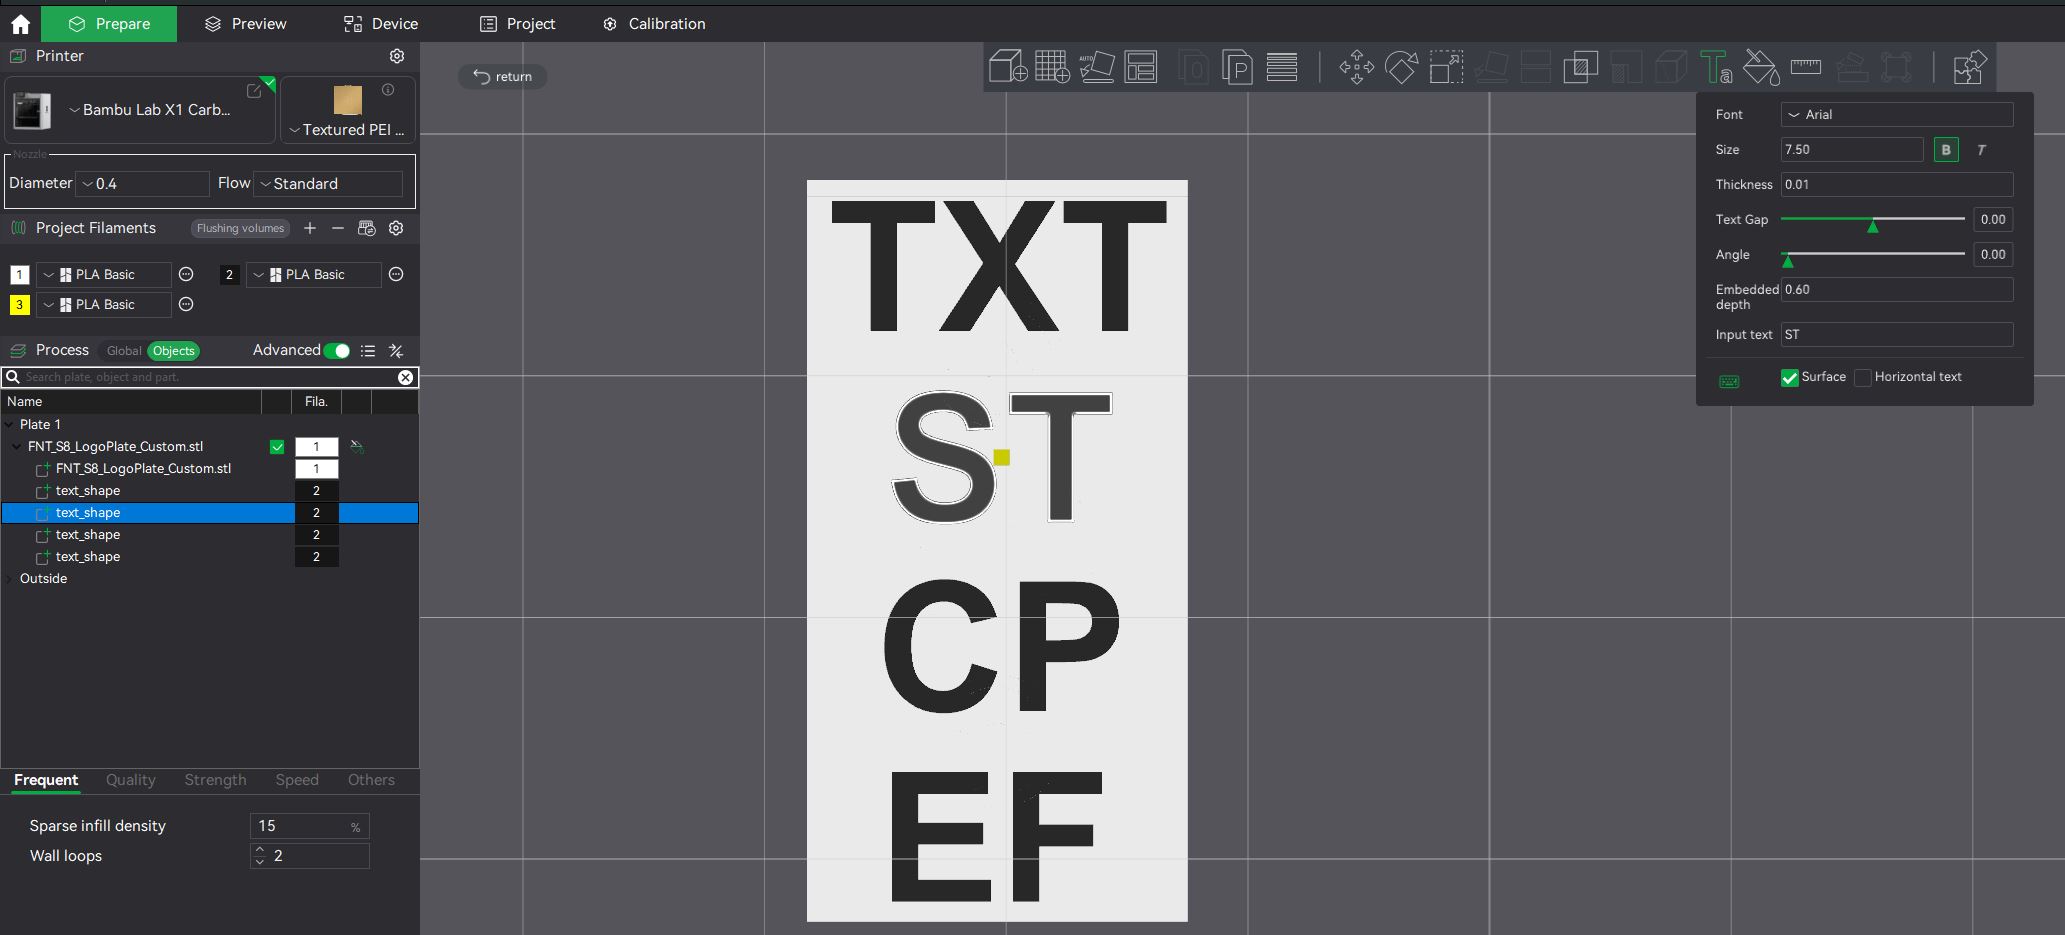
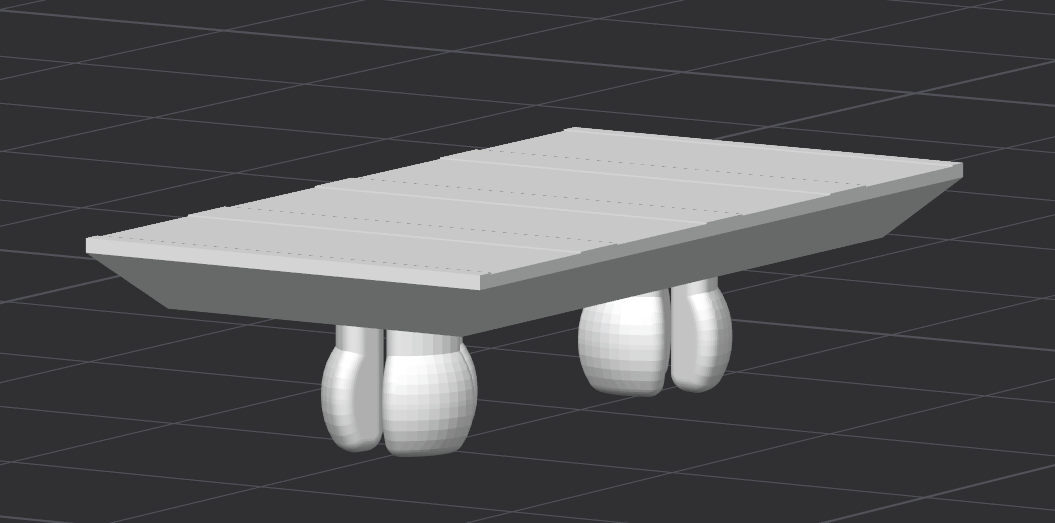
- Rotate the LogoPlates so that the flat side is facing up. Make sure the orientation is correct by checking the markings on the back side of the LogoPlates. On the model, you can see lines that correspond to the positions of the individual buttons on the FNT holder
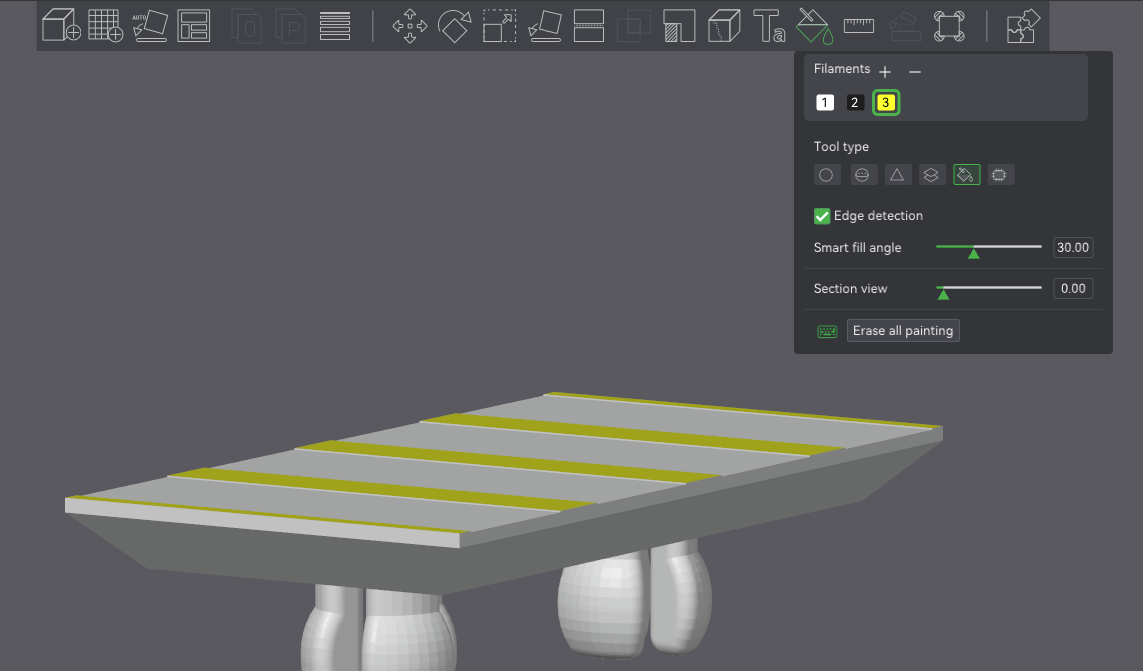
3. For better orientation, I recommend coloring these lines with a third color (e.g., yellow). Use the Color Painting function and the Fill tool.
4. Rotate the LogoPlate so that it is facing you directly. Use the Text tool and adjust the following values:
Font: Use it as you like
Size: Maximum is about 7.5. Depends on the font type
Thickness: Reduce to 0.01
Embedded depth: 0.6
Input text: Here you can type your custom text
Once you've adjusted all the values, click on the LogoPlate and place the text where you need it. The guide lines will help you position and size the text correctly
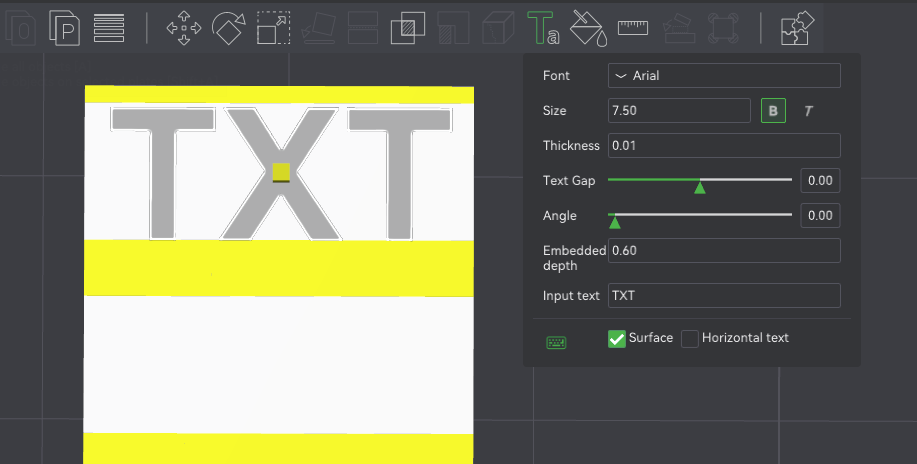
5. By using the Text tool repeatedly, fill in as many lines of text as you need.
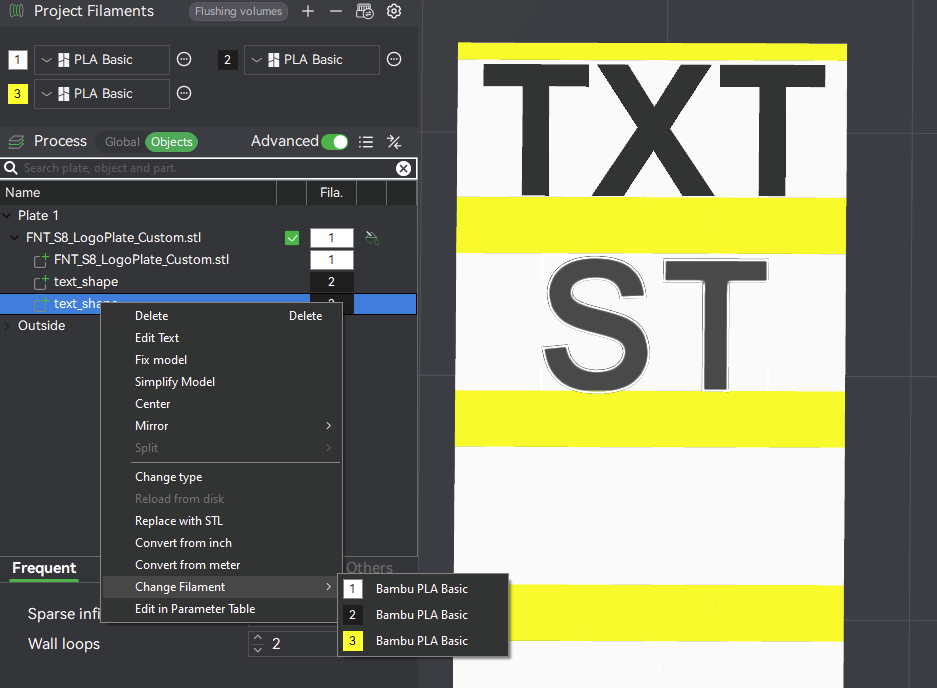
6. Switch the view mode from Global to Objects. Select the text_shape objects and change their filament to the color you want.
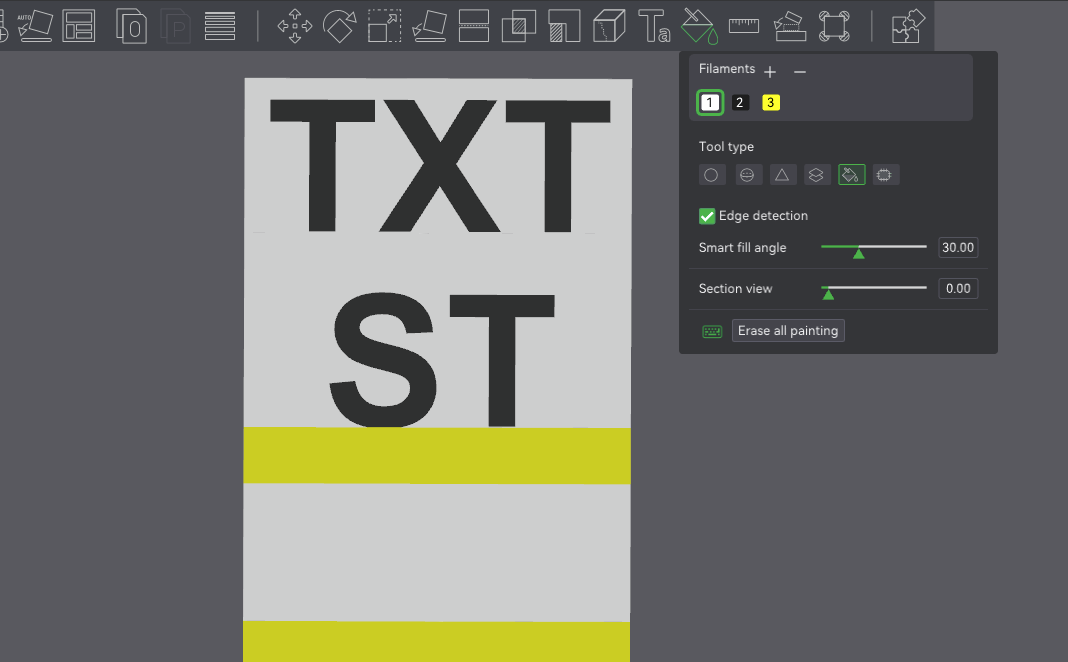
7. Flip the LogoPlate so that the front side is facing down, and repaint the yellow stripes with the base color — in this case, white.
Happy printing!
Design by Frantisek23 on MakerWorld (license: BY-SA).