

Little Alien: Filament Sample Swatch Box V-Shape


Little Alien: Filament Sample Swatch Box V-Shape
- Made to order — 3D printed after you buy
- Free shipping on orders over $25
- Quality checked before it ships
- Questions? Contact us · Returns
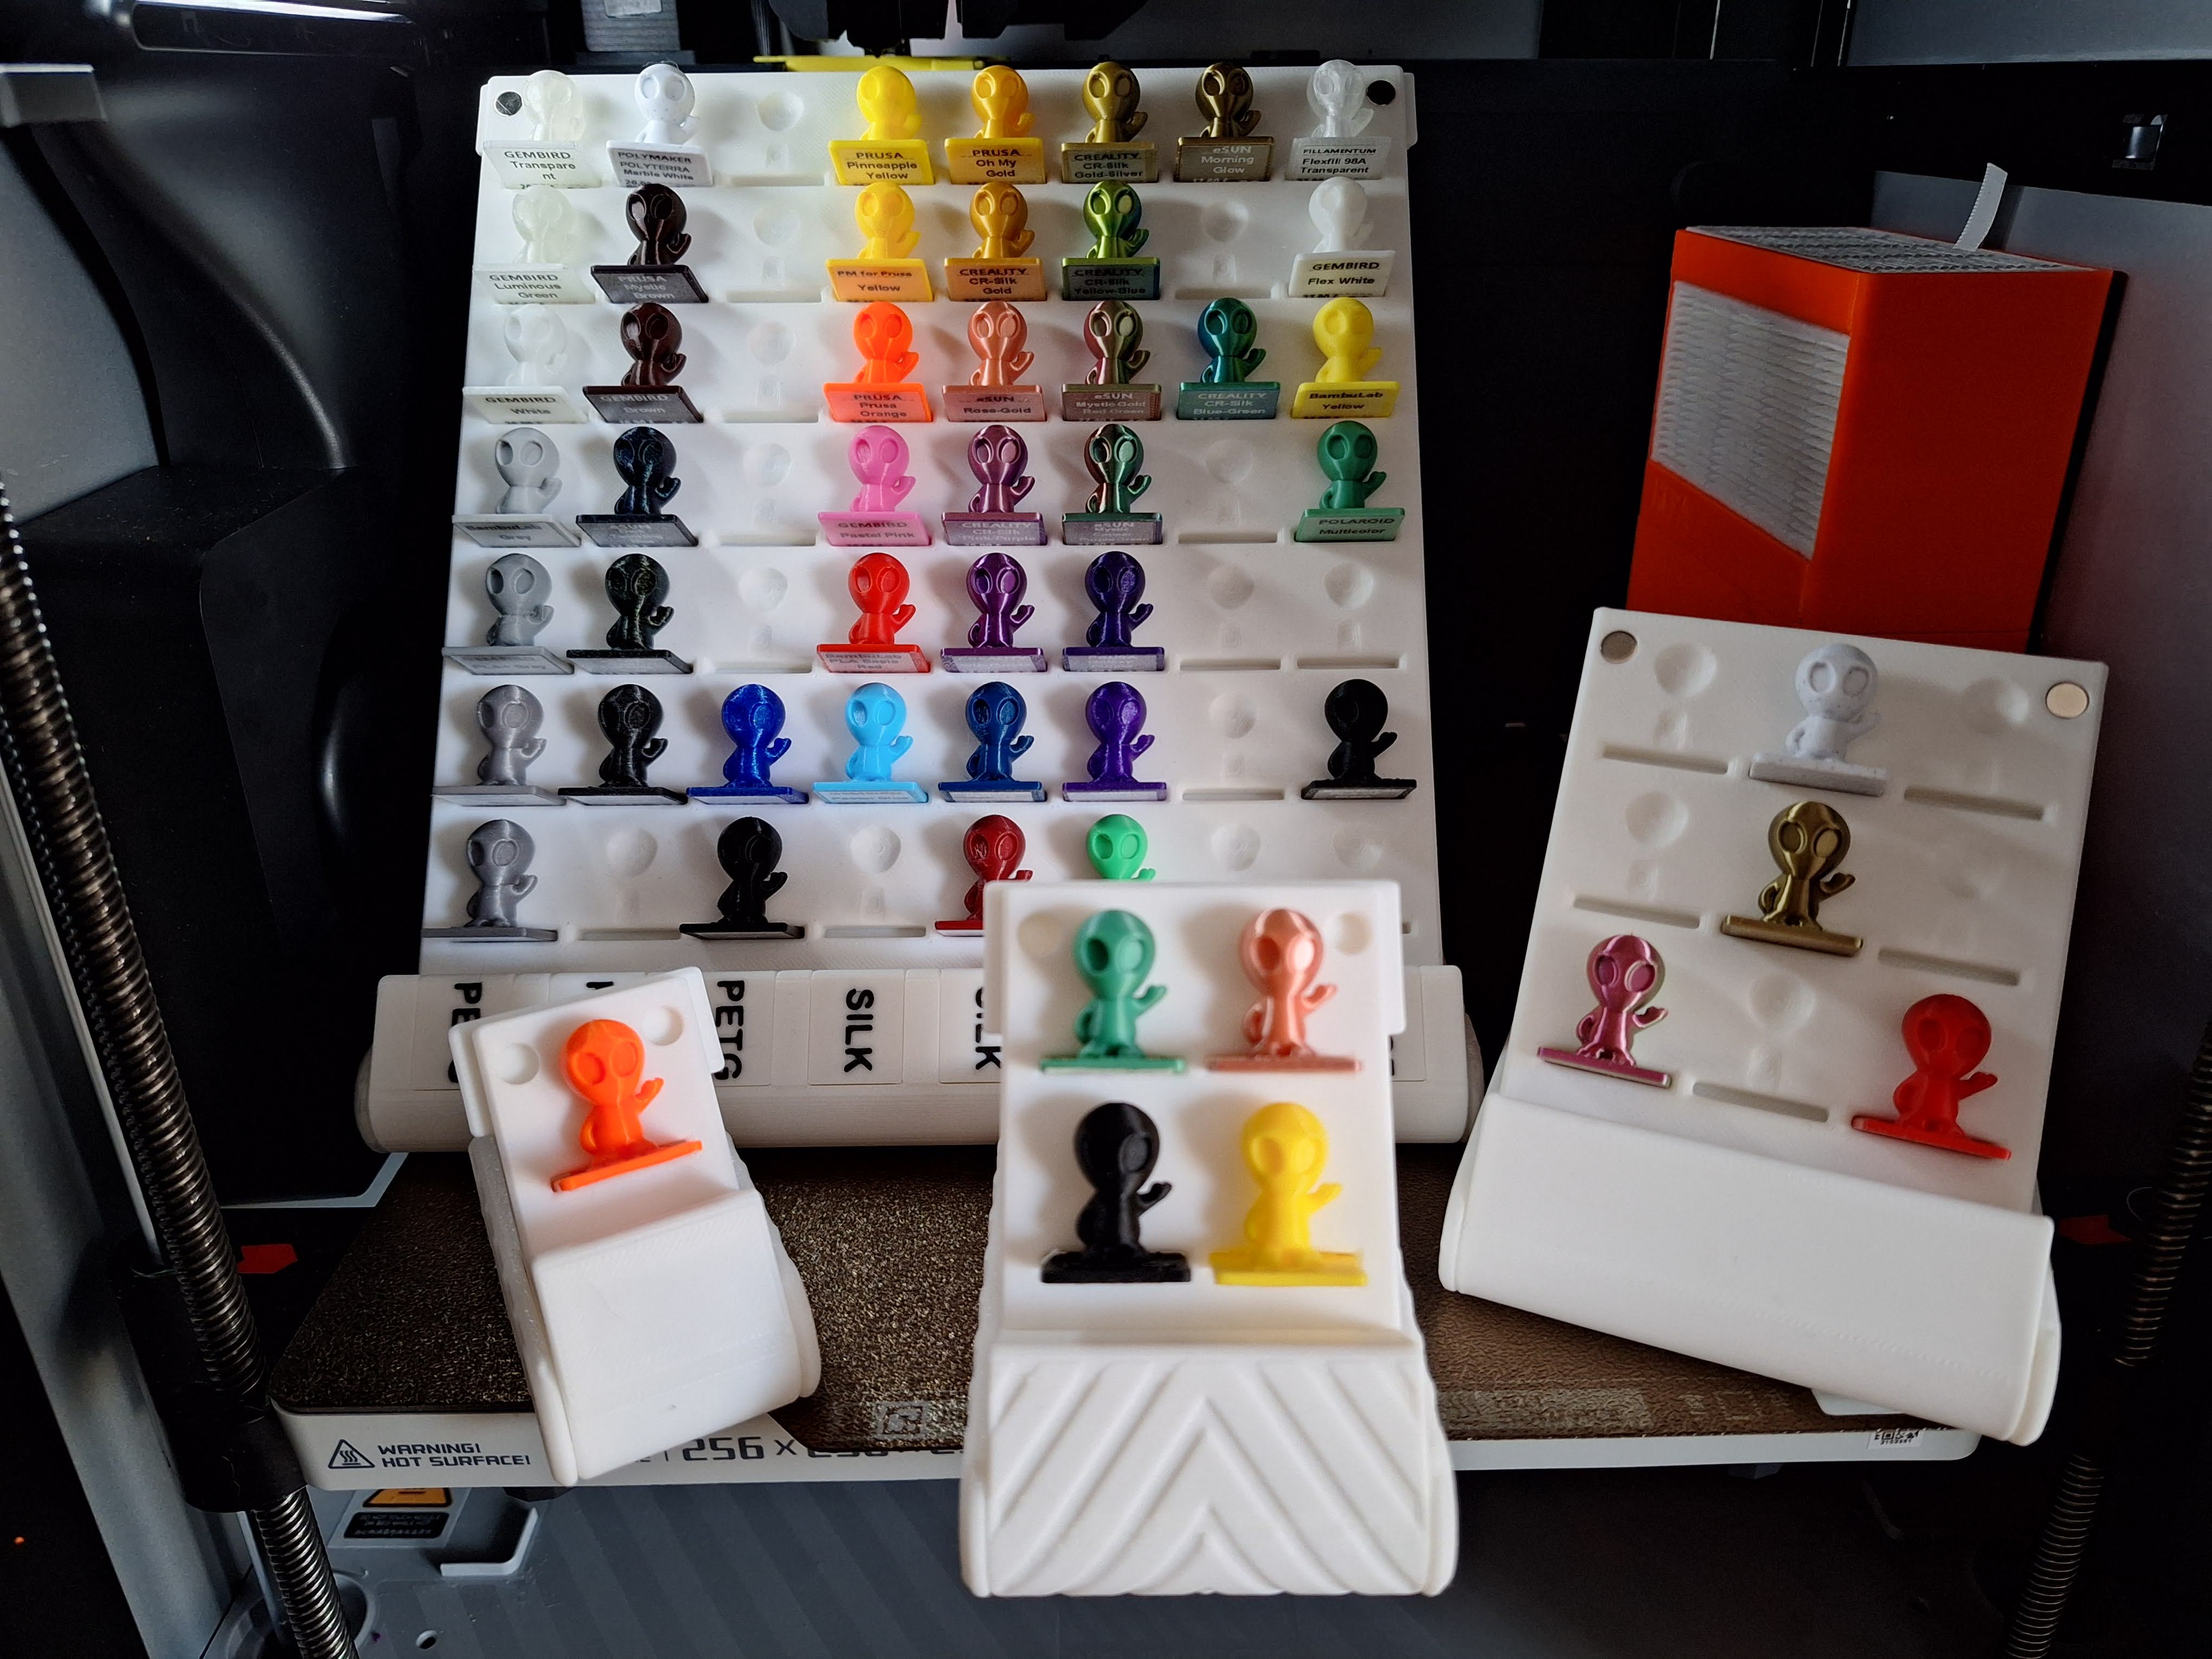
Note: This page only contains the V-shaped model (in the middle of the picture). Other designs will be available soon.
Hello
I present to you my model: Little Alien Visitors: Filament Sample Swatch Box. Printing the Little Alien Visitors: Filament Sample figures is fast. A build plate with 4 different figures is printed in less than 60 minutes.
This allows you to store, transport and display 1-56 pcs of filament samples printed as Little Alien Visitors from jdormer9.
you will need:
- Little Alien Visitors model, download it here: https://makerworld.com/en/models/749527?from=search#profileId-683012
- 2 pcs of M4x10 (to M4x20) countersunk head screw
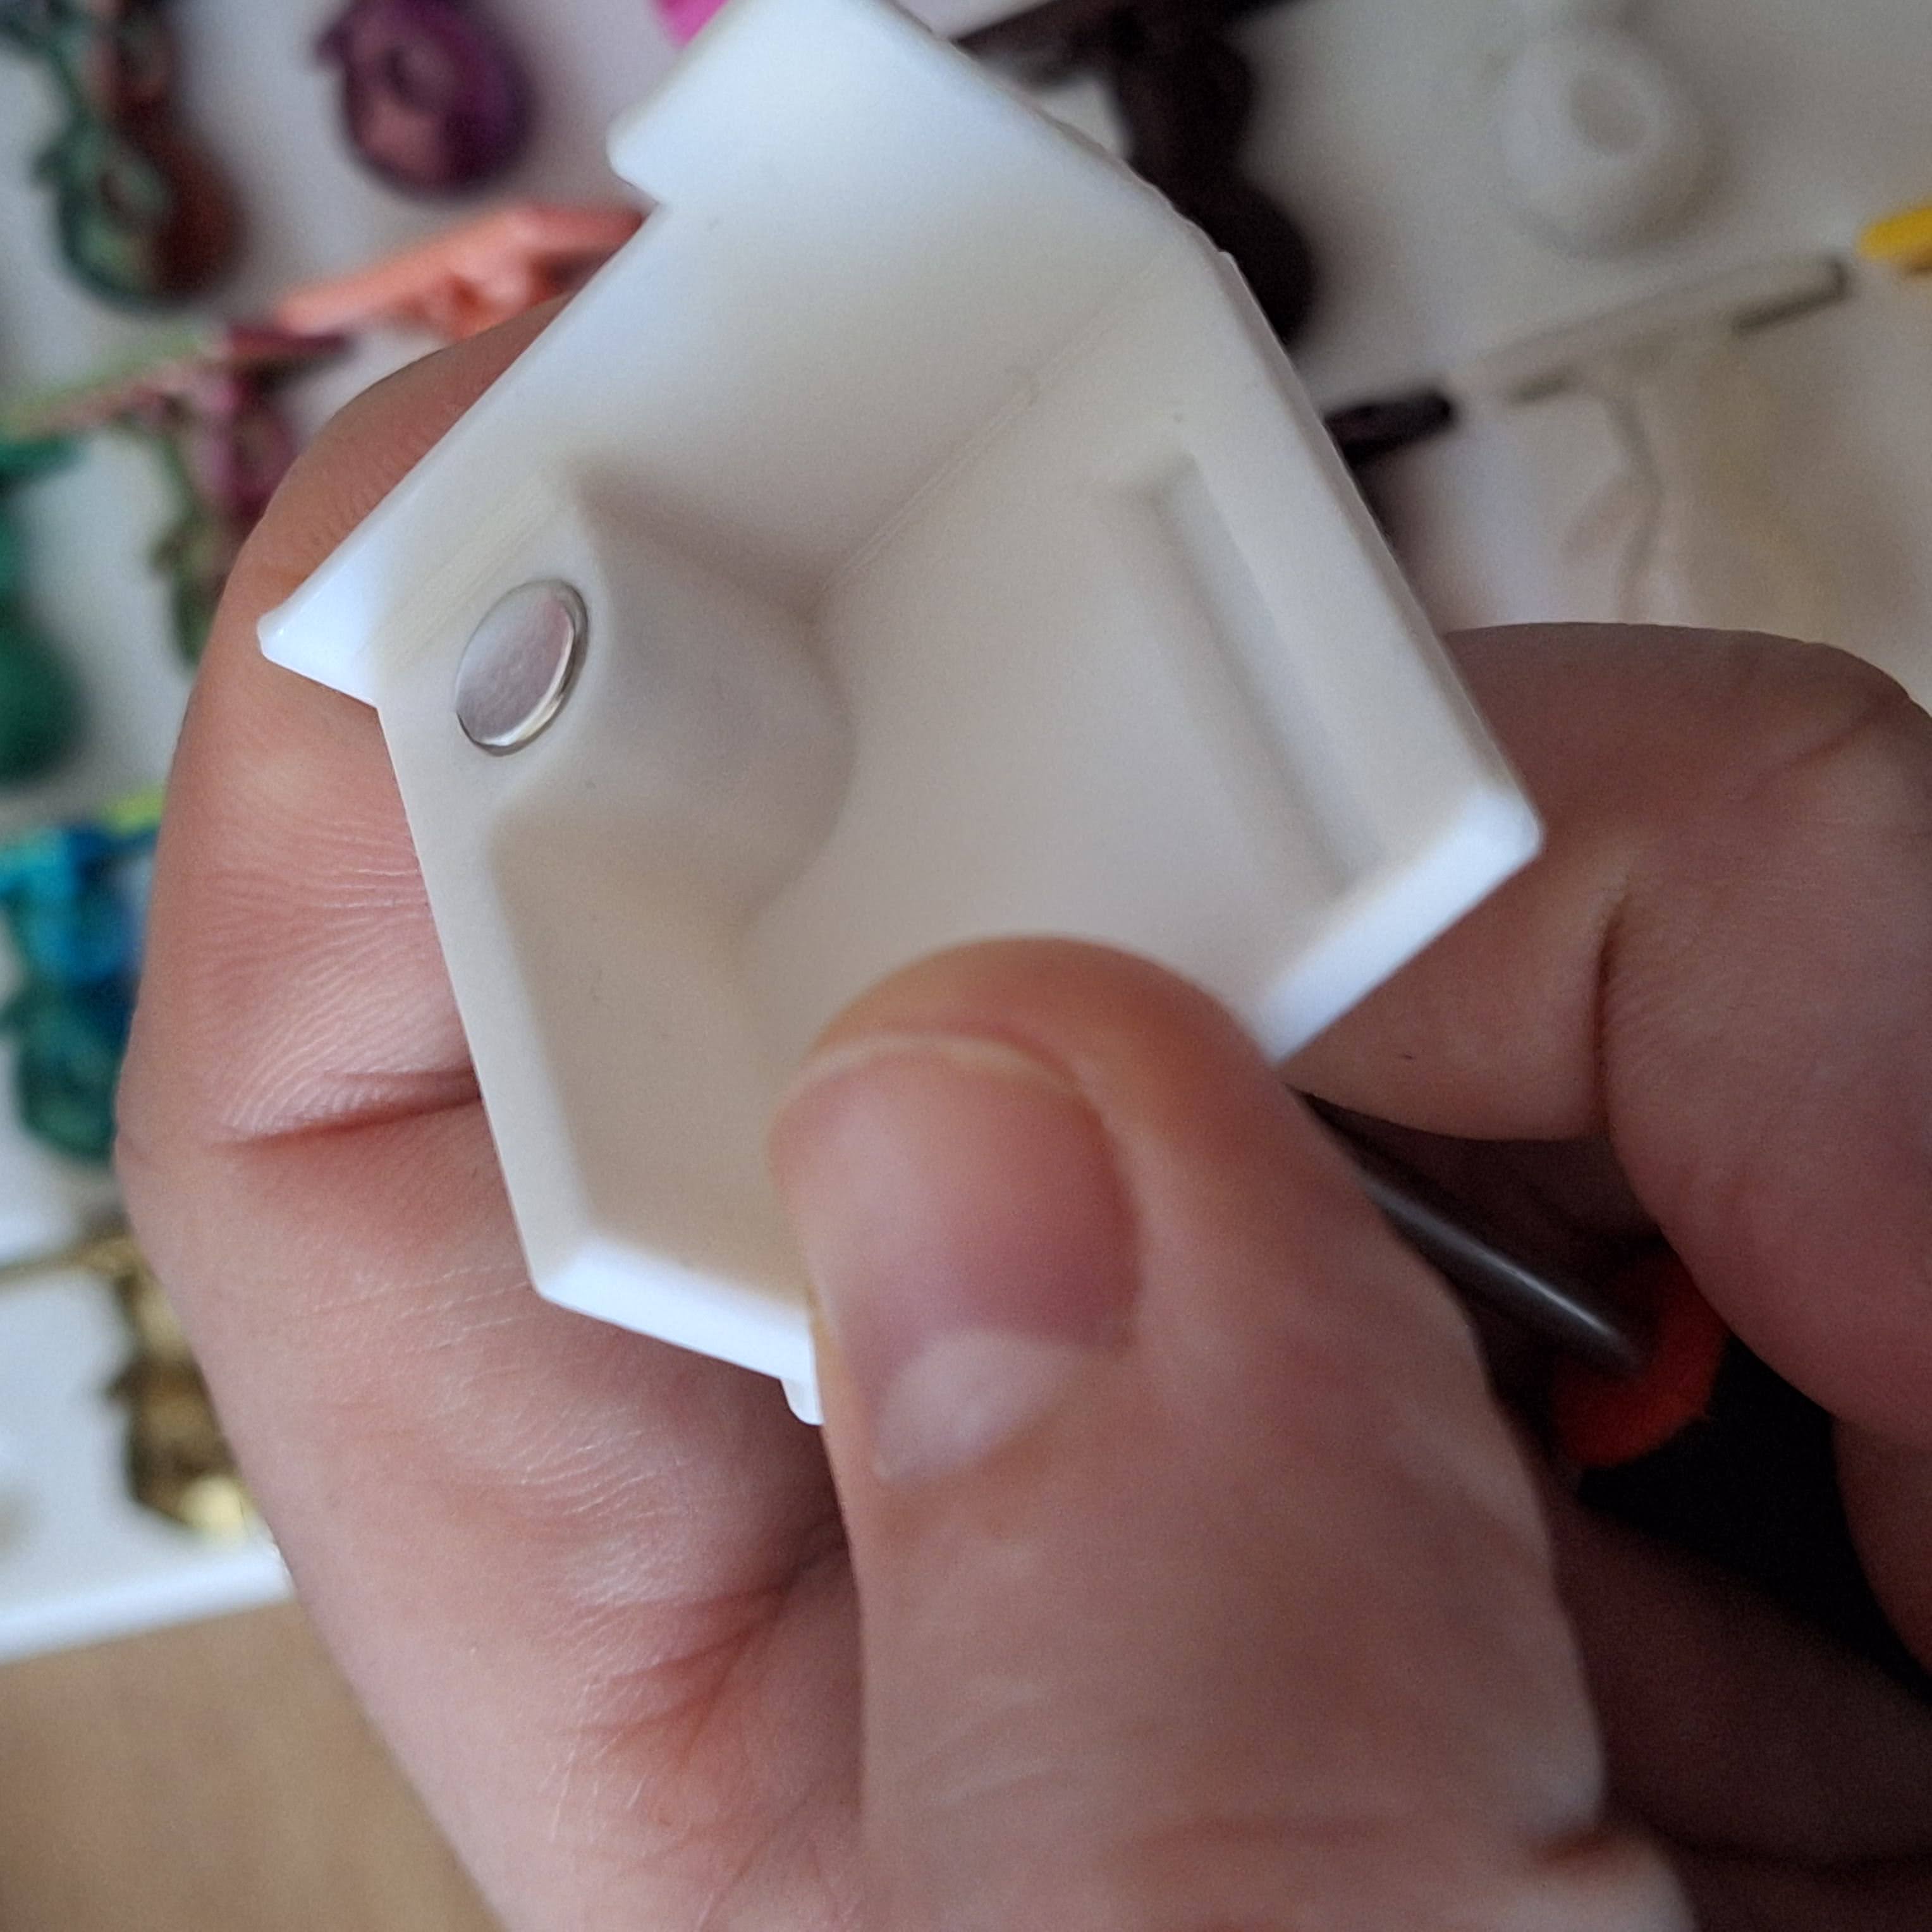
- 4 pcs of round magnet 6x3mm
- Screwdriver
Story
Little Alien Visitors
I love Little Alien Visitors model from jdormer9
When I was thinking about which filament swatch checker I would use, I remembered Little Alien.
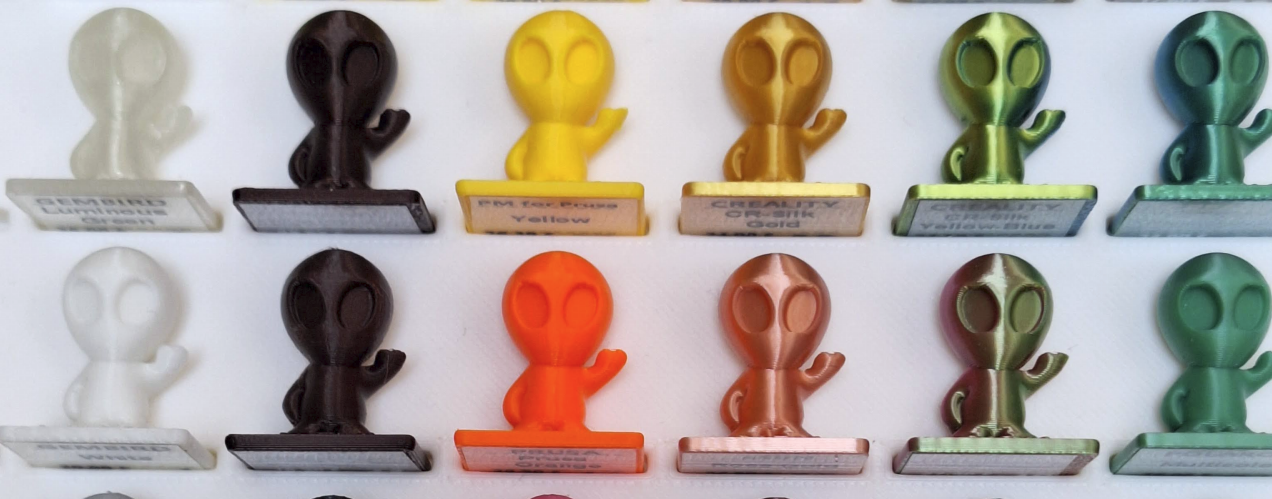
Little Alien is very tiny, is neither as large as popular Benchy, nor as flat as most filament swatch cards, which not show how individual layers of filament will look after printing. Little Alien also has enough detail on the head, arms and legs, which beautifully shows how the material will behave on overhangs. The raised hand, on the other hand, indicates how the printer will handle small details. Size of the alien on the base is: height 22mm, base is 19x19mm.
On the base you can add text in yous slicer, for example filament brand and type. Text should not he heigher than 0.4mm (2 layers).
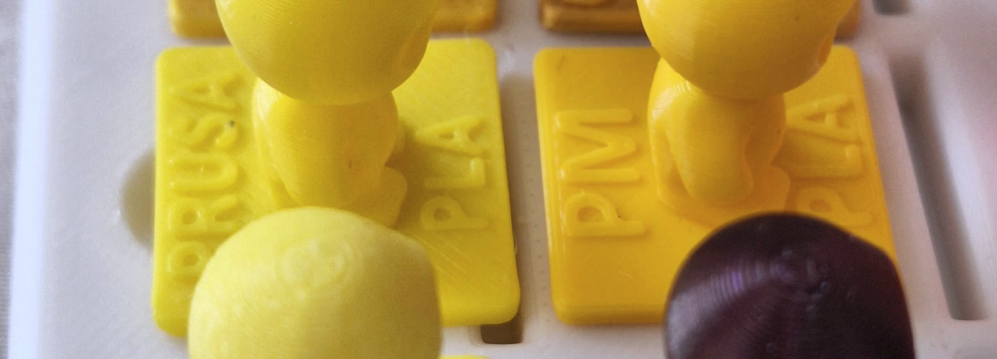
On the bottom of the base, you can stick information about the filament. Use a label not larger than 18x18mm. The 18mm Brother tapes TZe-141 (black text on clear) and TZe-145 (White text on clear) are excellent.
Please download print profile of the Little Alien Visitors here: https://makerworld.com/en/models/749527?from=search#profileId-683012
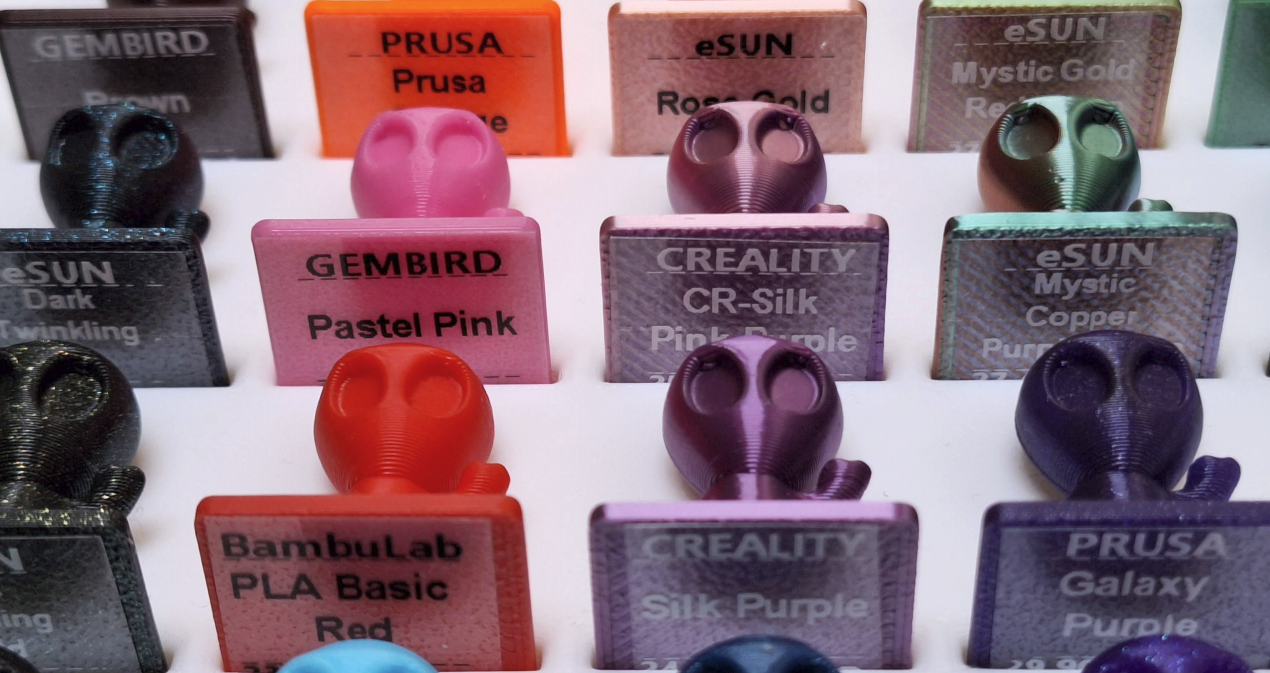
Edit text in Bambu Studio slicer - Little Alien Visitors
- After you download the Little Alien Visitors, open it in the Bambu Studio (Text editing work in OrcaSlicer, Prusa Slicer different - please use steps bellow - Edit text in OrcaSlicer. If you want to create brand new text in Bambu, pleasse also use steps bellow like OrcaSlicer)
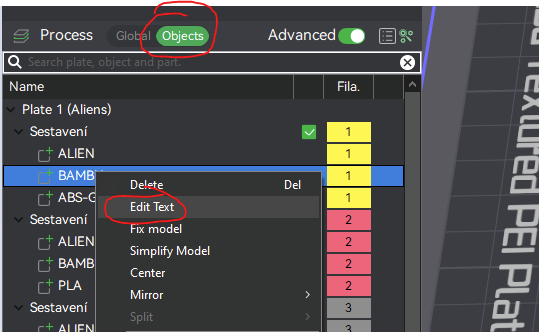
- Select Process - Objects.
- Right click on BAMBU (or other brand) and select: Edit Text
- Change Input Text
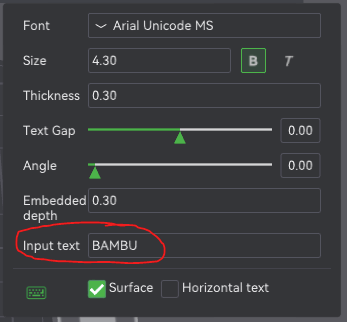
- Change text also on filament type if needed
- Leave selected Print sequence: By object
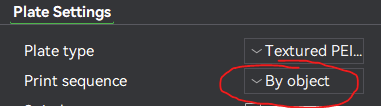
- Print up to 4 different Aliens at once
Edit text in OrcaSlicer - Little Alien Visitors
- After you download the Little Alien Visitors, open it in the OrcaSlicer (PrusaSlicer and other slicers use similar logic.)
- Select Process - Objects.
- Right click on BAMBU (or other brand) and Delete object
- Delete also on ABS (or other filamet type) object
-
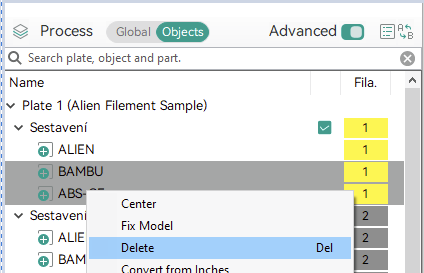
Delete objects with brand name and filament type - Select the Alien on the plate and use Text (emboss) function (shortcut T)
- Double click on the appeared text and move it by mouse to the base
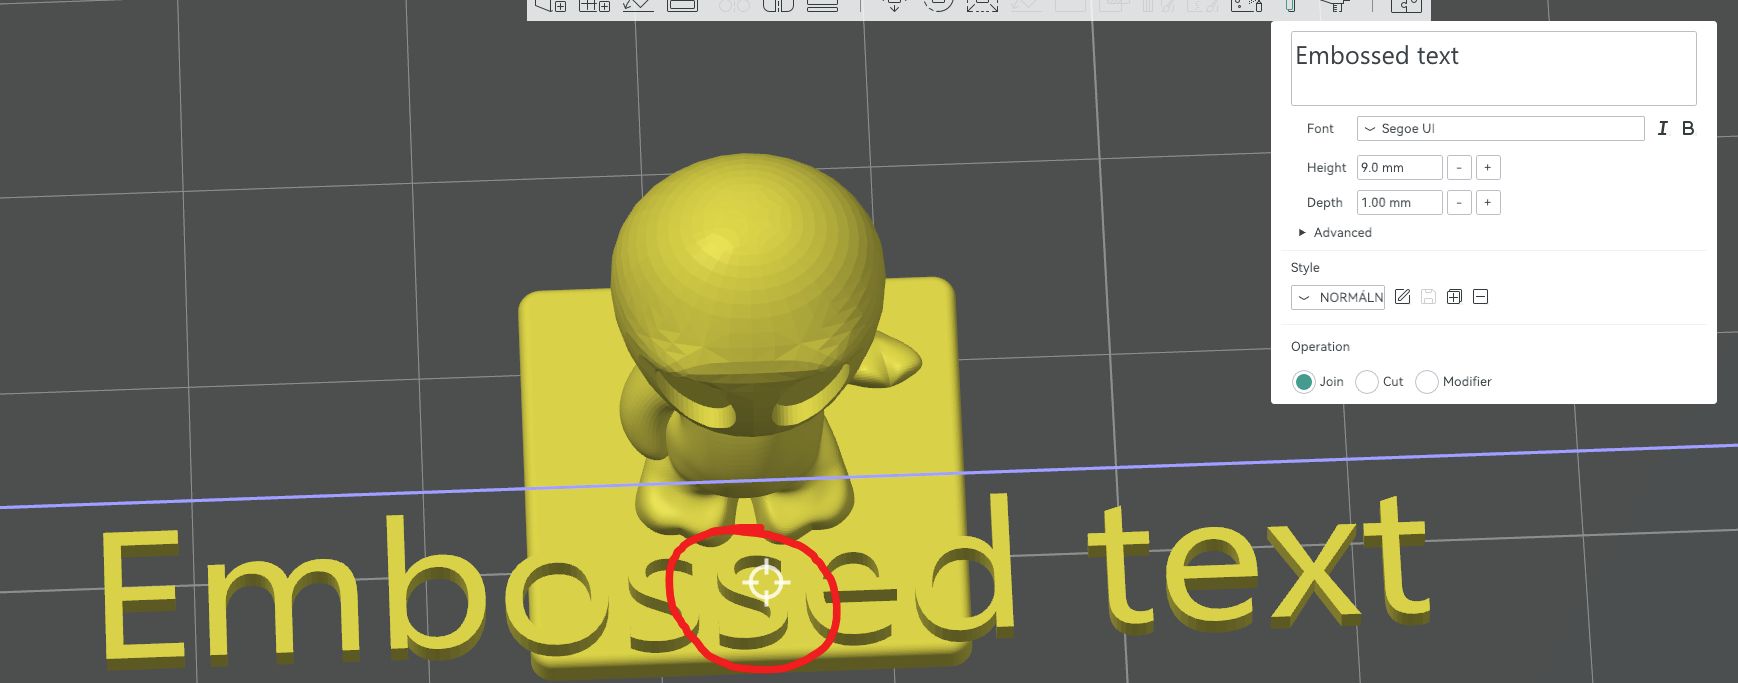
Select Alien, Use TEXT function, Double click on the appeared text and move it - Edit text - change font size to 5-7mm and DEPTH to 0.4mm
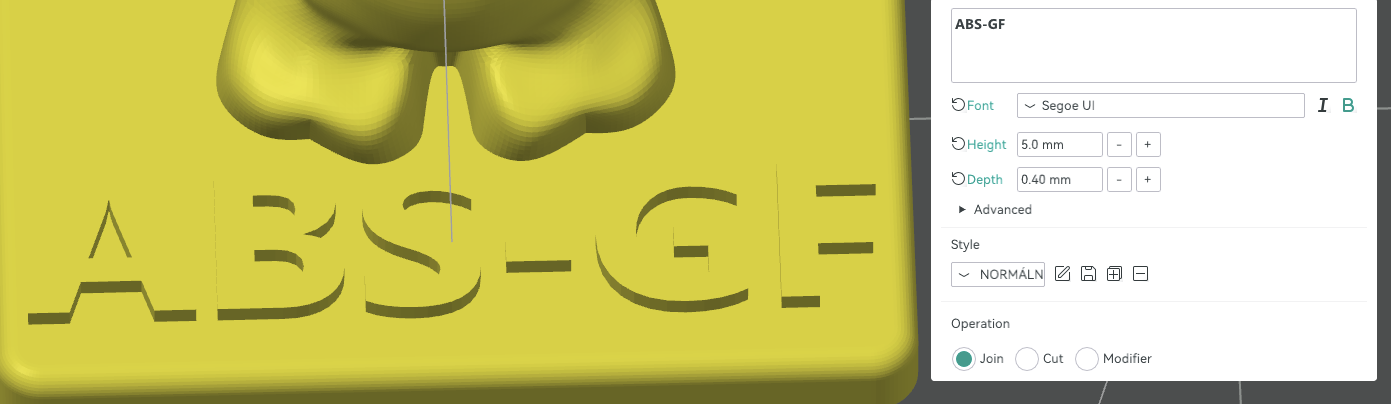
Depth must be 0.4mm - Change text also on filament branf type if needed
- Leave selected Print sequence: By object
- Print up to 4 different Aliens at once
Box - storage / display / transport
So the last thing left for us is how to store the Aliens and how to transport and display samples to friends or customers can choose the right color and material.
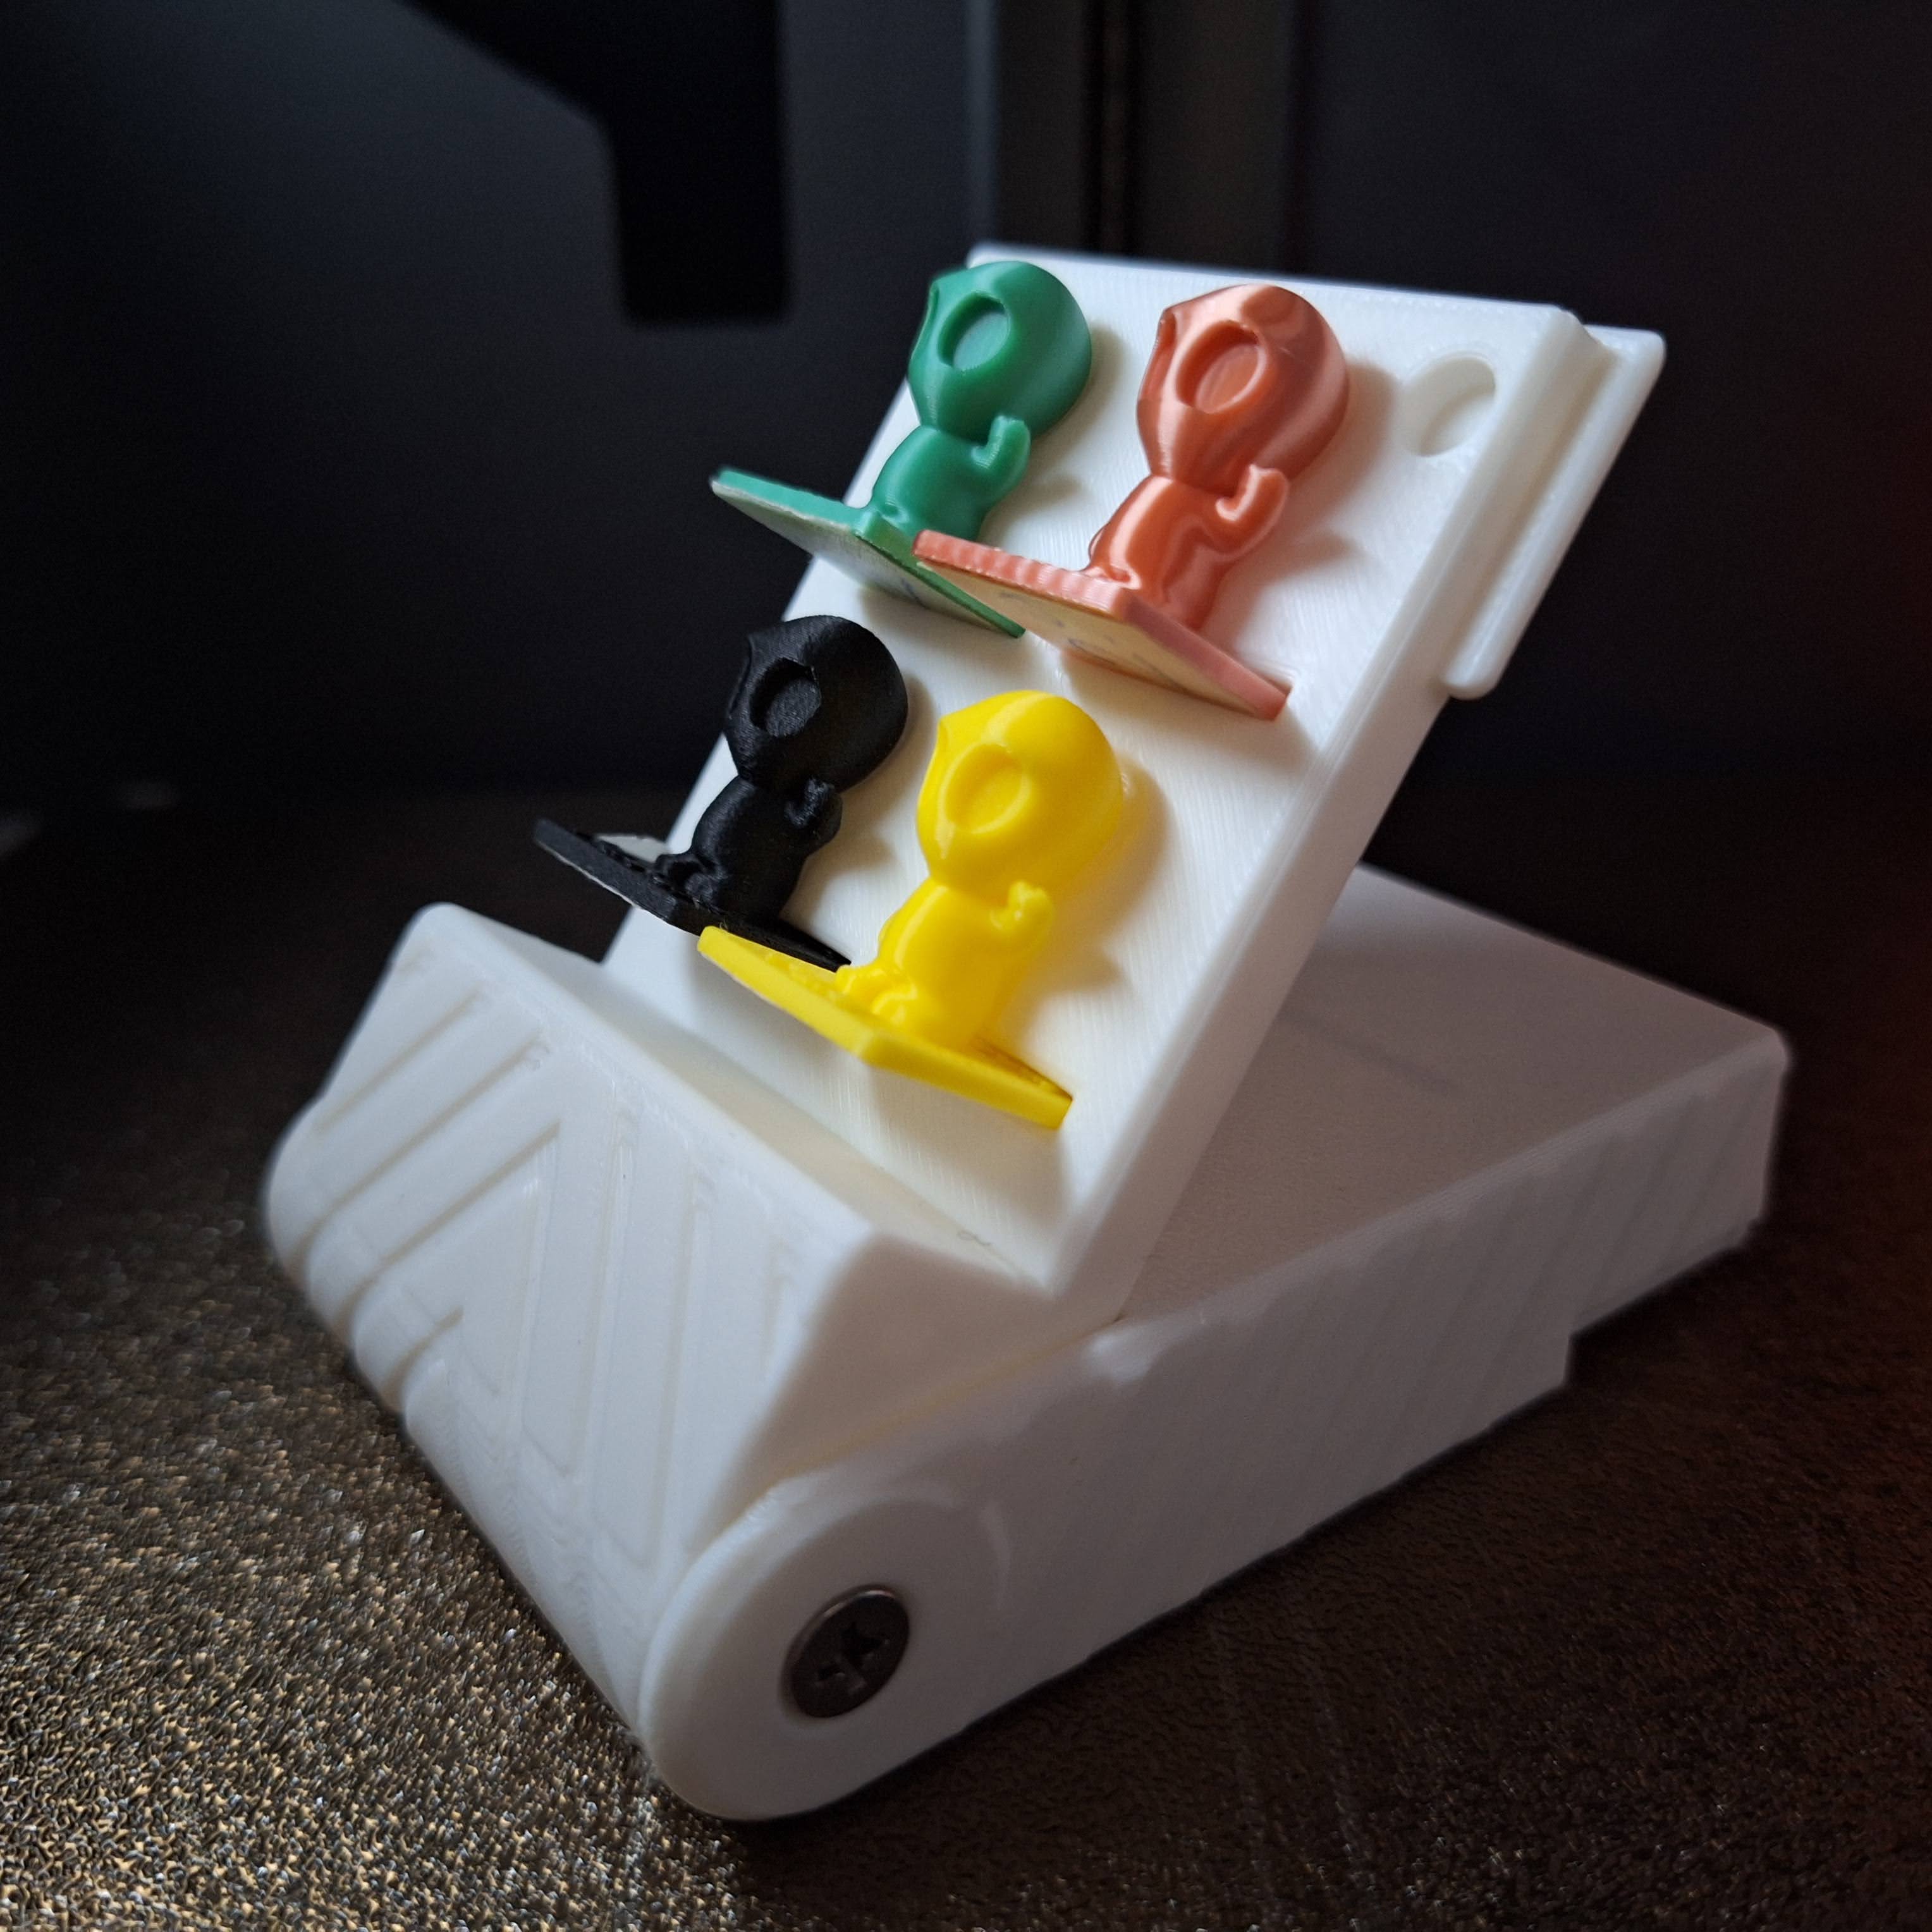
I created the box that you can open by simply turning the lid. Assemble the body and cover using 2 pieces of M4 countersunk head screws. The lid is also a stand. When opened, the box becomes a display board. The individual Little Alien figures hold beautifully in their position. At the same time, they can be very easily removed and put back in their place. You don't have to worry about them getting mixed up during transport. The box is thin in the transport position. It is only 21mm high. It fits easily in a bag. Even the largest box, when filled with alien figures, is very strong and cannot be compressed or deformed even with great force. Strong round magnets 6x3mm holds the box closed. Please use CA007 magnets from Bambu: https://eu.store.bambulab.com/en-sk/products/round-magnet?variant=48741472633180&_pos=1&_sid=a3469a284&_ss=r
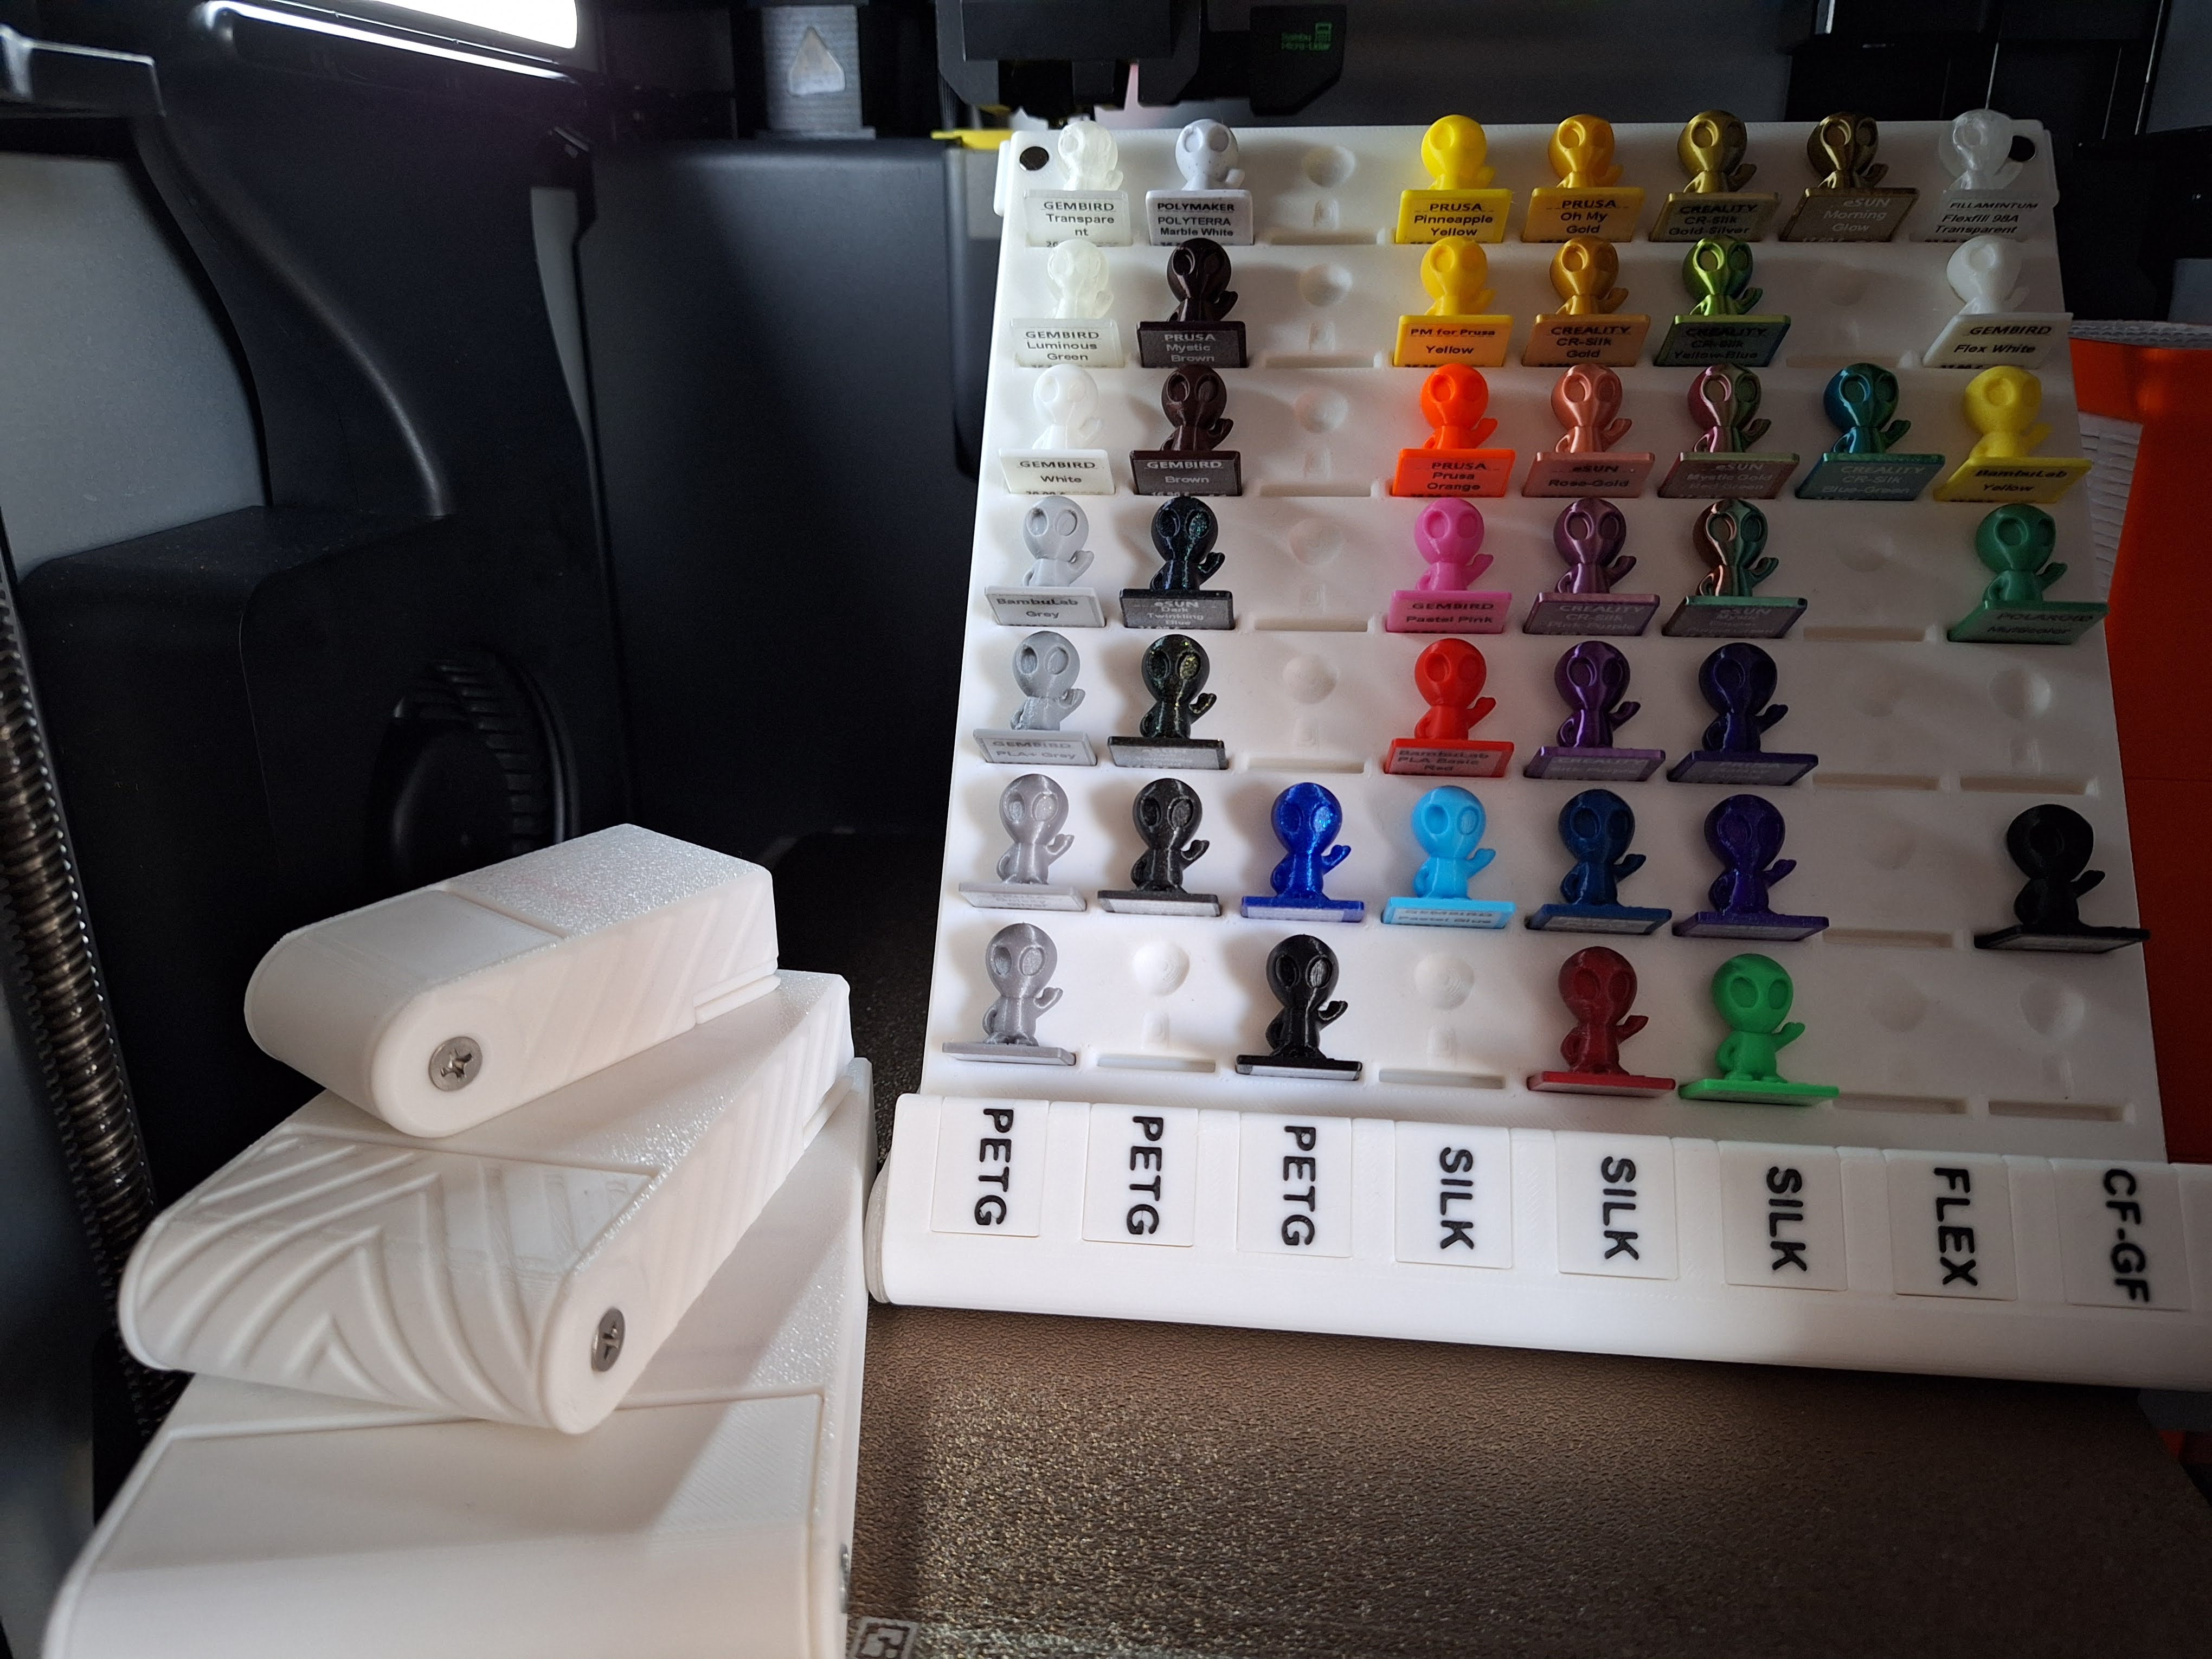
Box size
You can print the box in different sizes for 1, 4, 9 and even 56 Aliens. You can find the basic sizes as print profiles. If you are interested in a 1x5 or 7x3 box, use the attached STL files
Magnet Tester
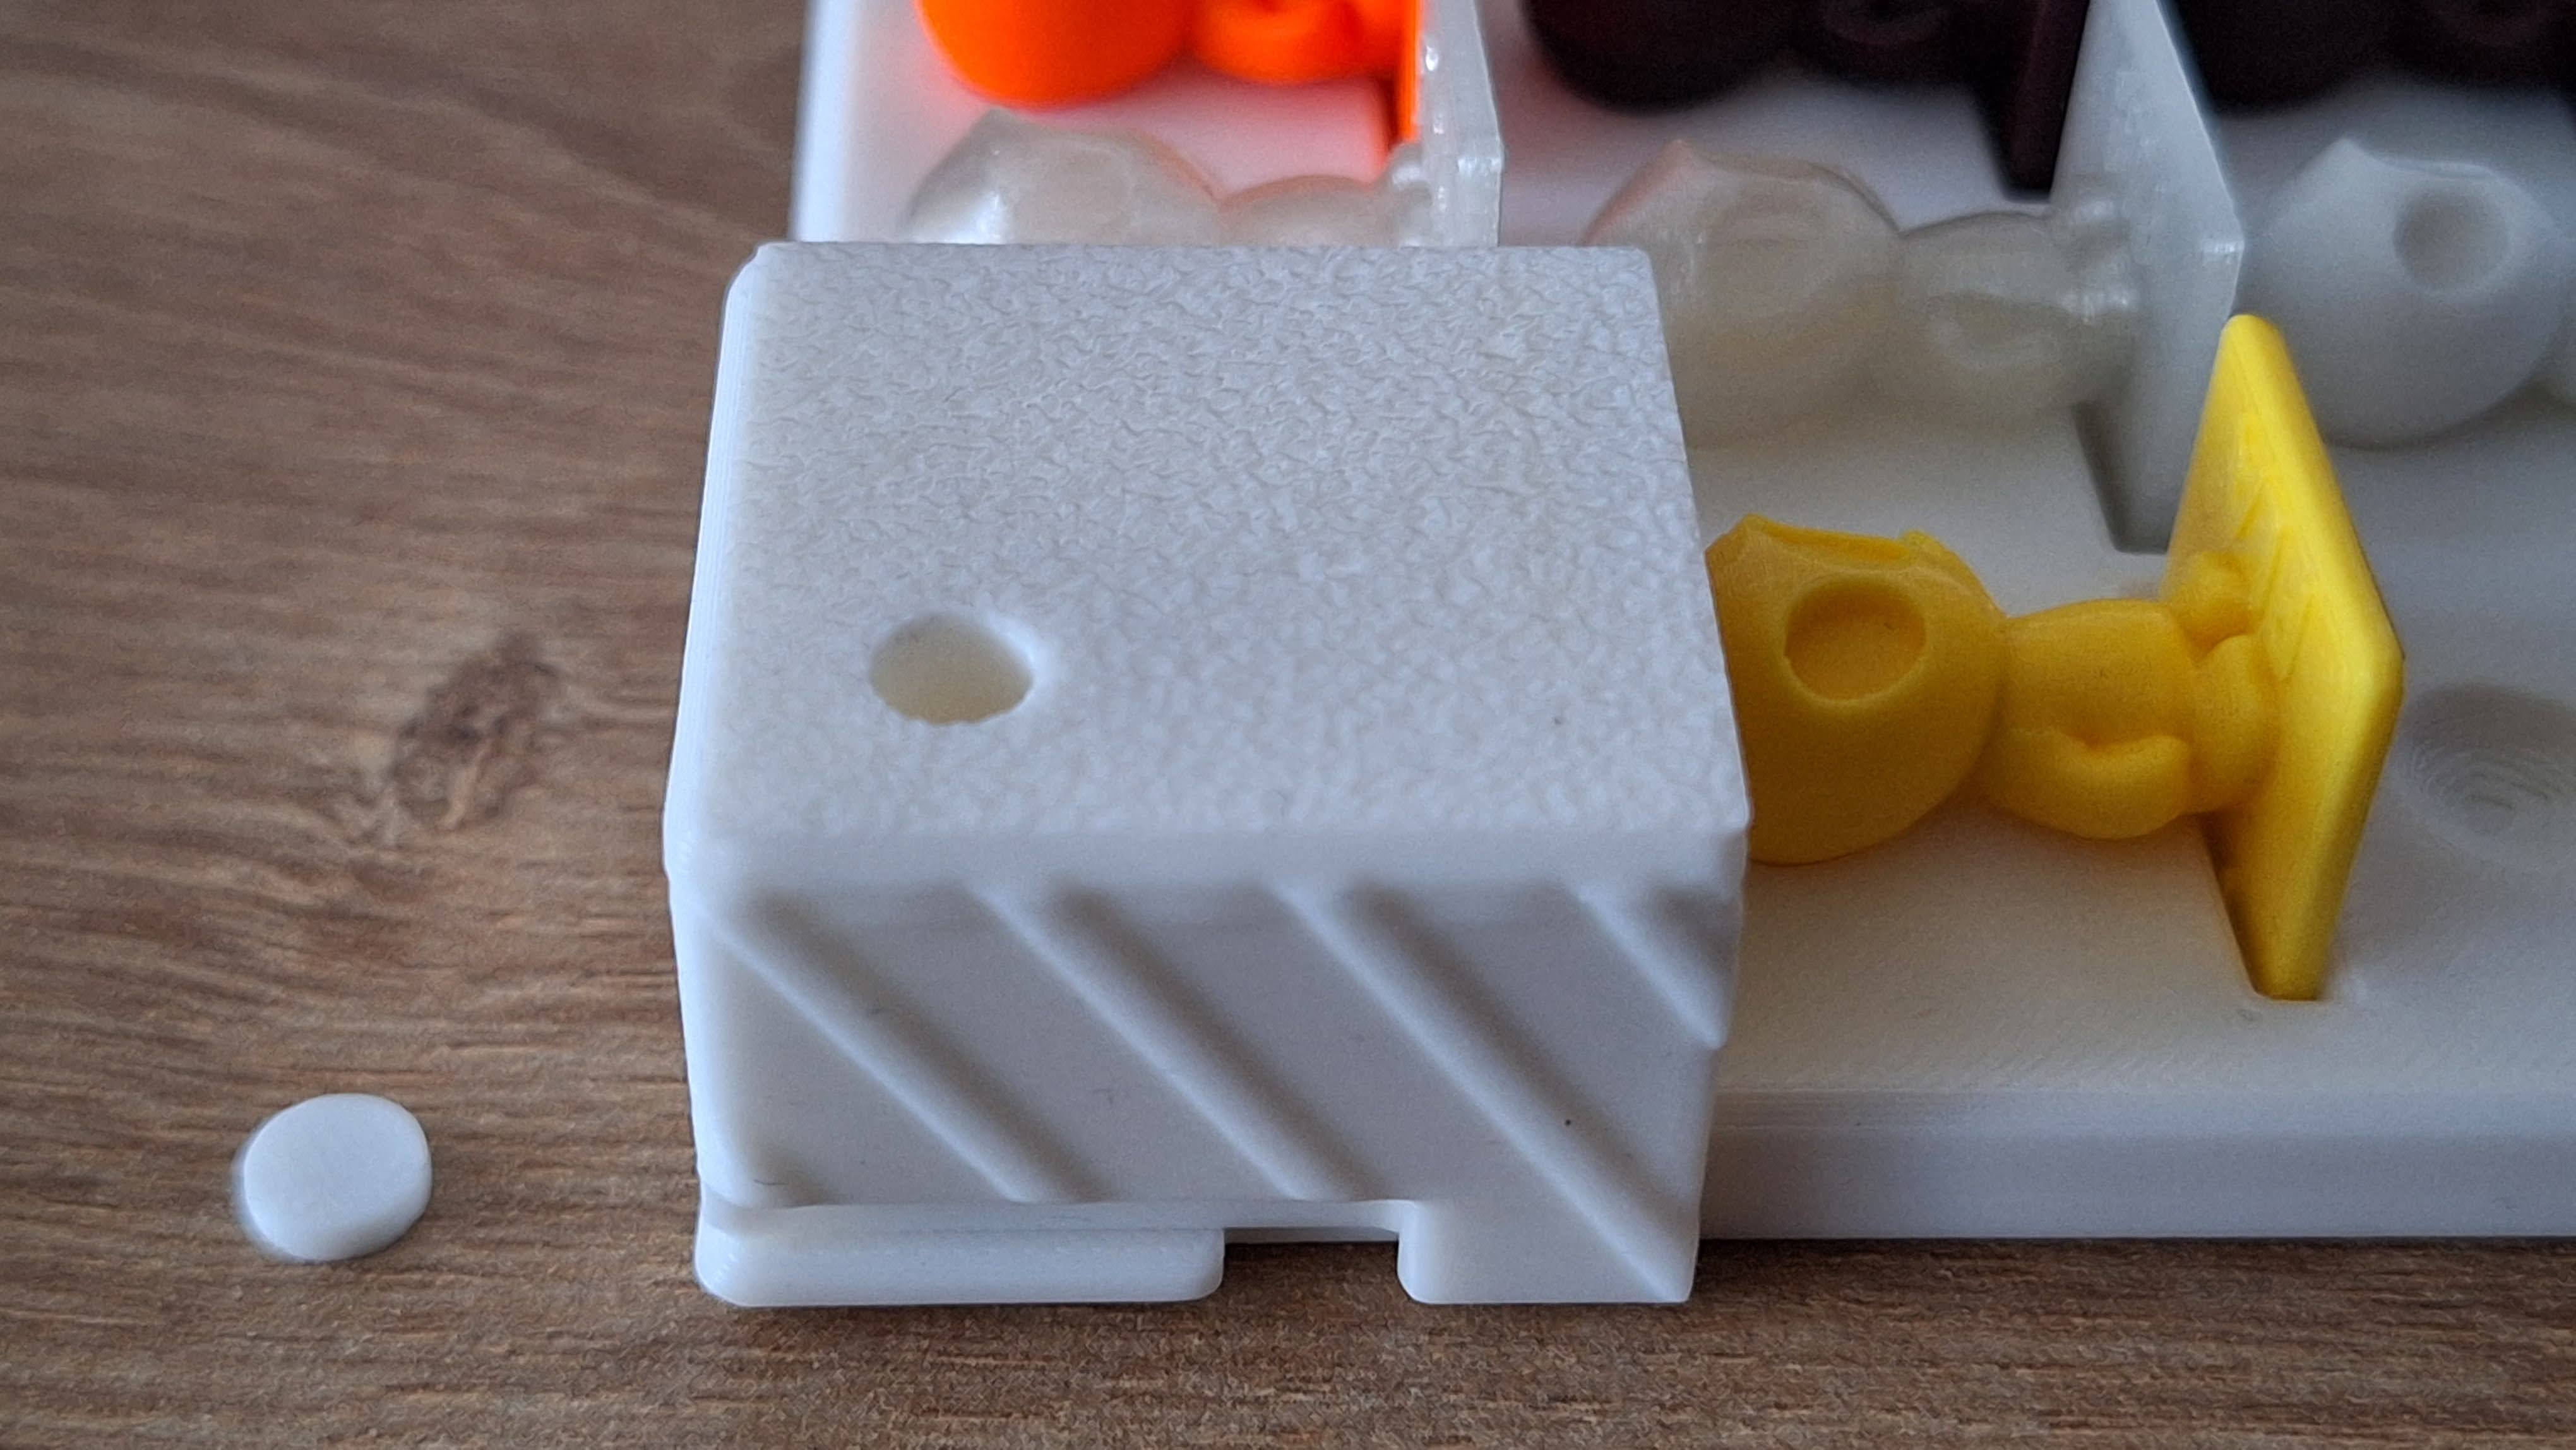
Magnets have great strength and if you want them to work properly, set the strength according to the MagnetTester, which is in each printing profile.
- Insert one 6x3mm round magnet to the box Body (not to the cover)
- Insert 2mm thick plastic disc to the magnet tester.
- Insert another magnet to the magnet tester and push the magnet as deep as it will go.
- Place the magnet tester against the body and test the force needed to separate.
- Evaluation of the strength of the magnet
- If the force is too small, use more plastic discs.
- If the force is too large, push the magnet deeper / use fewer plastic discs.
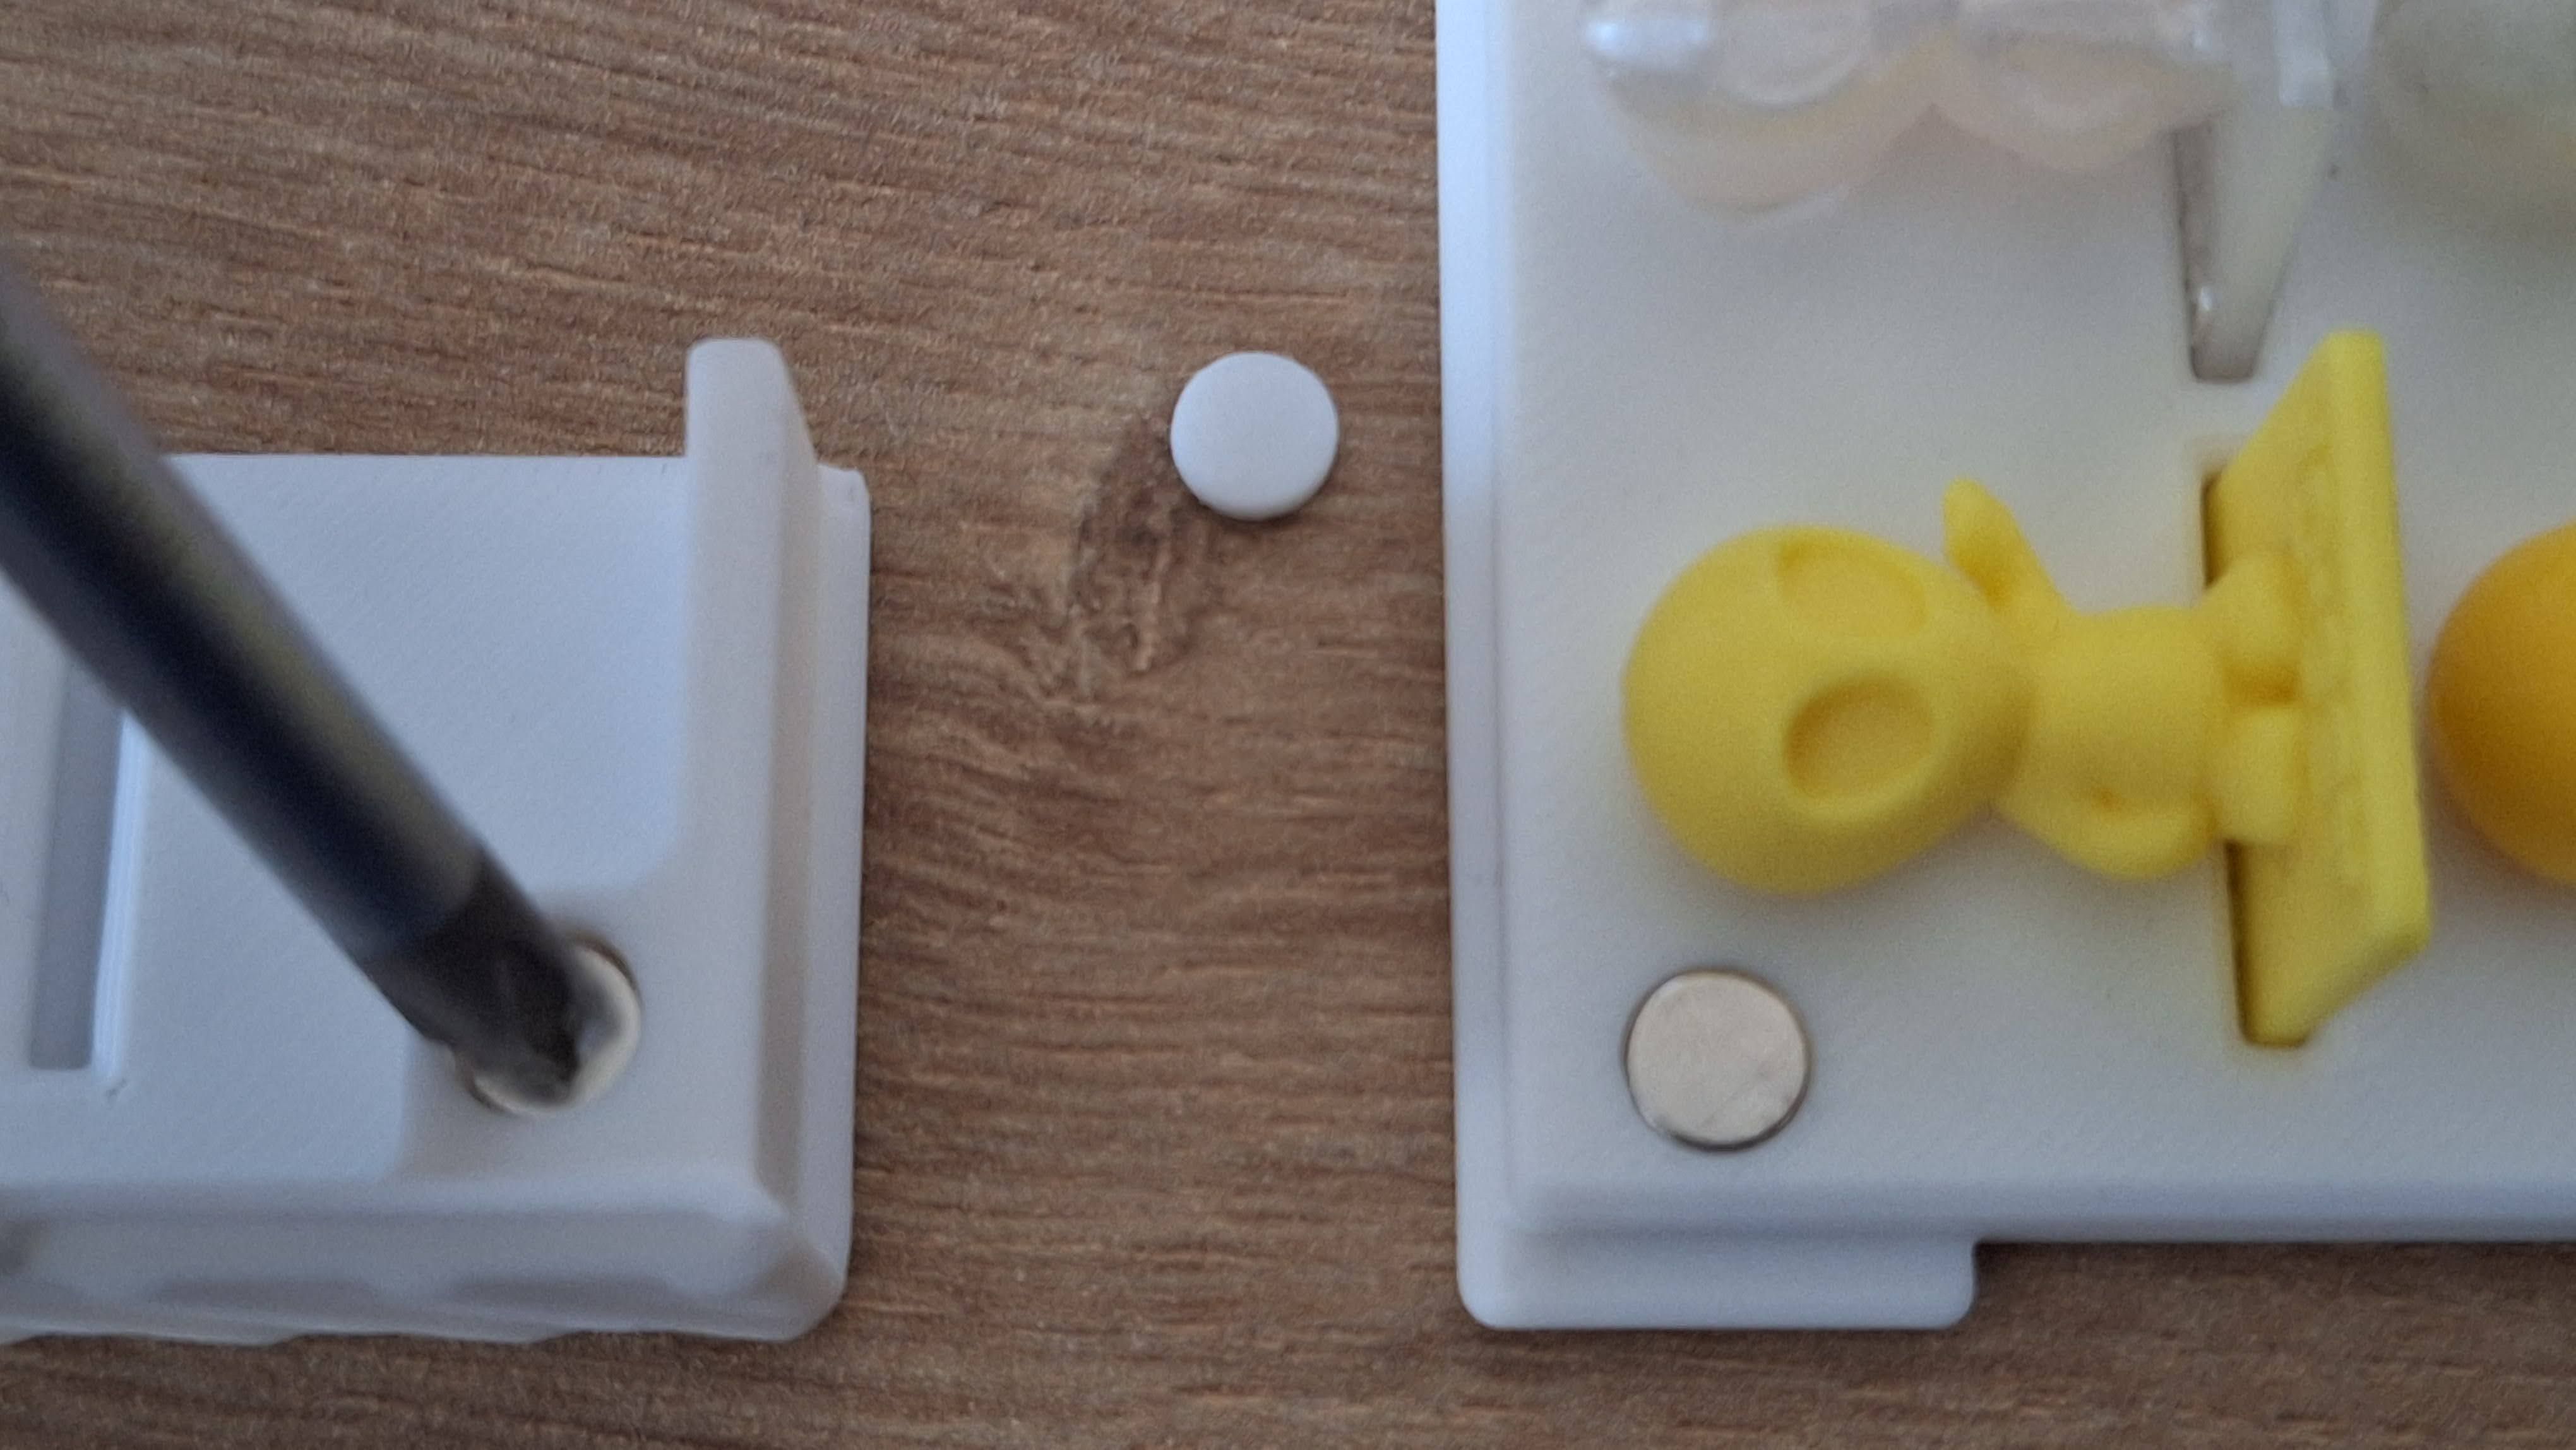
- To remove the magnet from the tester, use a cross-head screwdriver, for example. Insert it into the hole and push the magnet out.
- Insert the magnet together with the corresponding plastic discs into the box base. When inserting, use a drop of glue to ensure that the magnet is permanently secured.
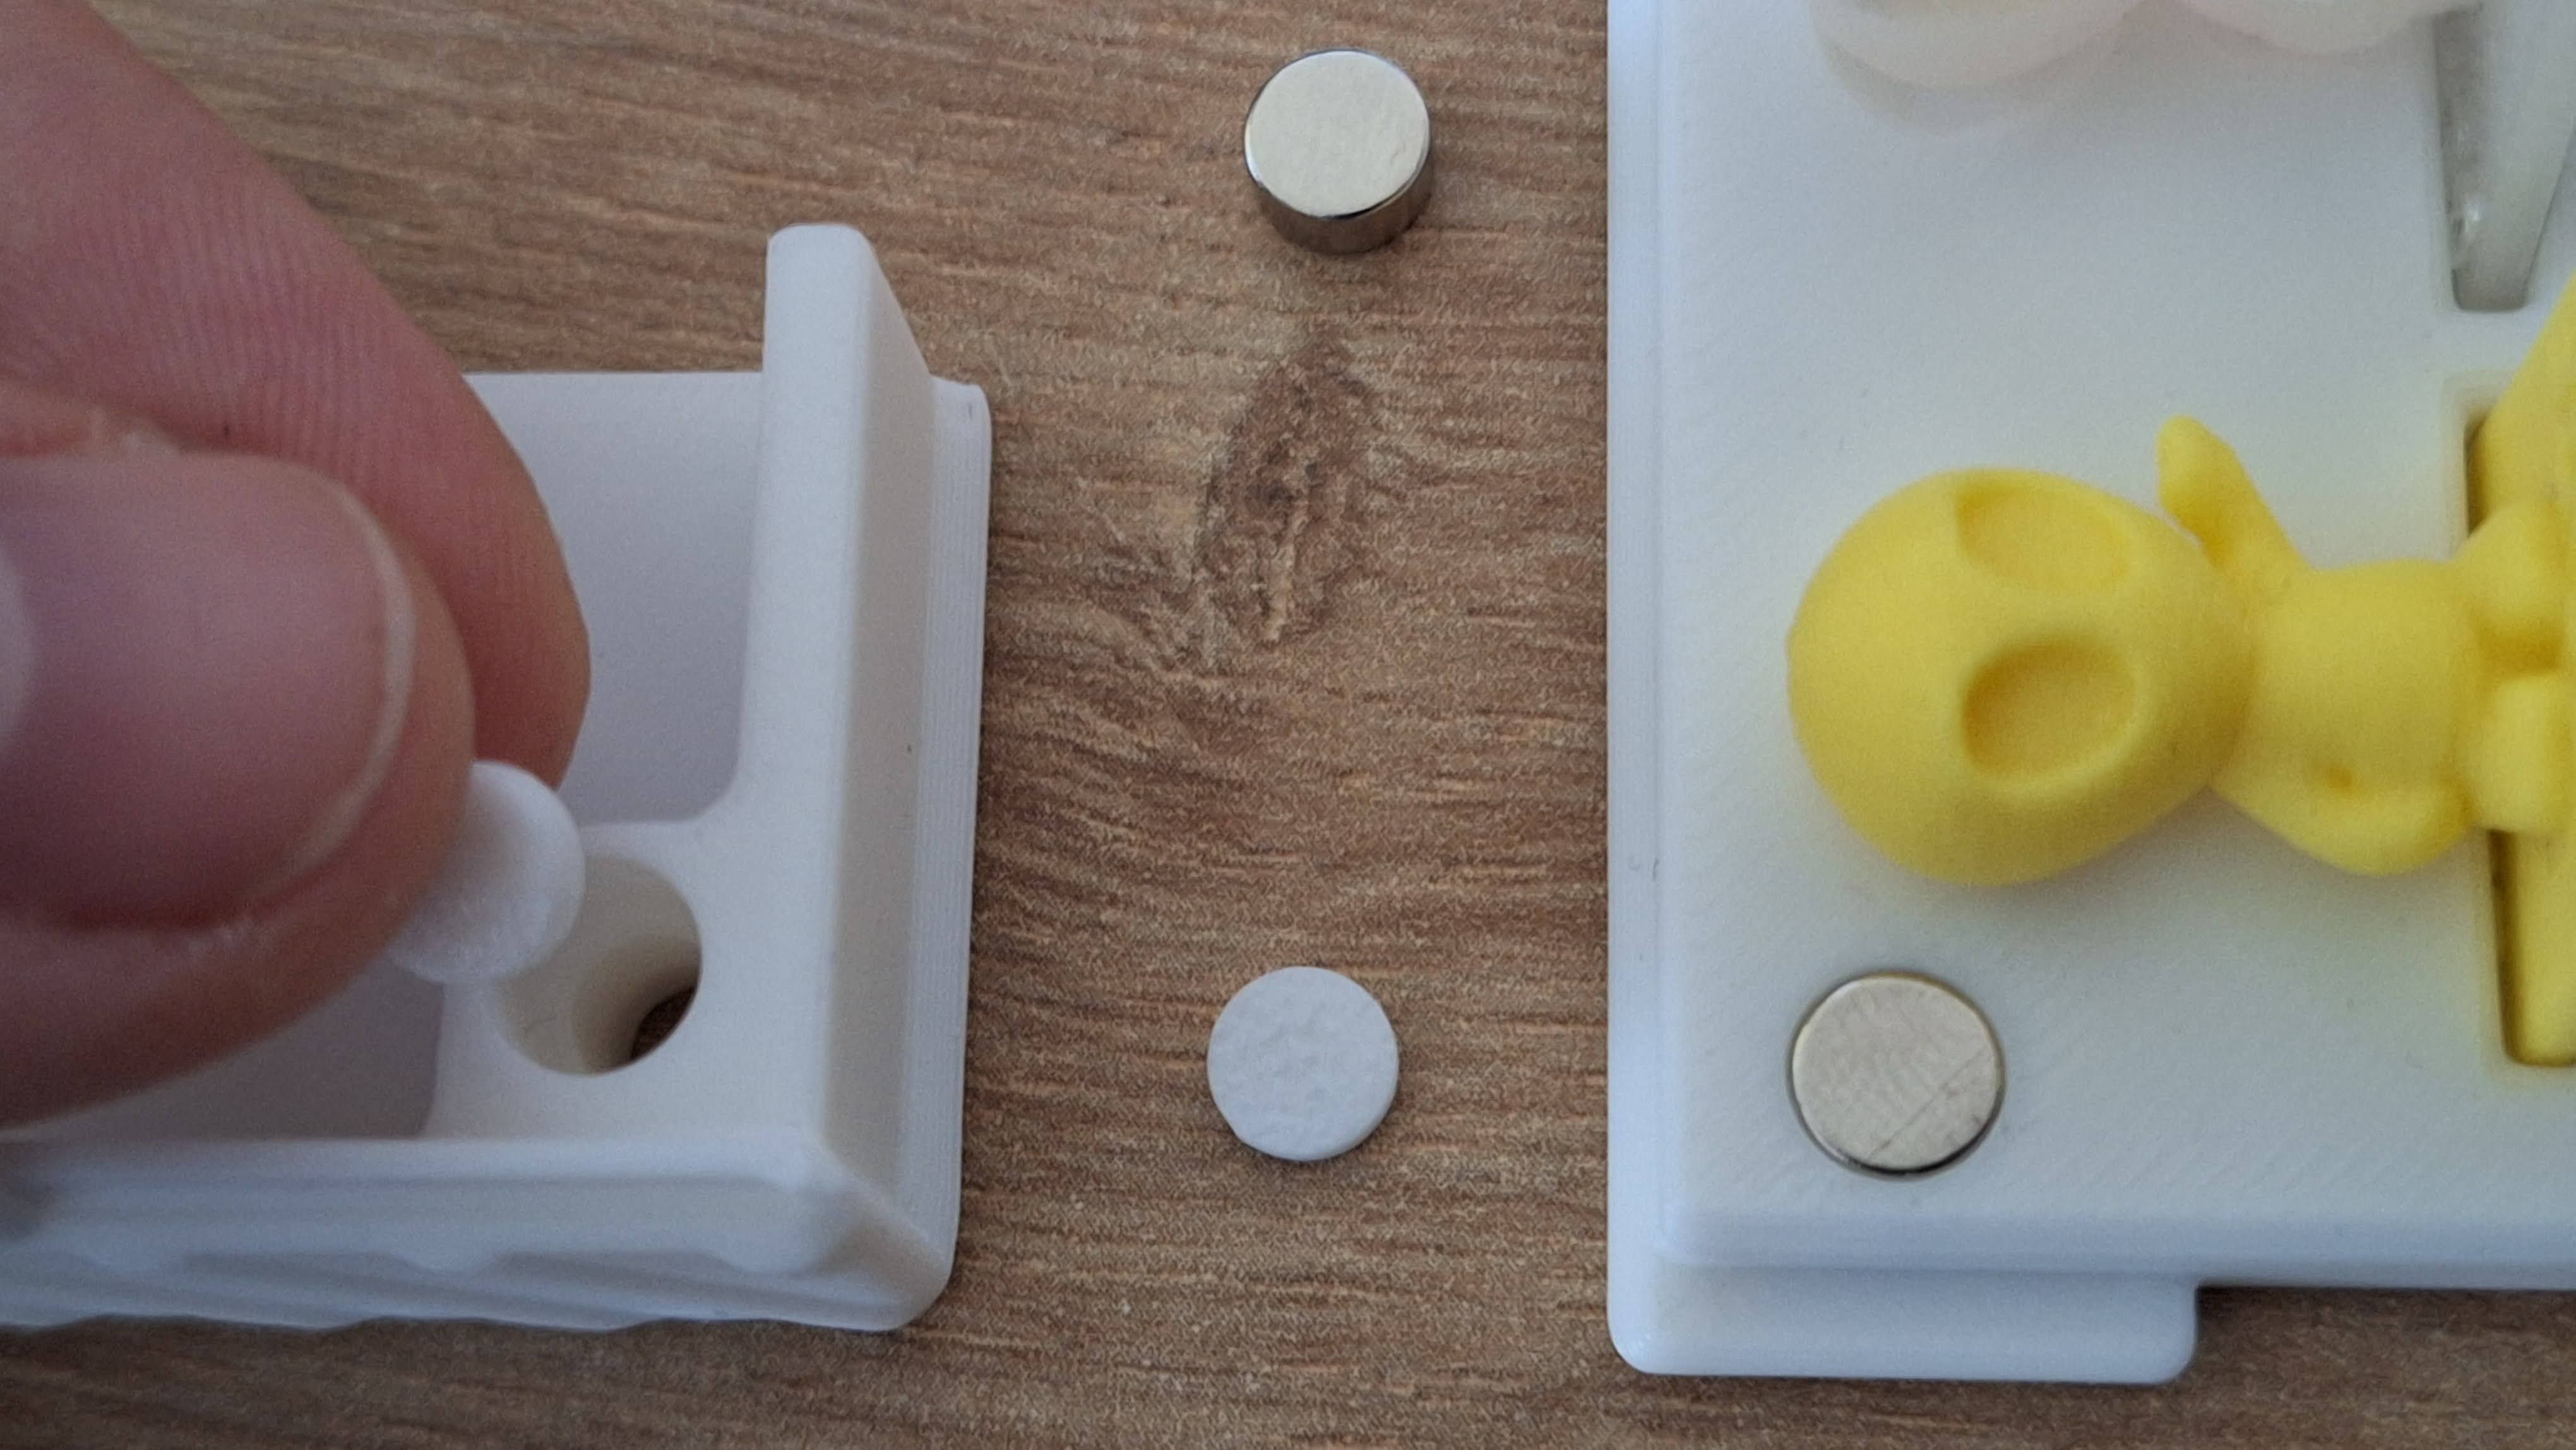
Insert 2mm thick plastic disc to the magnet tester (left); Insert one 6x3mm round magnet to the box Body (not to the cover) (right)
Design by Frantisek23 on MakerWorld (license: BY-SA).