

Pen Vault 1.0


Pen Vault 1.0
- Made to order — 3D printed after you buy
- Free shipping on orders over $25
- Quality checked before it ships
- Questions? Contact us · Returns
Don’t you hate it when you leave your desk for 5 minutes, only to come back and find that your favorite pen has been “borrowed” by an unknown colleague?!
Of course you could lock it up inside a drawer, but there must be a better way… A way that your favorite pen stands tall on your desk, and no one can take it!
Introducing the Pen Vault 1.0: a fully featured desktop stationary holder, with extra security features that make everyone in the office wish they have a 3D-printer.
Features:
- Two lockable pen/pencil slots, able to fully secure various pen widths up to 13mm in diameter
- One lockable drawer ~321cubic centimeters in volume
- A combination lock secures the entire device either in locked or unlocked state
- 10 non-lockable pen slots, 2 ruler slots, and a top surface area to hold miscellaneous items like pins & paper clips.
Operation:
The 2 wheels turn clockwise to hold the pens in place (the more you turn, the more secure the grip is), and counterclockwise to release them. Each wheel grips one pen and is independent of the other.
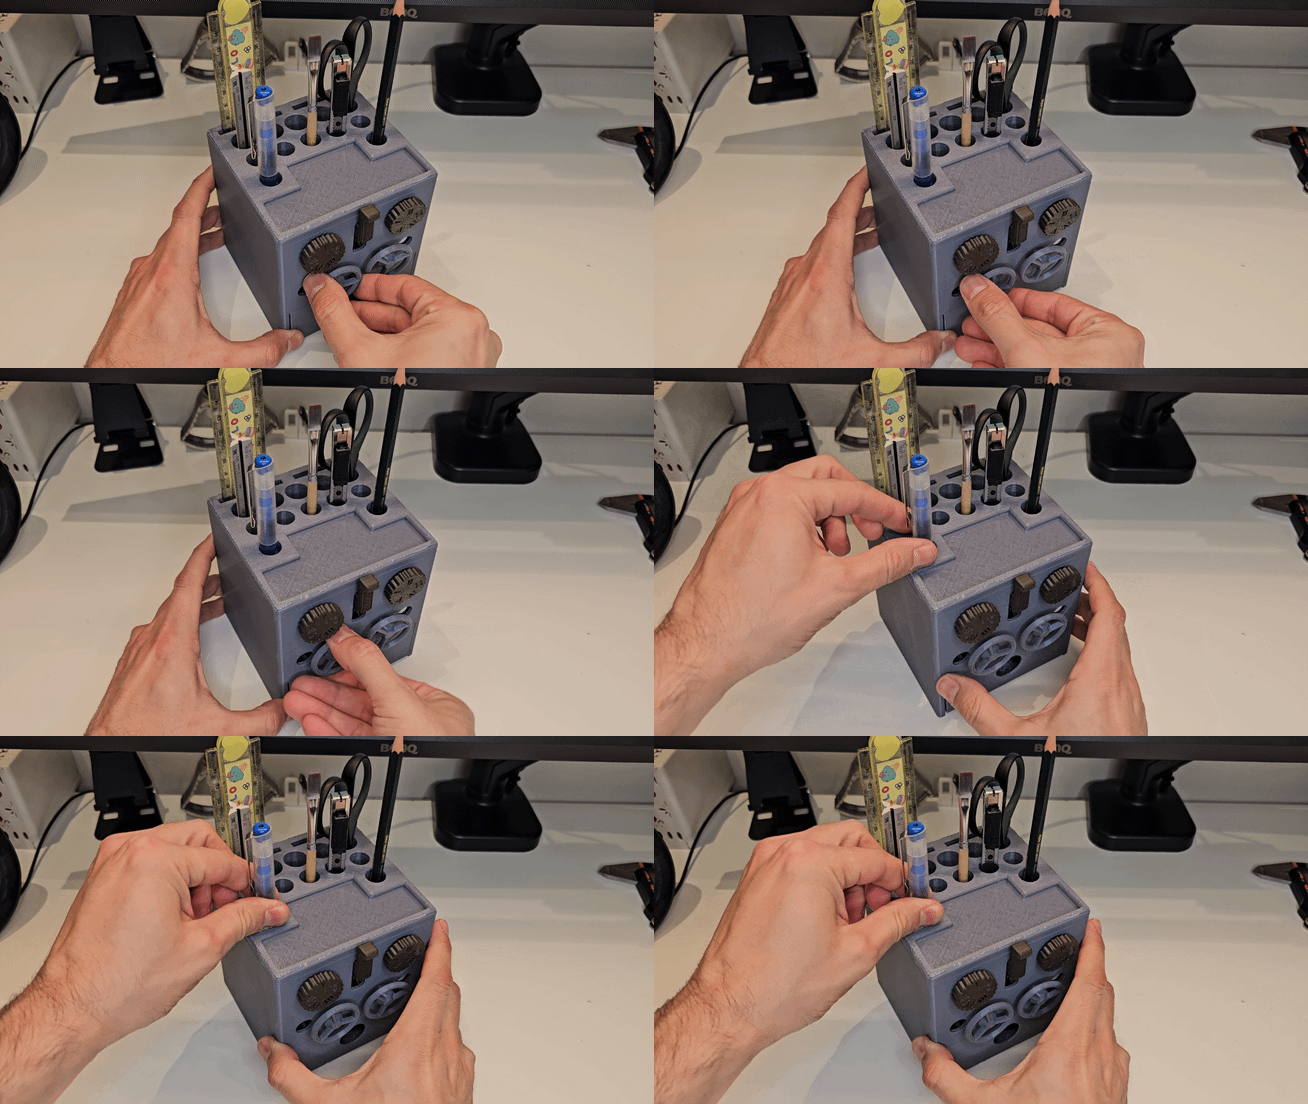
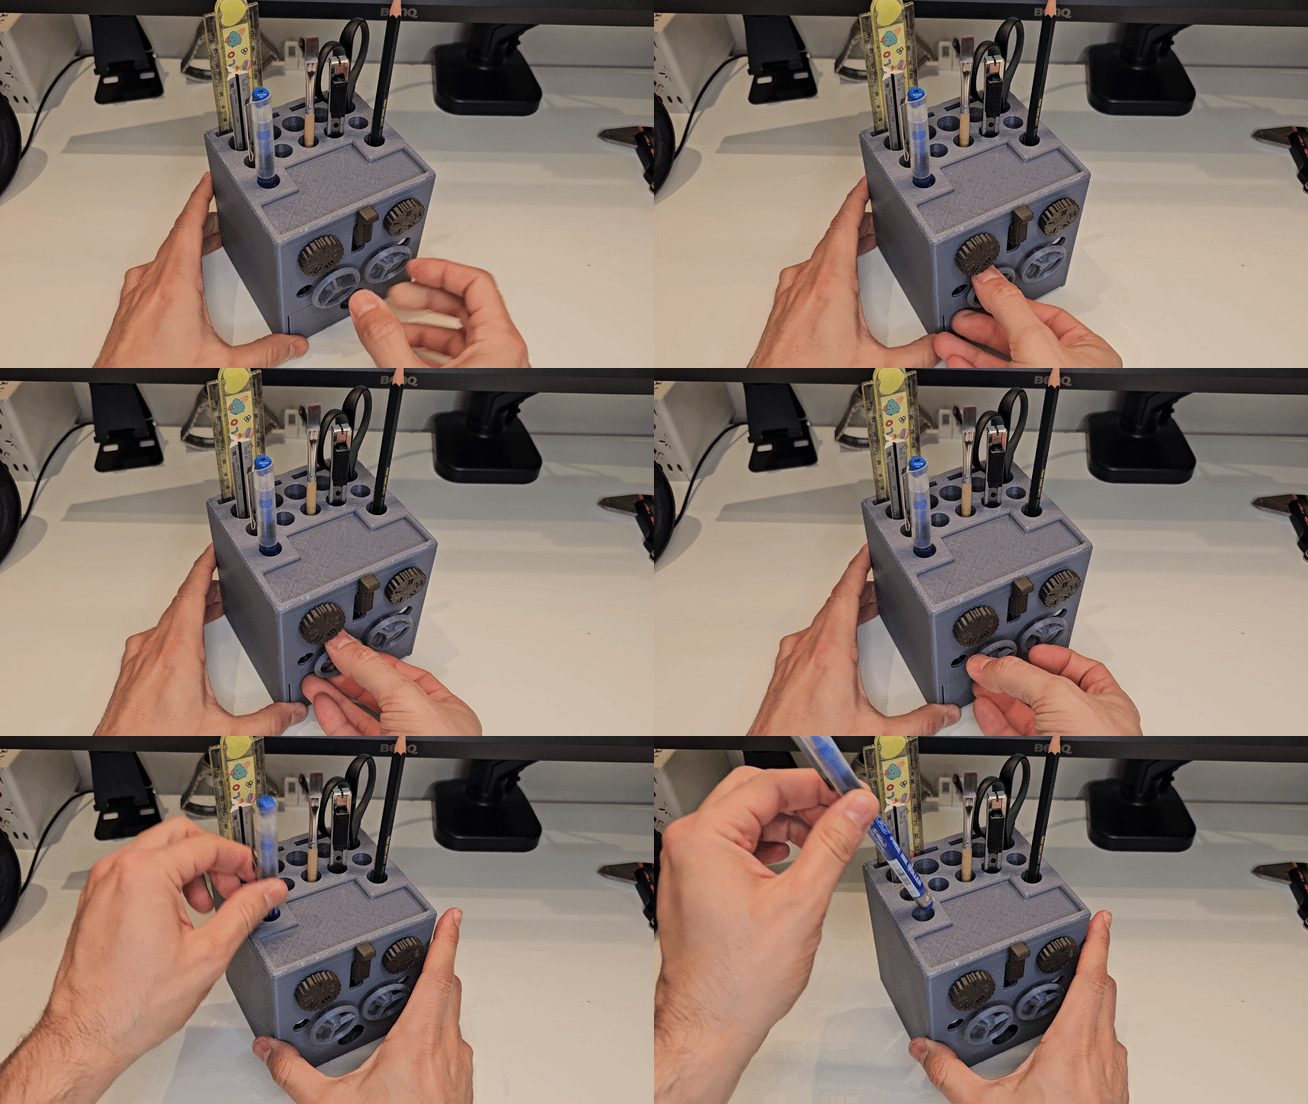
The 2 knobs secure the central lever either up (unlocked) or down (locked).
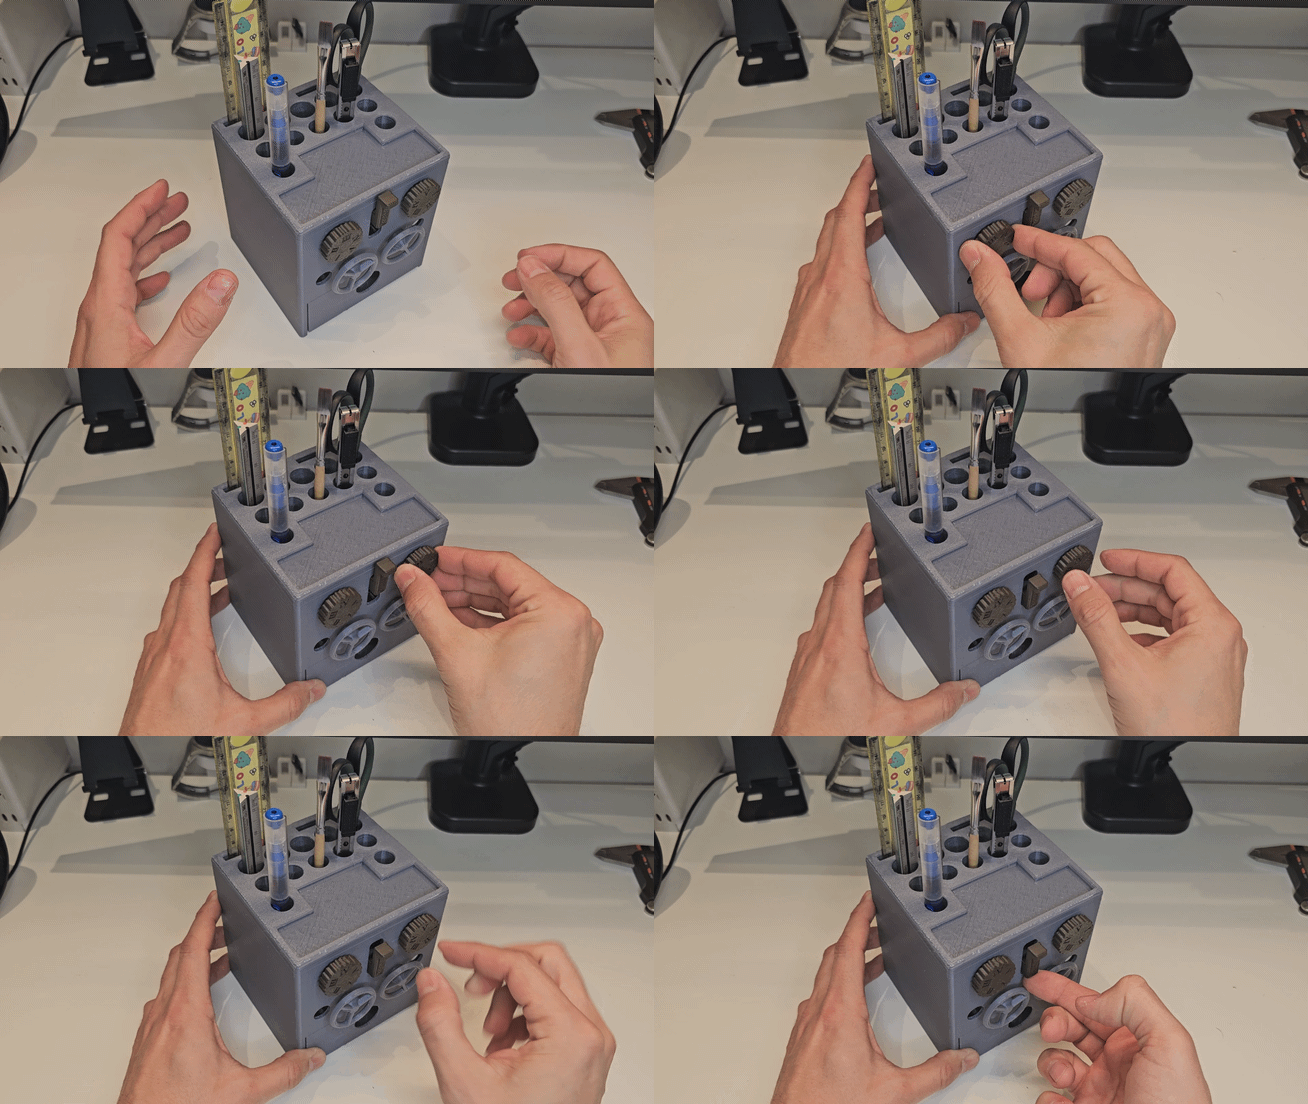
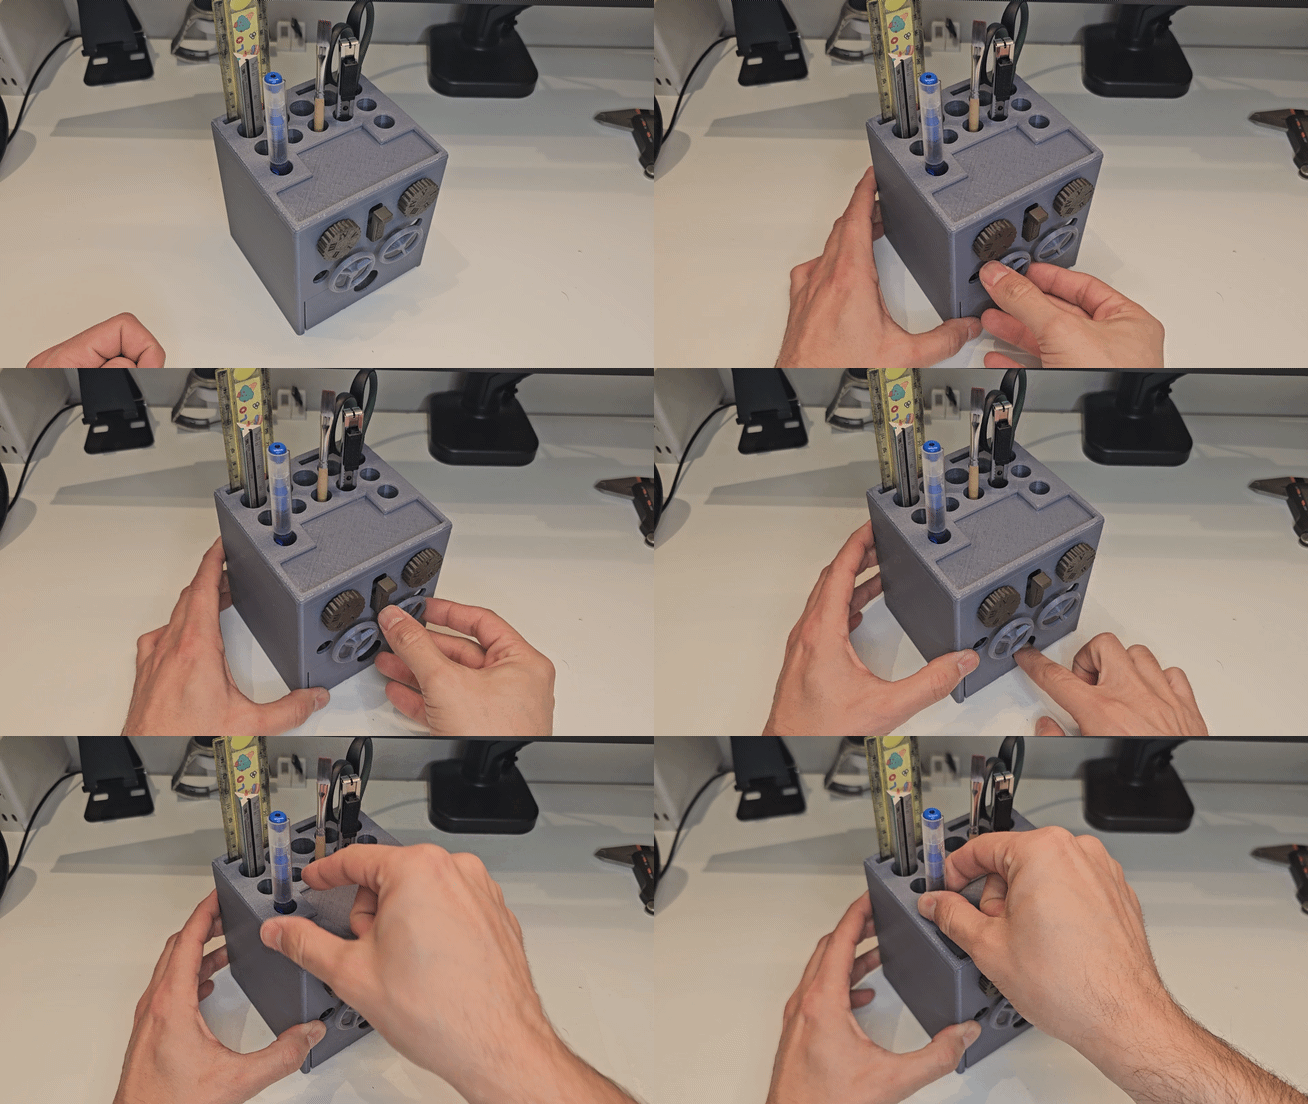
When in the unlocked position: the 2 wheels can rotate to grip or un-grip the pens. The drawer is also free to open and close.
When in the locked position: the 2 wheels can no longer rotate in either direction. The drawer is also locked shut.
Print Material:
Components on the first plate (all small & movable parts) are highly recommended to be printed in PETG, as they are subject to flexing & static forces.
All other parts (Base, Case, and Drawer) can be printed in the filament of your choice. I added brims on the print profile in case your filament warps on such bigger parts.
Slicer settings:
For those downloading the STL files, below are the recommended slicer settings. Print orientation is shown in the images.
| File | Material | Layer Height | Support? | Plate Adhesion | Number of Walls |
| Gear | PETG | 0.2 |
No | None | 2 |
| Gear Shaft | PETG | 0.2 |
No | None | 2 |
| Lever | PETG | 0.2 |
Yes | None | 3 |
| Lever Connector | PETG | 0.2 |
No | None | 3 |
| Locking Gear | PETG | 0.2 |
No | None | 3 |
| Nut Gear | PETG | 0.2 |
No | None | 3 |
| Wheel | PETG | 0.2 |
No | None | 3 |
| Knob | PETG | 0.2 |
No | None | 2 |
| Knob Connector | PETG | 0.2 |
Yes | None | 2 |
| Knob Snap | PETG | 0.2 |
No | None | 2 |
| Thread Joint | PETG | 0.2 |
No | None | 3 |
| Push Plate | PETG | 0.2 |
No | None | 3 |
| Locking Plate | PETG | 0.2 |
No | None | 2 |
| Base | PETG / PLA | 0.2 |
Yes | Brim/None | 3 |
| Case | PLA / PETG | 0.2 or 0.3 |
Yes | None/Brim | 3 |
| Drawer | PLA / PETG | 0.2 - 0.4 |
Yes | None | 3 |
Assembly:
First of all, make sure all prints are smooth from any support material & brims to ensure frictionless sliding & rotation.
No extra hardware is needed for the assembly, I only recommend gluing some rubber bands on the push plate for an extremely secure grip on the pen.
All components that secure into one-another should have a tight enough fit. If your tolerances vary, please use glue to secure the connection.
-
Start by assembling the internal components into the “Base”: thread the “Thread Joint” into the “Nut gear” in their position, as shown below. Do for both sides.
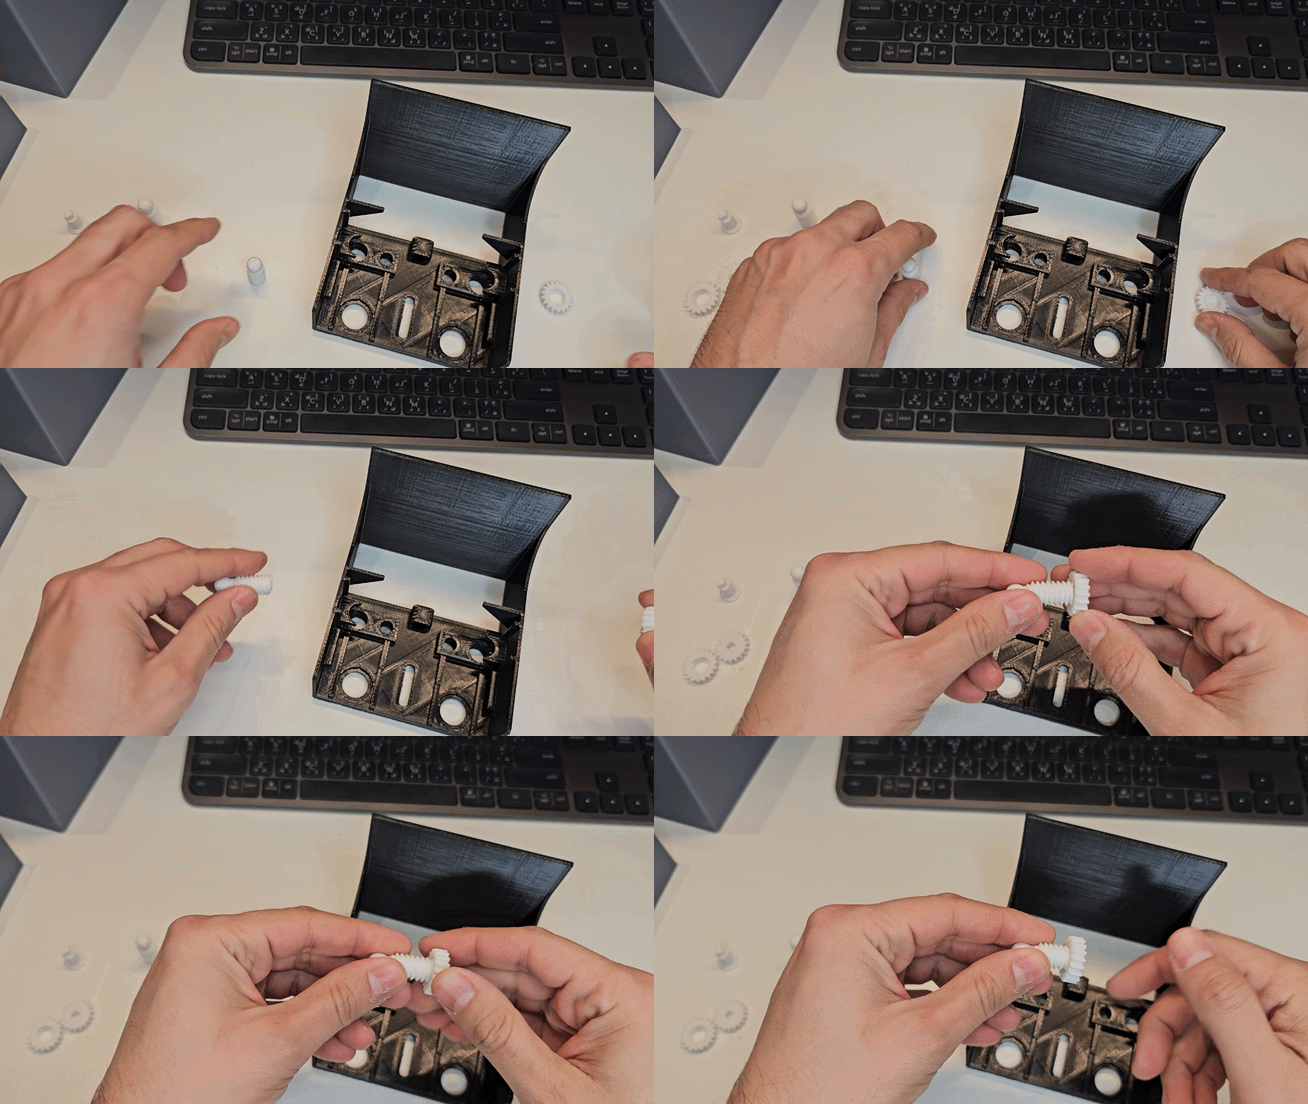
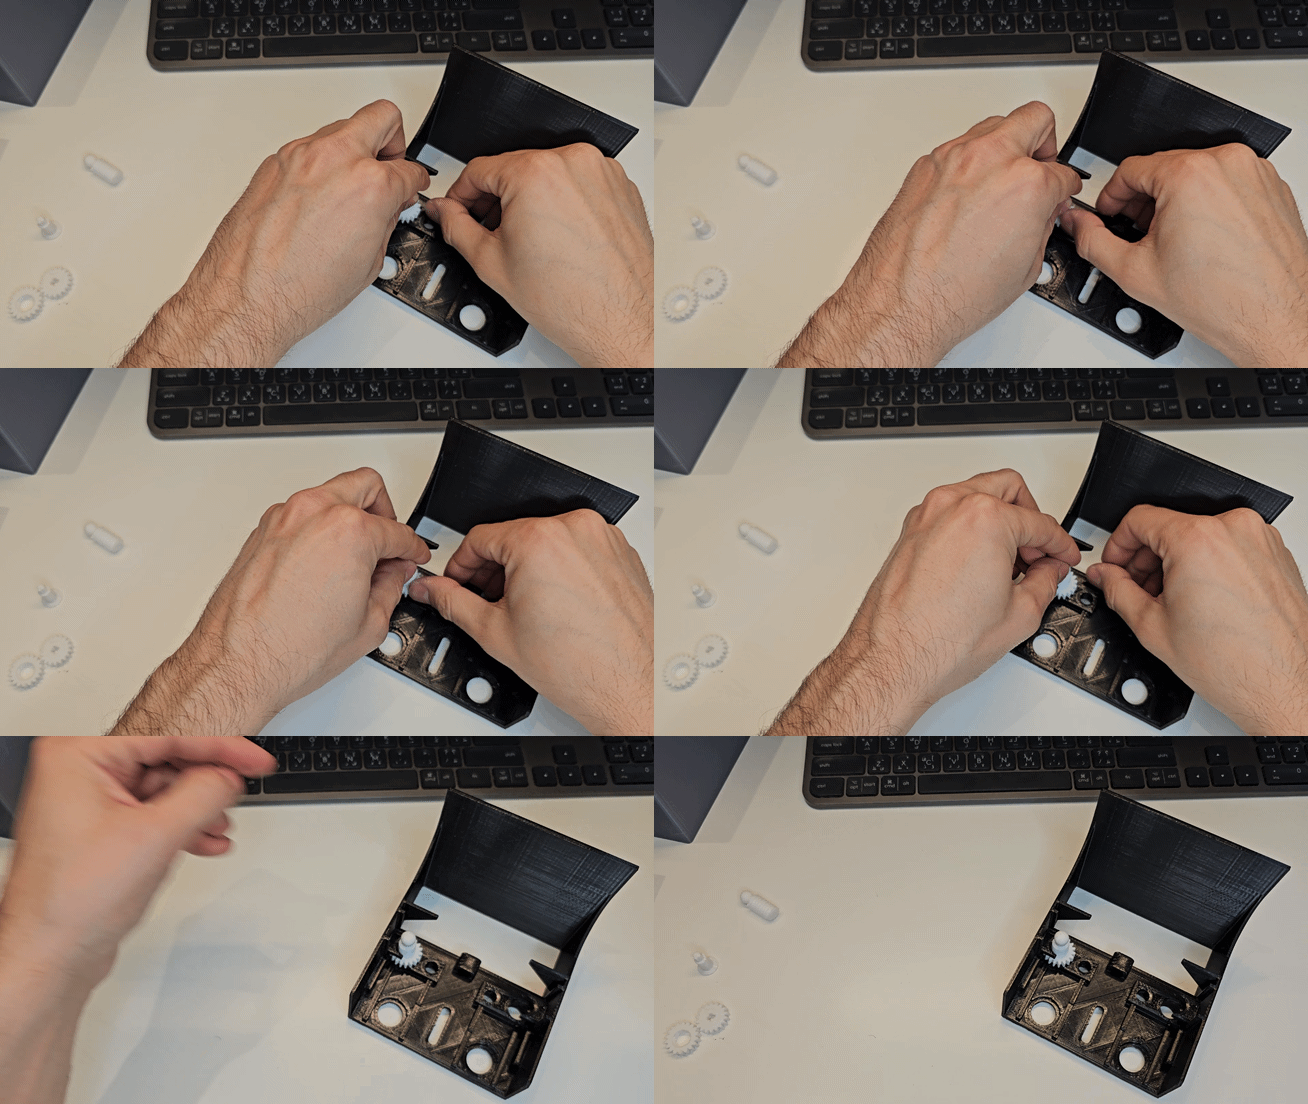
-
Next connect the “Gear shaft” to the “Gear” through the “Base”, meshing with the above “Nut gear”. Do this also for both sides.
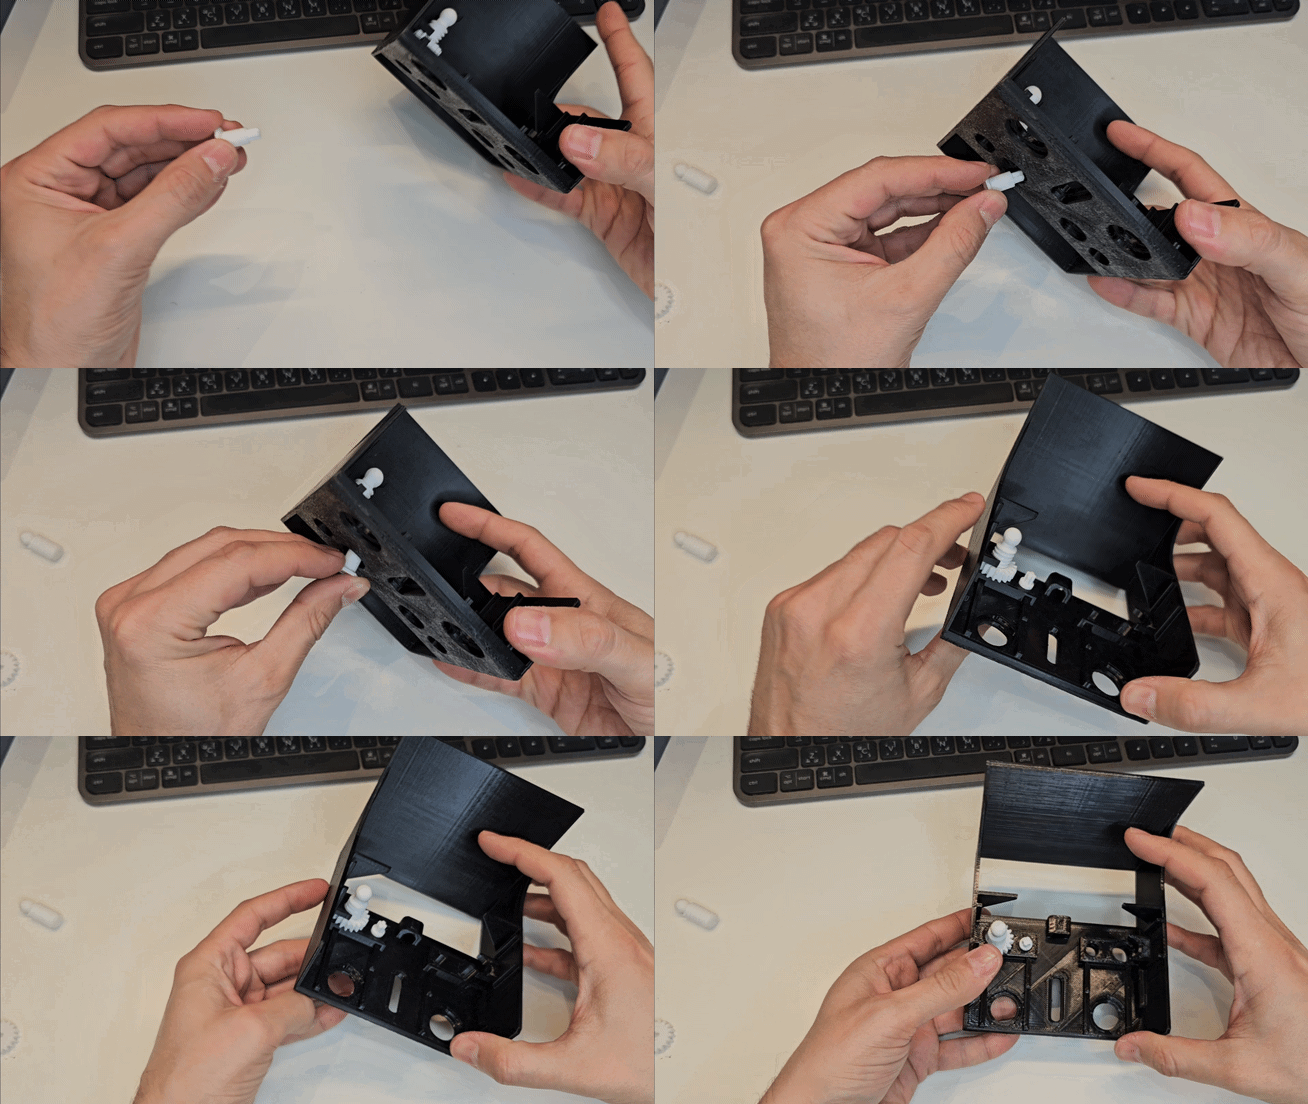
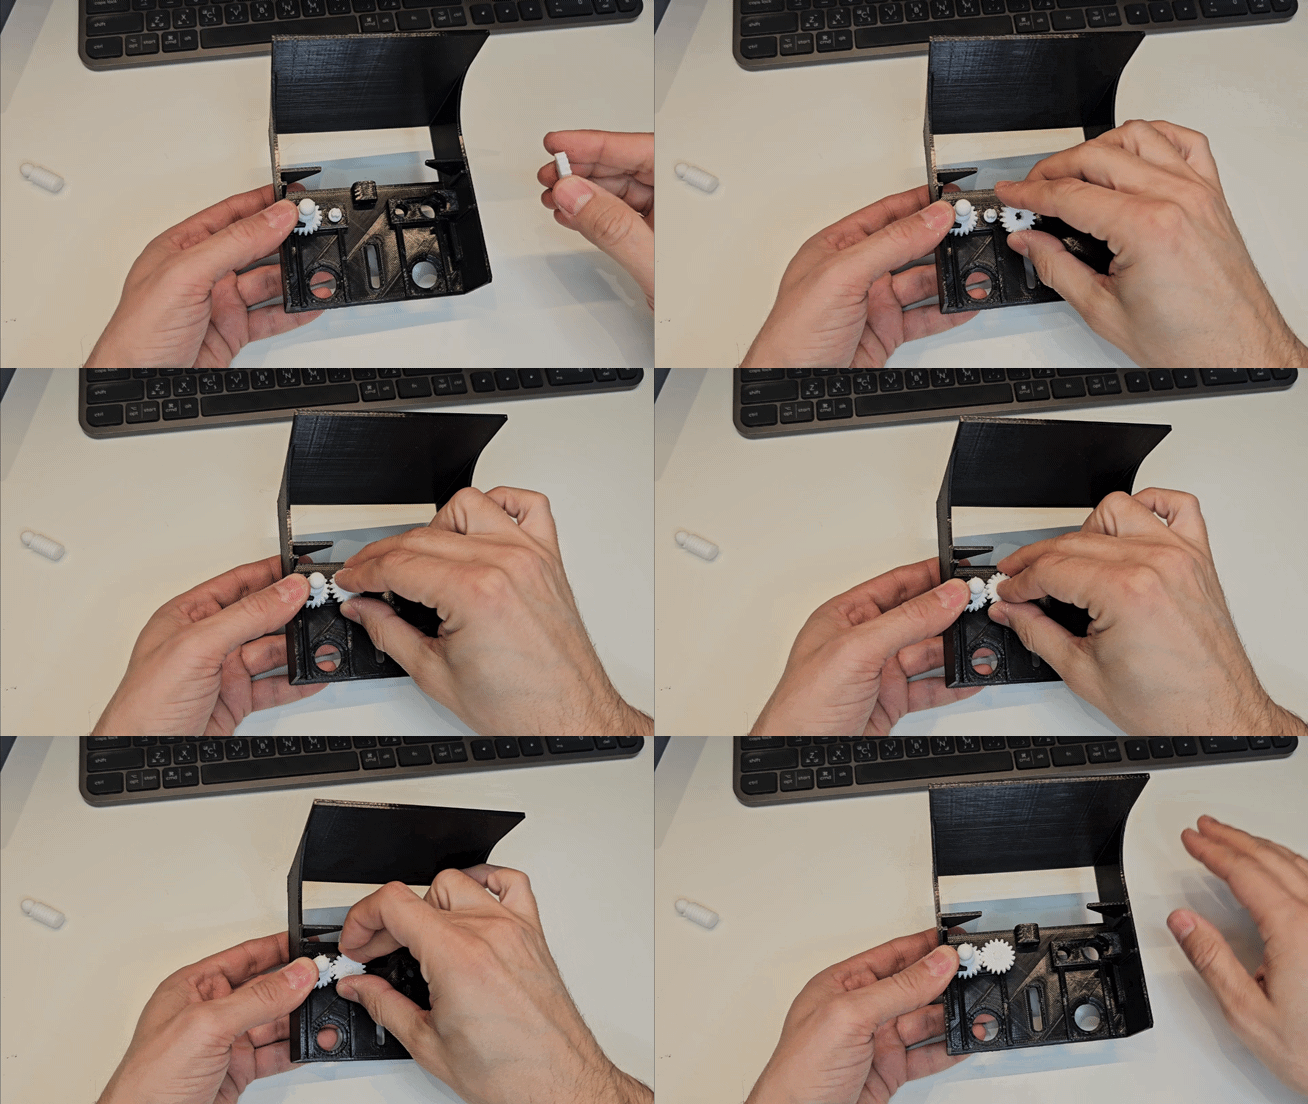
-
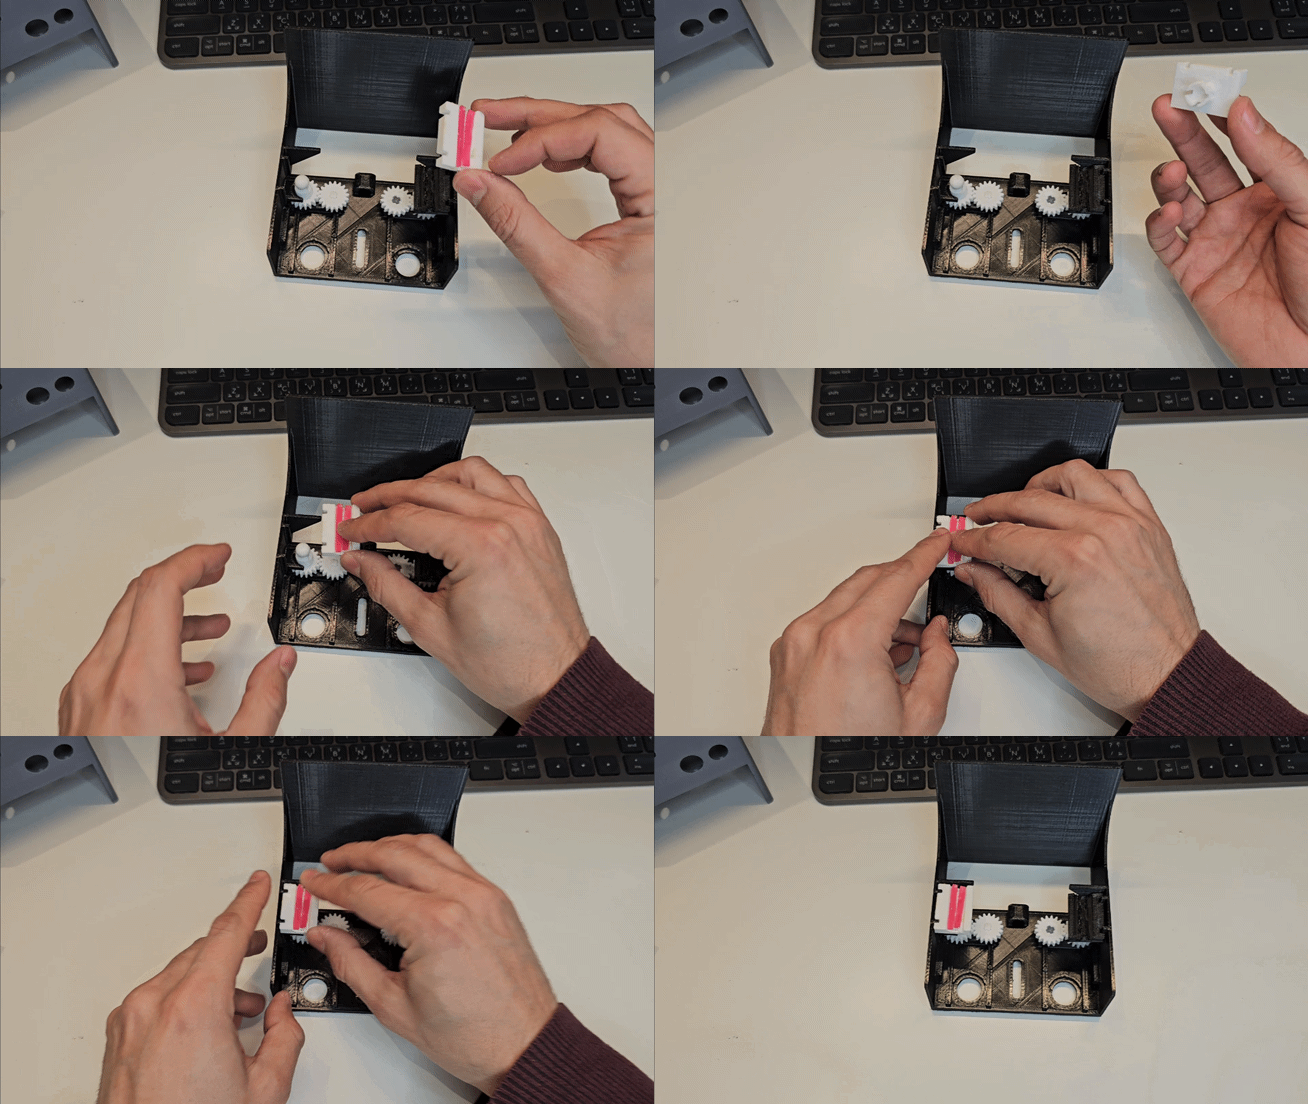
Click the 2 “Push plates” onto the ball joints of the “Thread joints”. You might need to thread them further inside to expose the ball joint.
-
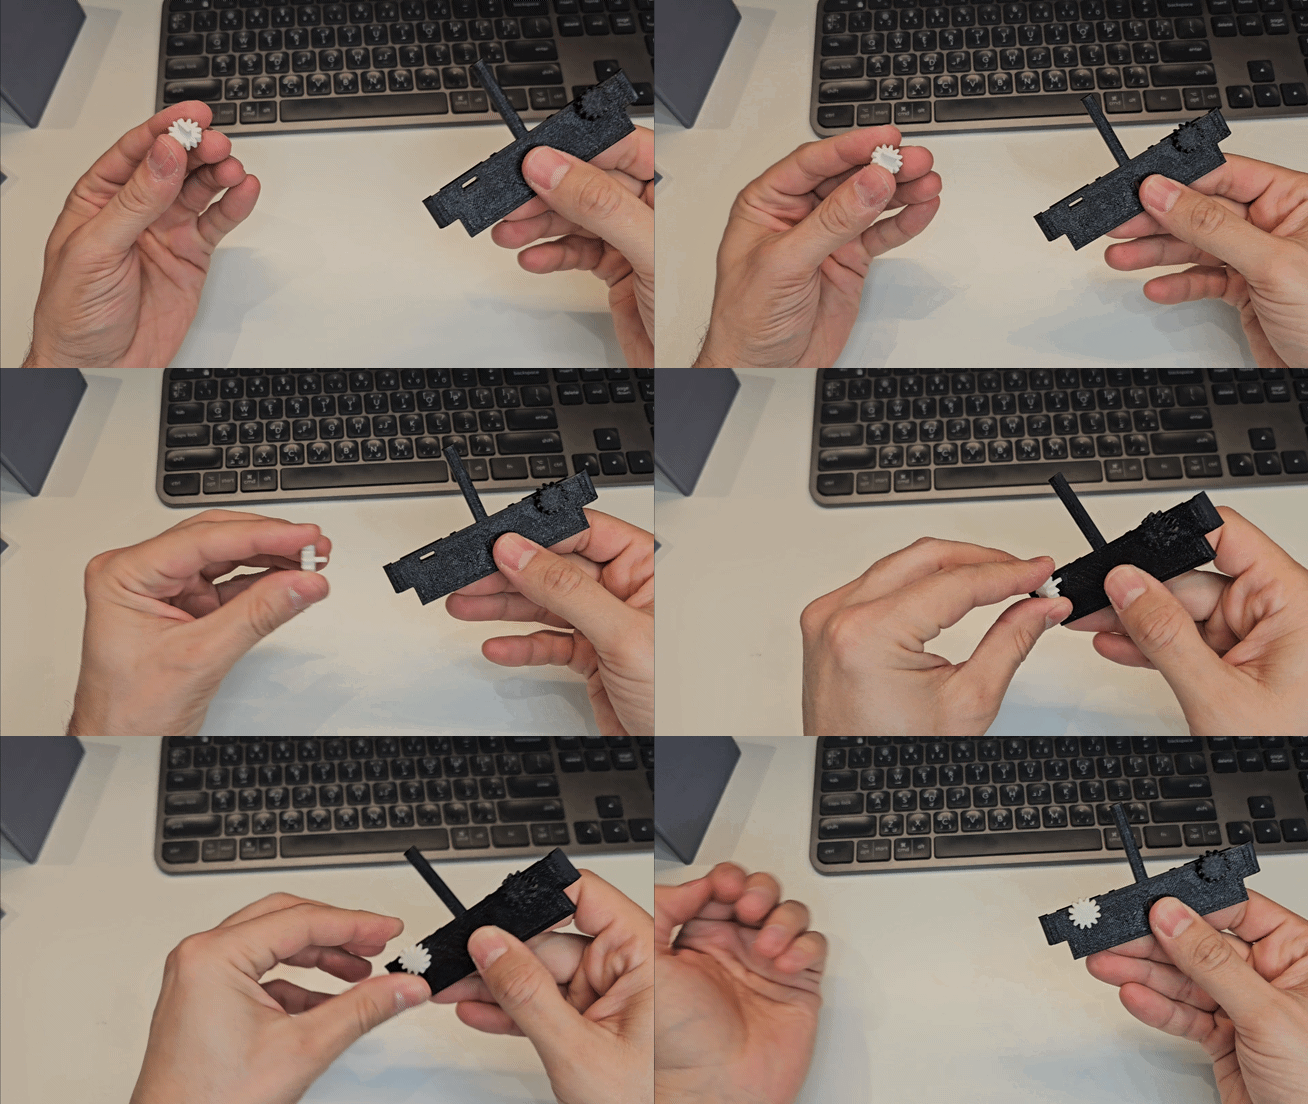
Insert the 2 “Locking gears” into the “Locking plate”.
-
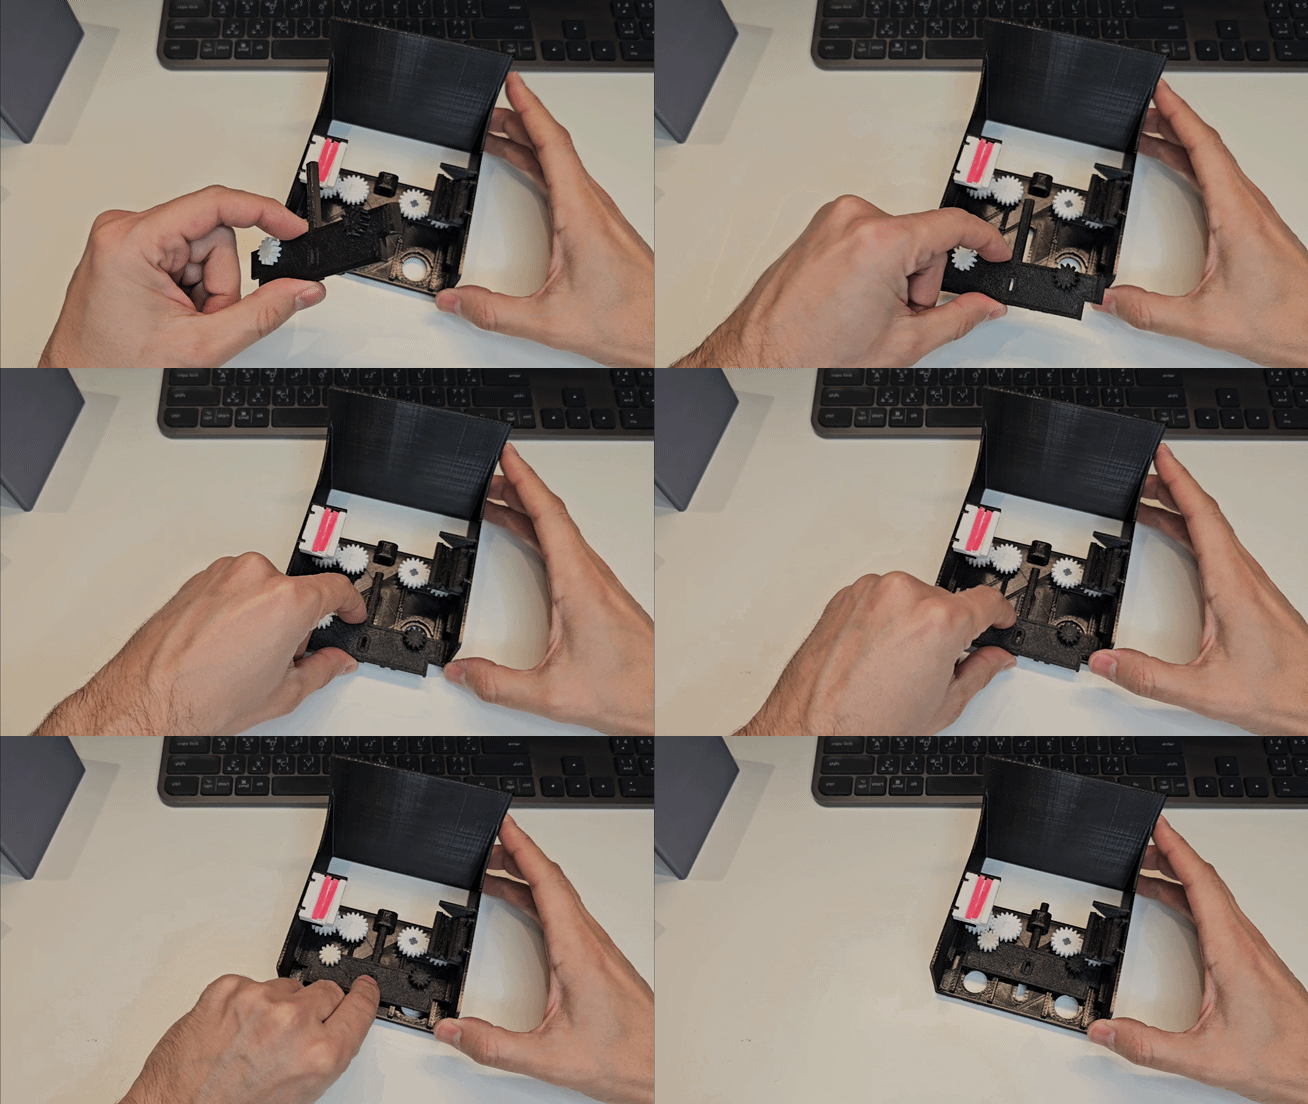
Slide the “Locking plate” into position. Move it all the way down.
-
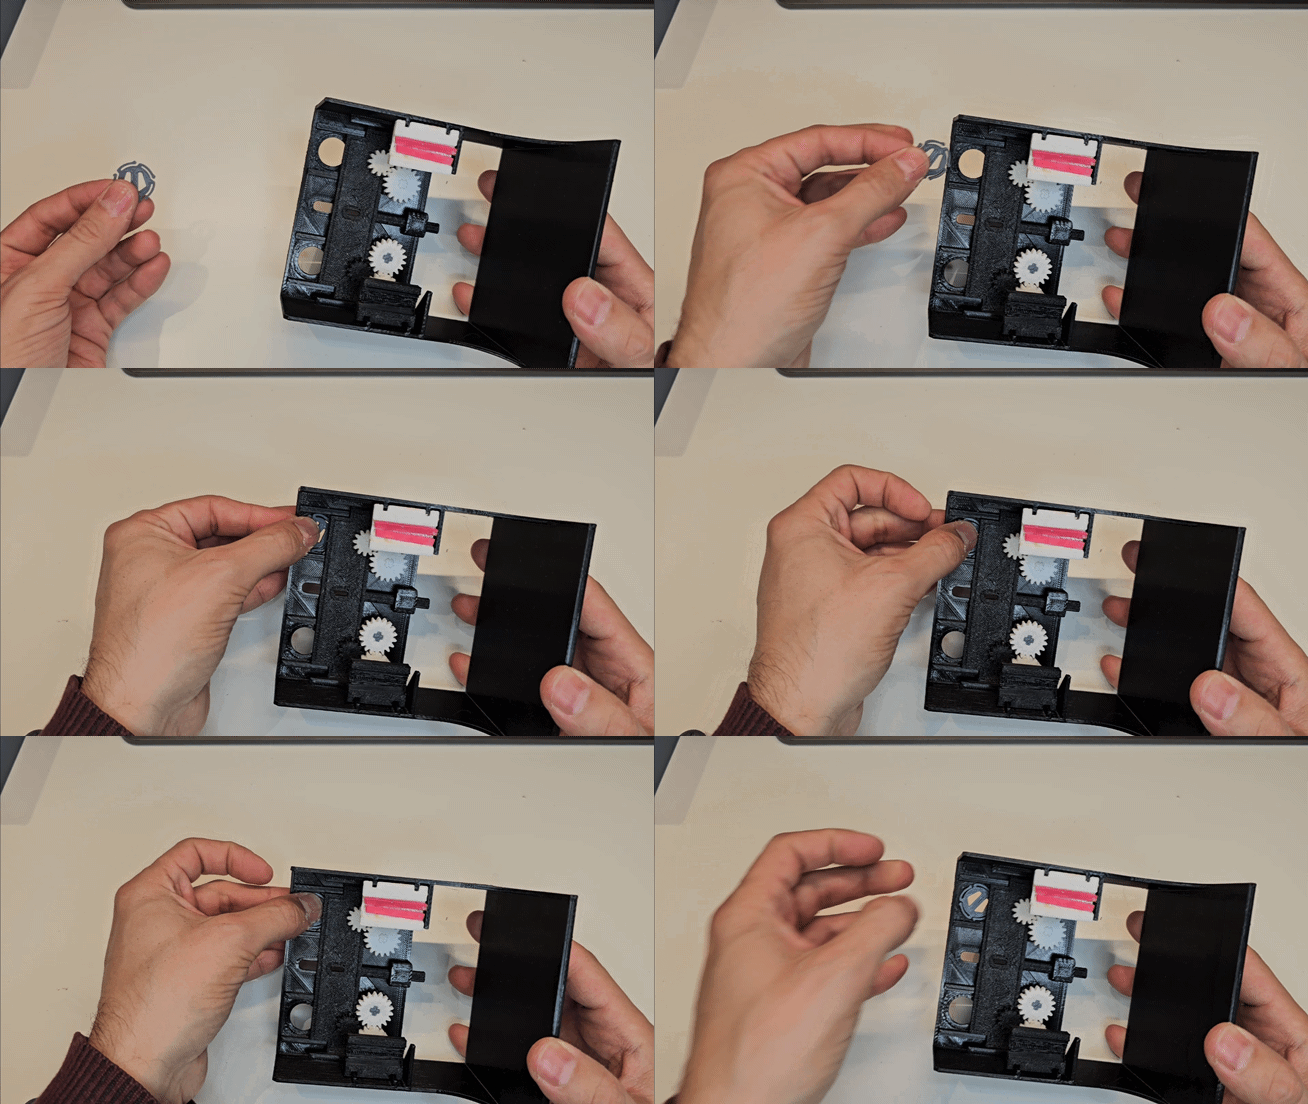
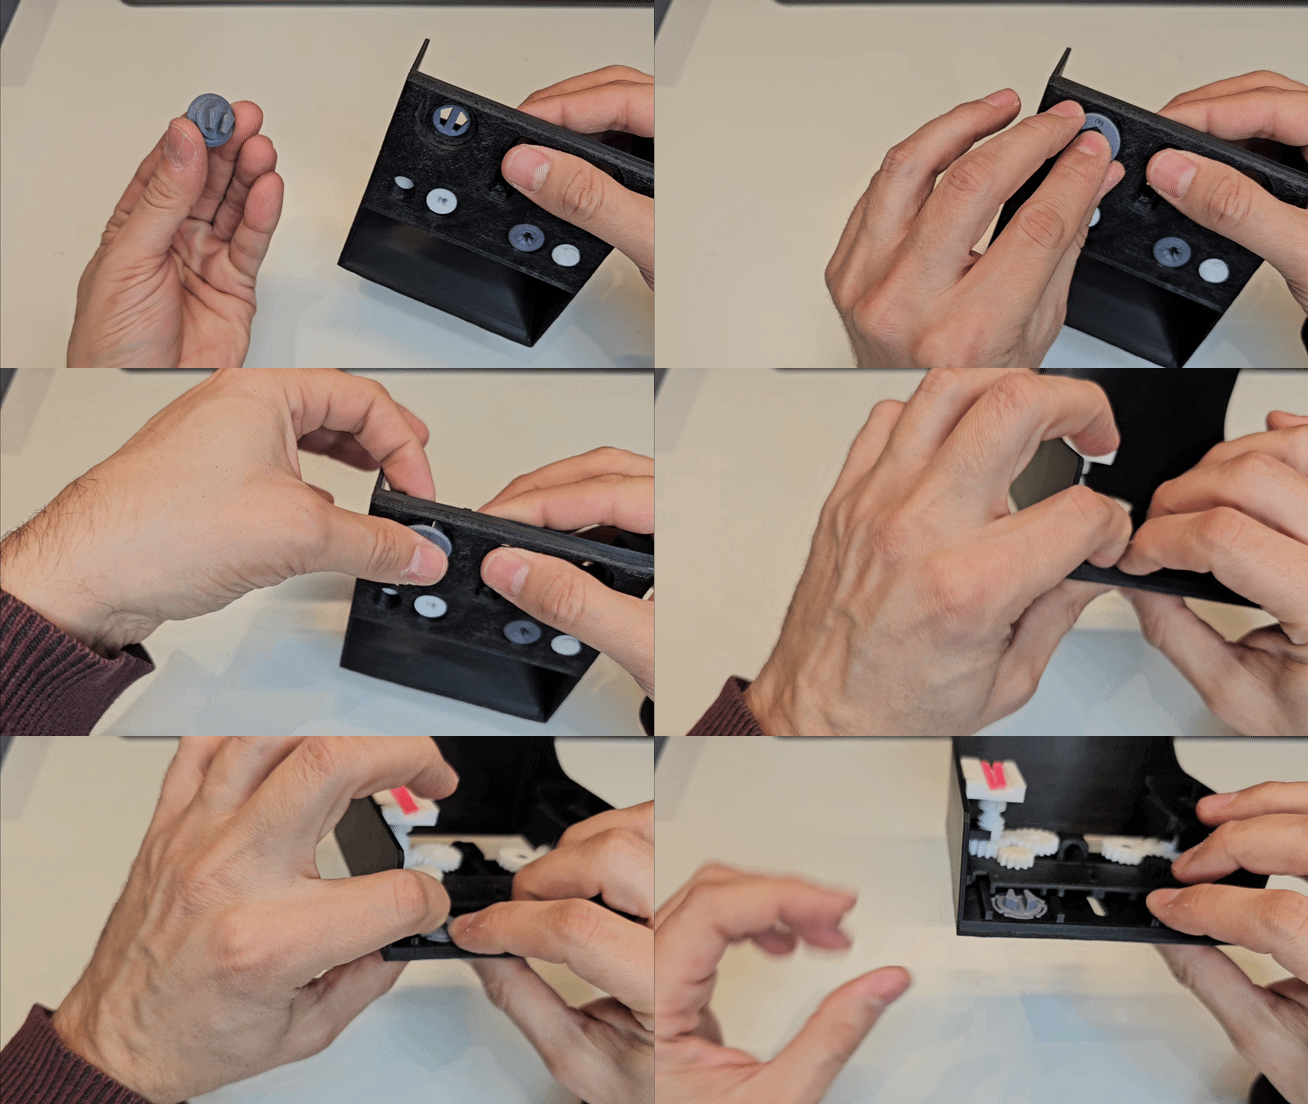
Connect the “Knob snap” to the “Knob connector” via the upper hole. Make sure the connector slides all the way in. Do this also for both sides.
-
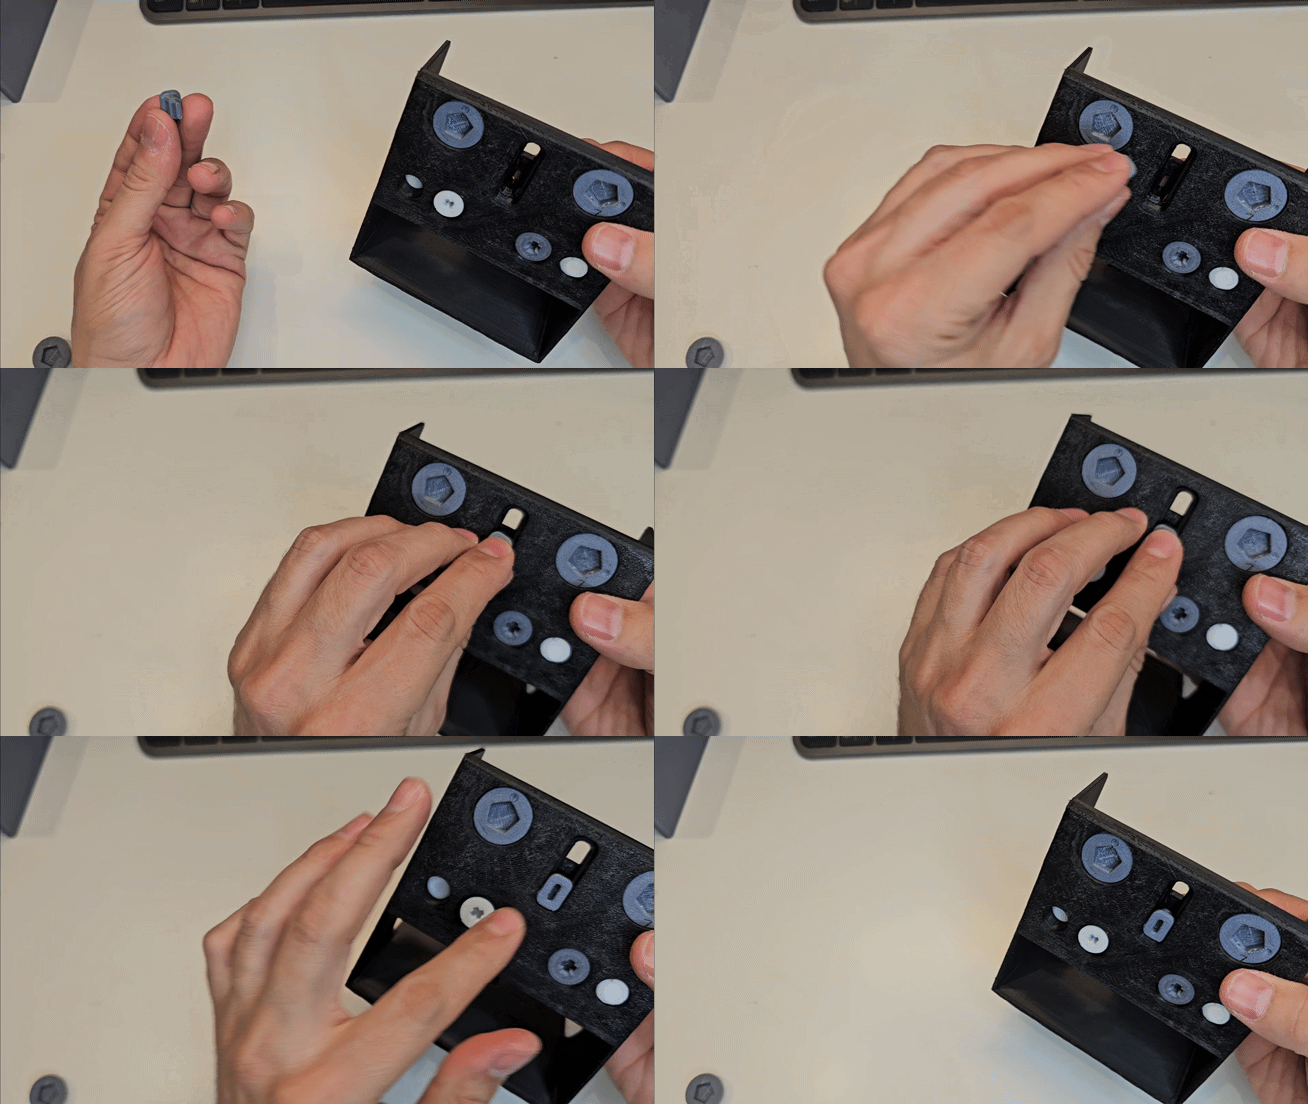
Insert the “Lever Connector” through the base, locking it with the “Locking plate”.
-
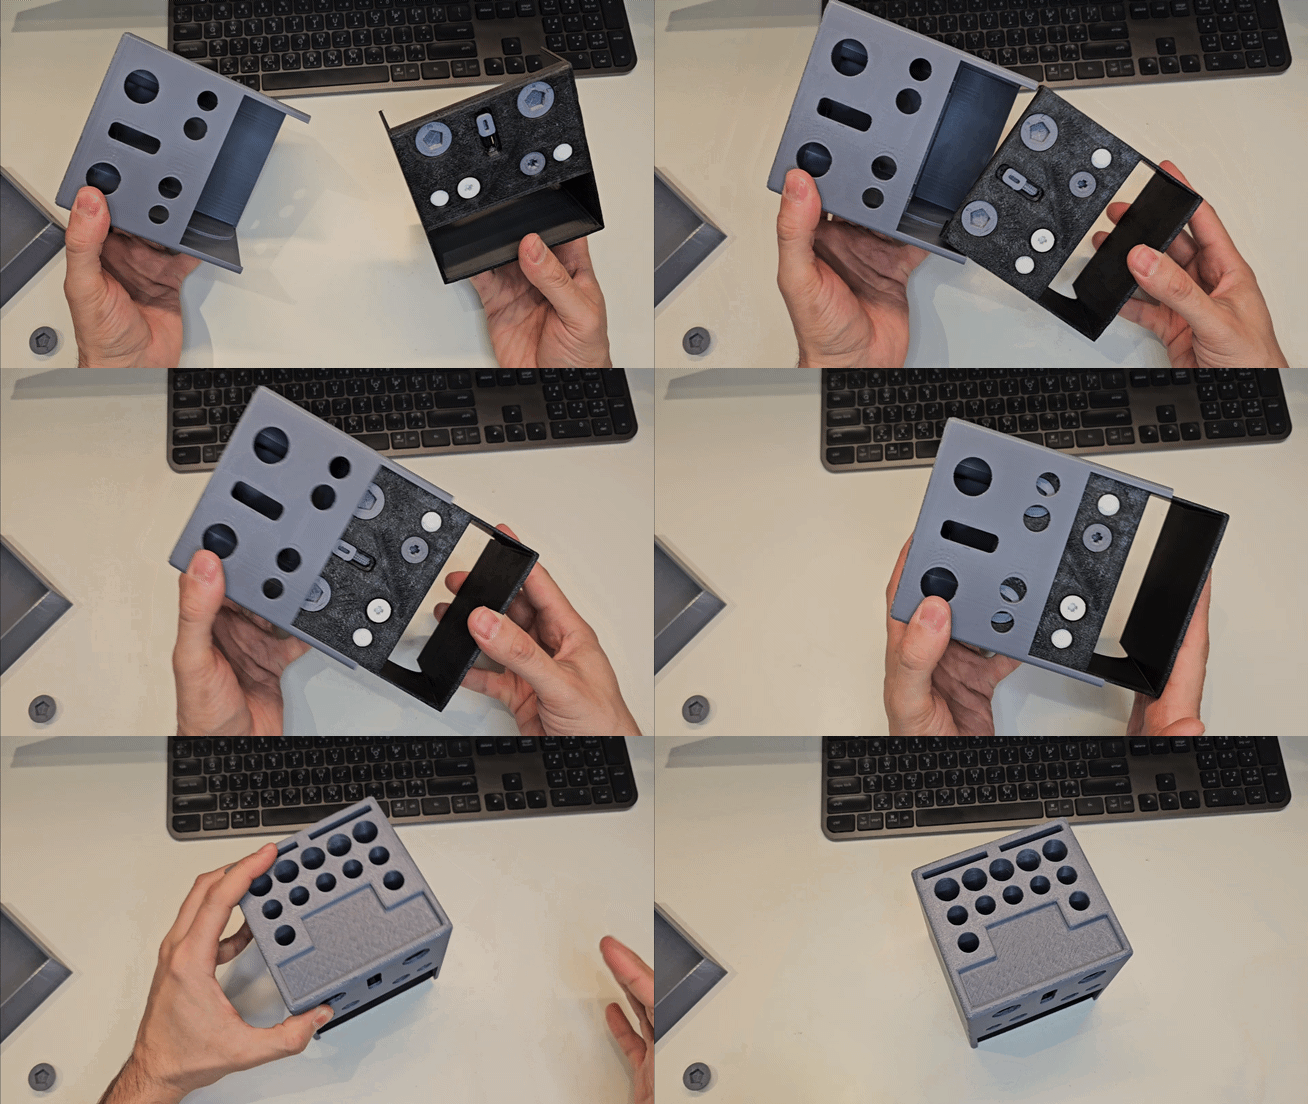
The “Base” is now assembled. Slide it inside the “Case”.
-
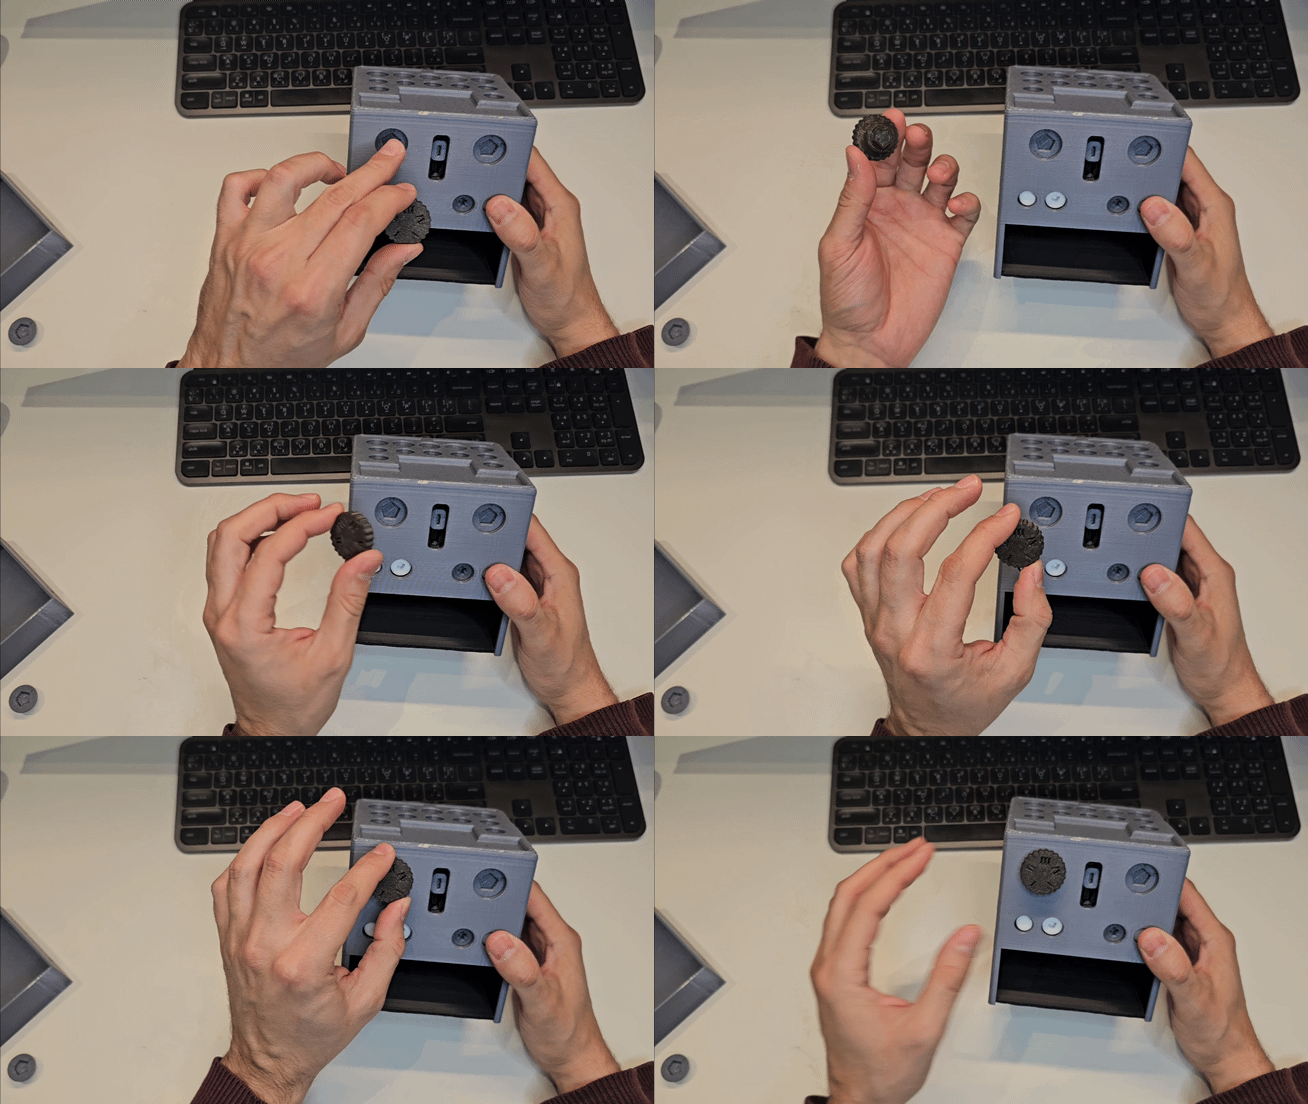
Connect the 2 knobs. Align the small circle on the “Knob connector” to the number on the knob that corresponds to your secret code. It is up to you if you wanted to glue the knob, or keep the option to change the code later on.
-
Connect the 2 wheels and the lever to their corresponding connectors.
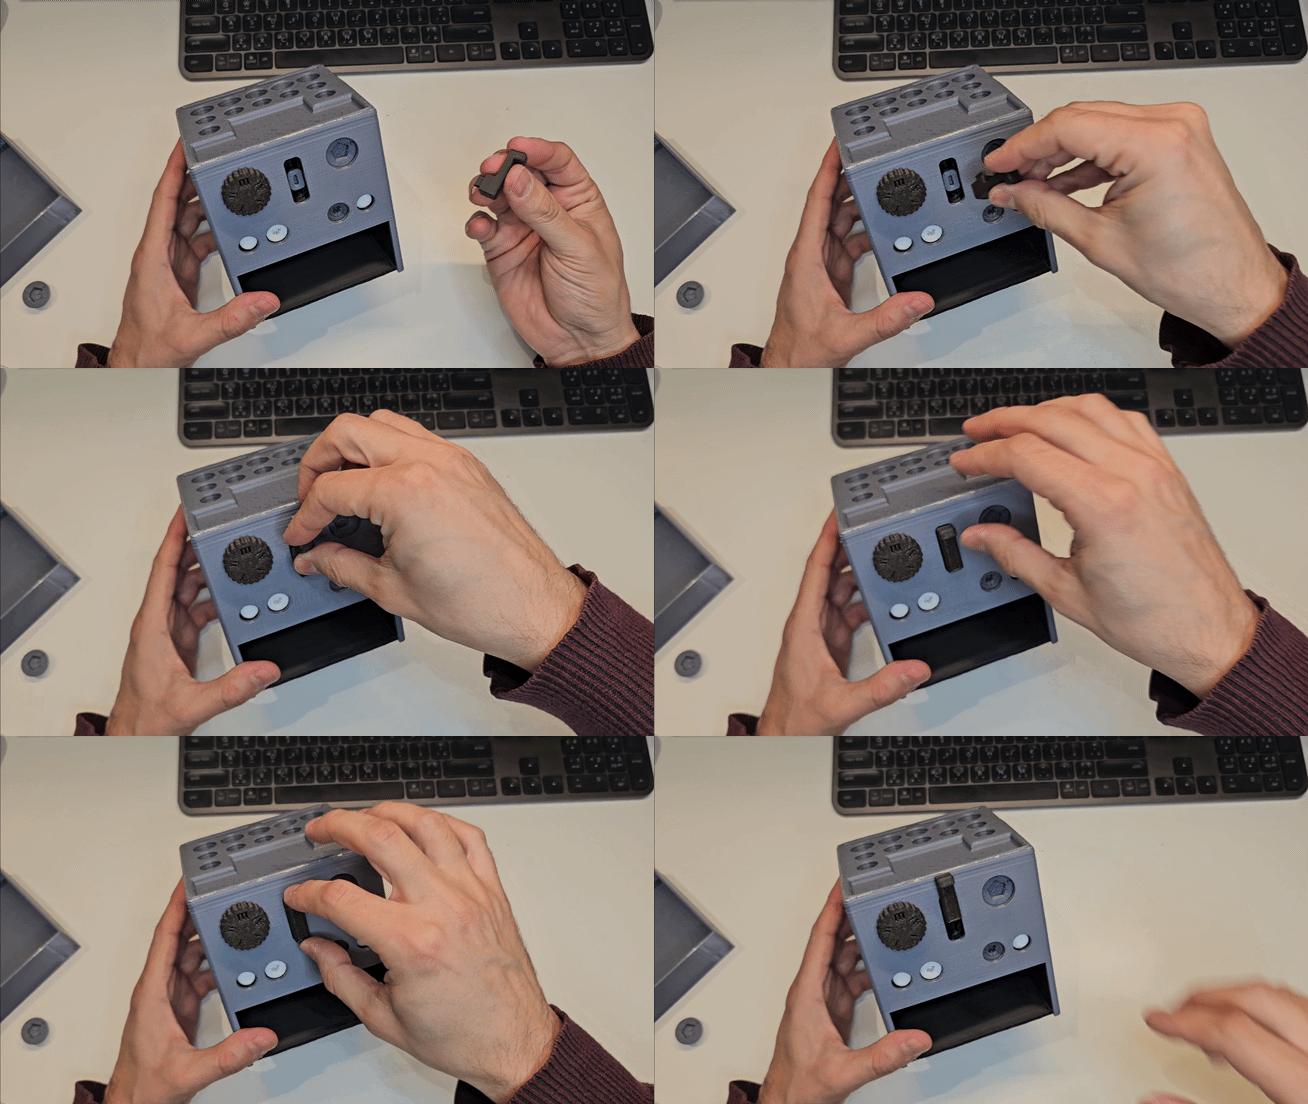
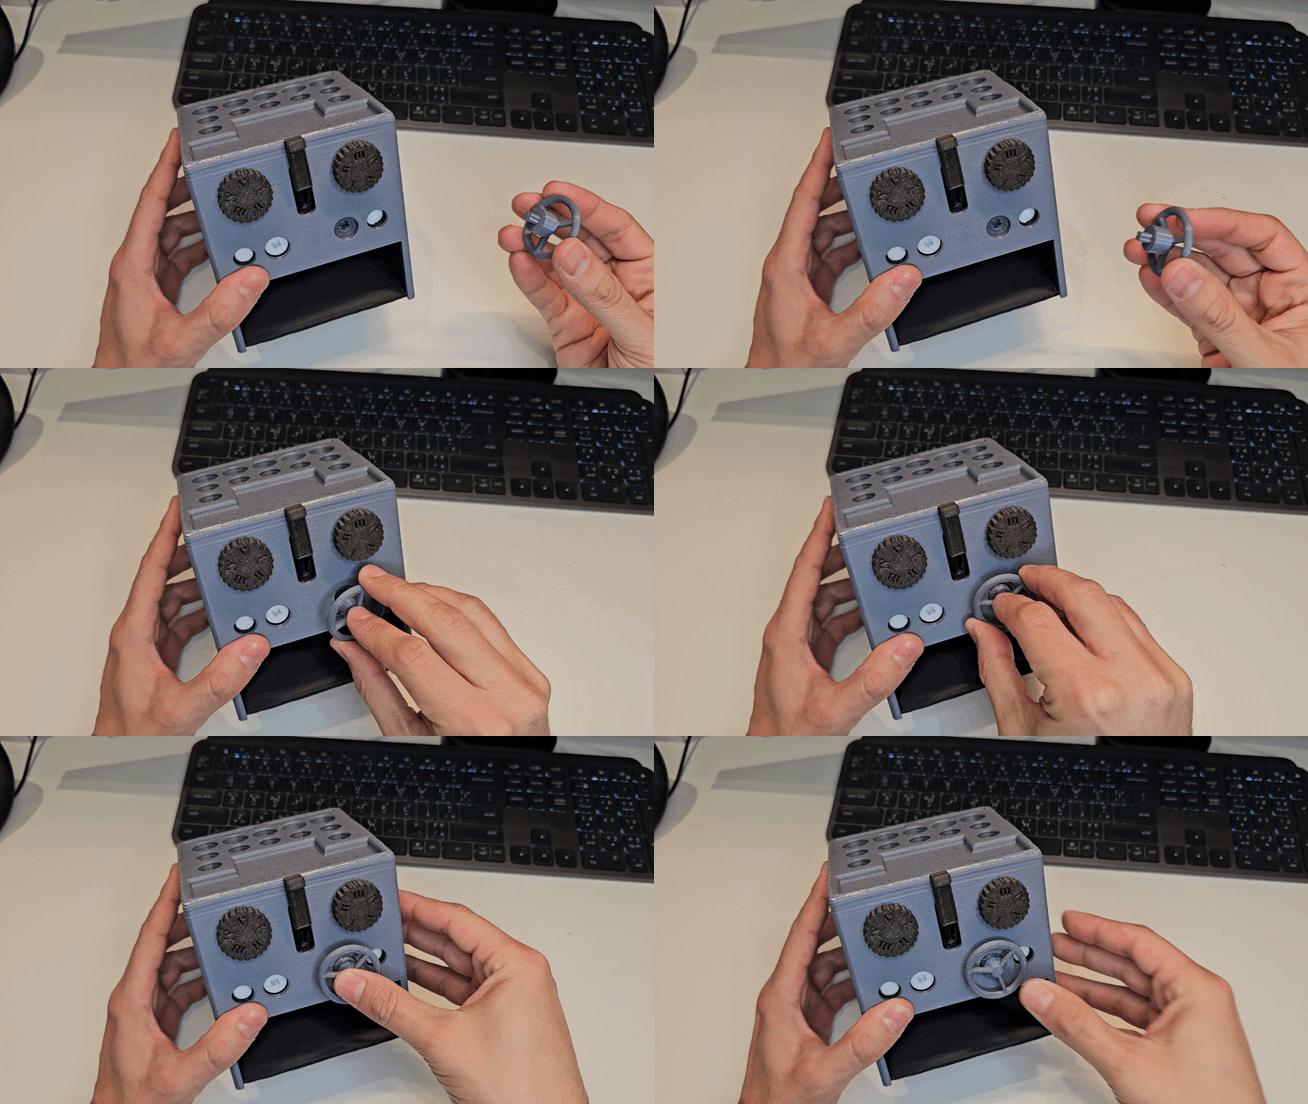
-
Insert the drawer.
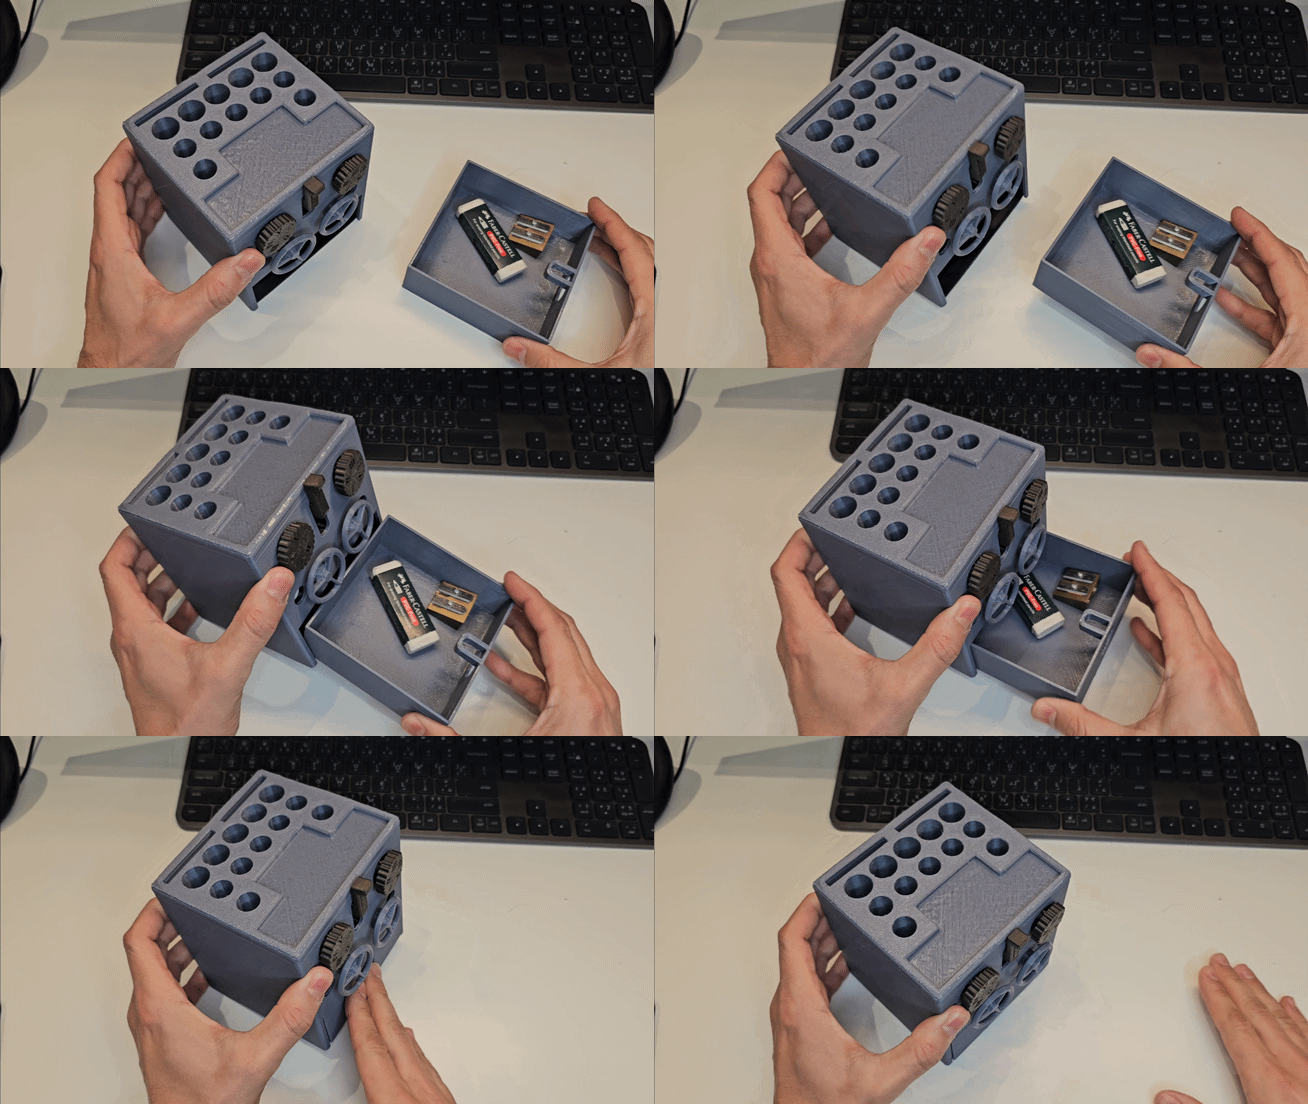
Note: If the lever is a bit loose, then its connector pin isn’t fully inserted into the locking plate. A loose lever will affect the rotation of the knobs. The lever has to be all the way up or down for the knobs to rotate freely.
Design by yahya on MakerWorld (license: BY-SA).