

Seven bay NAS shelf for 10 inch mini rack, 3U


Seven bay NAS shelf for 10 inch mini rack, 3U
- Made to order — 3D printed after you buy
- Free shipping on orders over $25
- Quality checked before it ships
- Questions? Contact us · Returns
This drive rack holds seven standard SATA drives in a way that they are hot-swapable. It takes up 3U on a 10" mini rack (I used the GeeekPi one). The main body takes a while to print and is a bit heavy, but it's very sturdy once installed. It's designed to use CoolerMaster toolless drive rails or 3D printed rails that are compatible. To make this work as a hotswappable system, you'll need to get 7 SATA adapters (around $40 total). I'd recommend printing in ABS or ASA, but I don't see why PLA or PETG wouldn't work fine.
All parts should print on a bed of at least 254x254.
NOTE: The drive sled itself is licensed under CC-Attribution-Noncommercial 4.0. The entire rest of this project is original work and licensed under CC-Attribution-ShareAlike.
Changelog
- V1.1 — 2025-02-09 — Added fan housing that mounts on the back
- V1.0 — 2025-02-06 — Initial release
BOM
Fasteners
- 14 of M3x10 (2 per drive)
- 8 of M3x10 (2 per fan)
- 10 of M3x16 (2 per drive)
- 4 of M3x25 (for the fan housing)
- 28 of M3 heat set inserts (4 per drive, Voron style, M3x5x4)
- 8 of M3 heat set inserts (2 per fan, Voron style, M3x5x4)
- 6 of 2mm zip ties [Opt 1, Opt 2, Opt 3]
- Drive mounting screws (optional if using actual CoolerMaster sleds)
- Minirack mounting hardware (depends on the rack system you're using)
Drive Sleds (choose one)
- Drive Rails by Labman
- Drive Rails Sled, remixed from Labman's design (link above)
- CoolerMaster rails (opt1, opt2-unverified, opt3-unverified, opt4-unverified)
SATA Adapter (Optional)
- Opt 1, verified
- Opt 2, verified
- Opt 3 (SATA Male to Female), unverified - has SAS option also unverified
- Opt 4, unverified
- Opt 5, unverified - has SAS option, also unverified
Fans
4 of 40mm x 40mm x 20mm PC fans
- Noctua NF-A4x20 (FLX, PWM) - verified
- GDSTime GDA4020 (any of the 12v options) - verified
Prep
If using the brim that's turned on by default in the project files, make sure to trim them off of the main housing and off of the drive sled.
Assembly
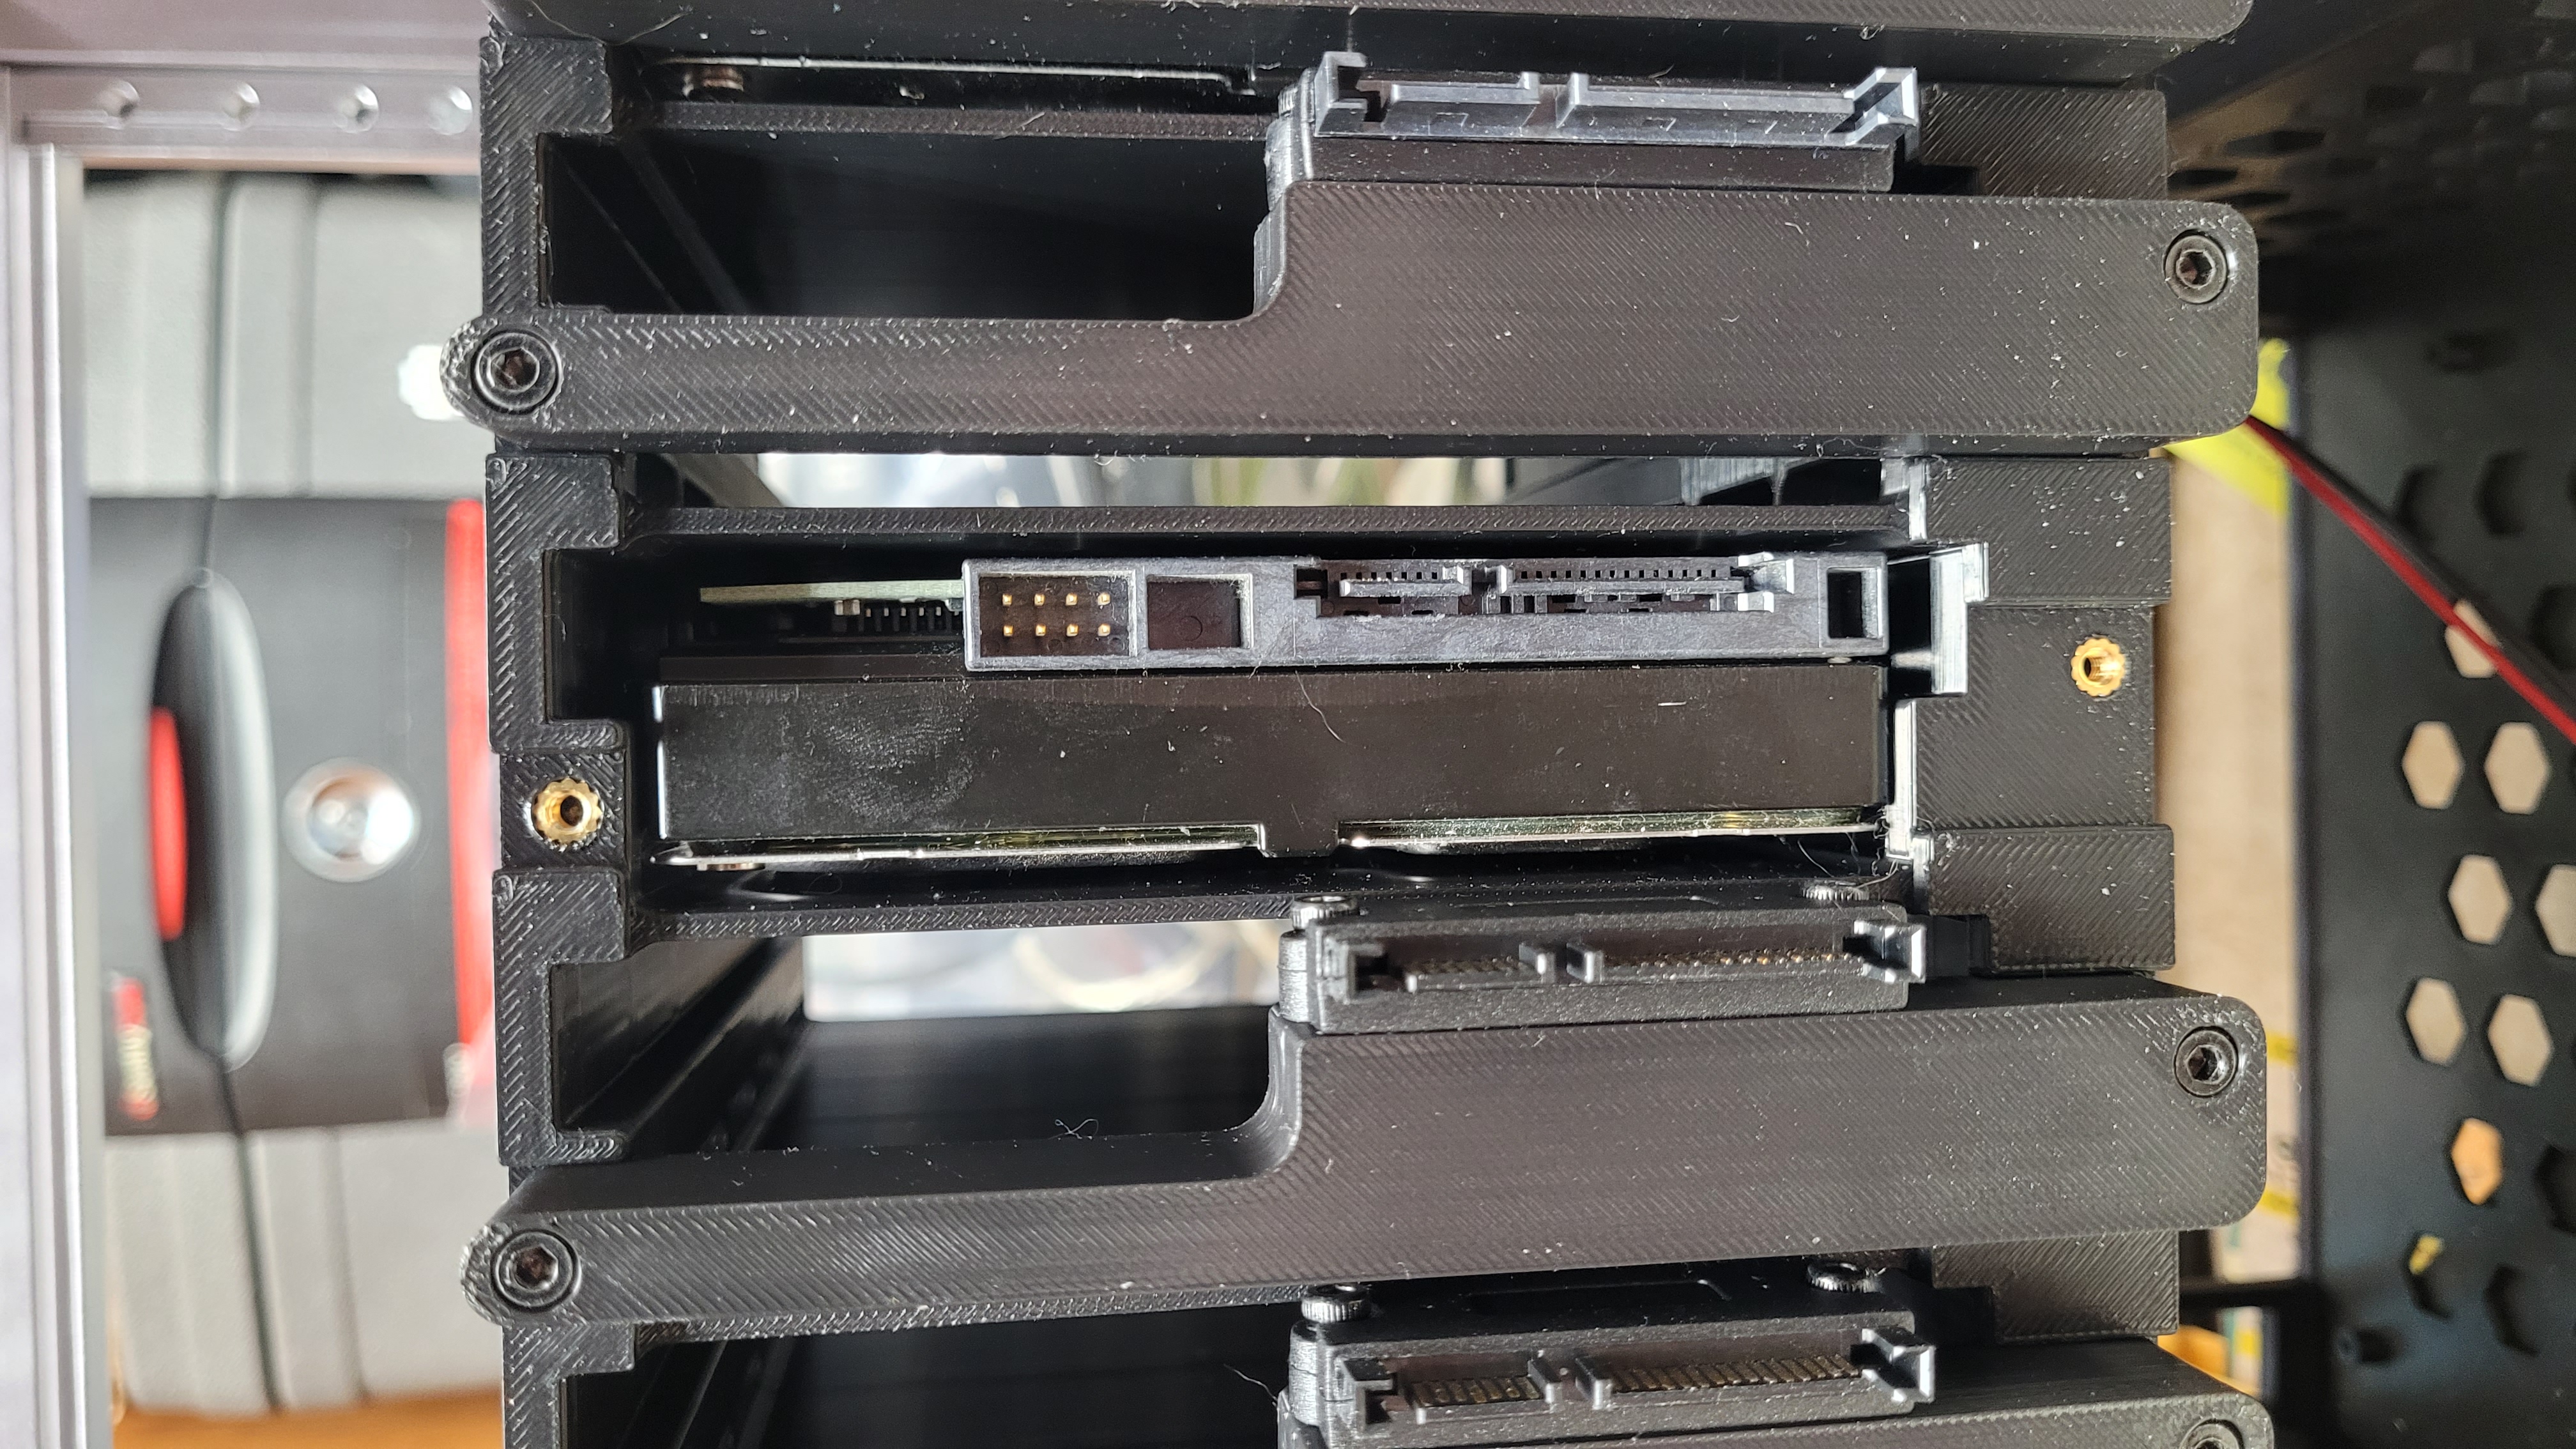
1. Install heat set inserts into the back of the rack.
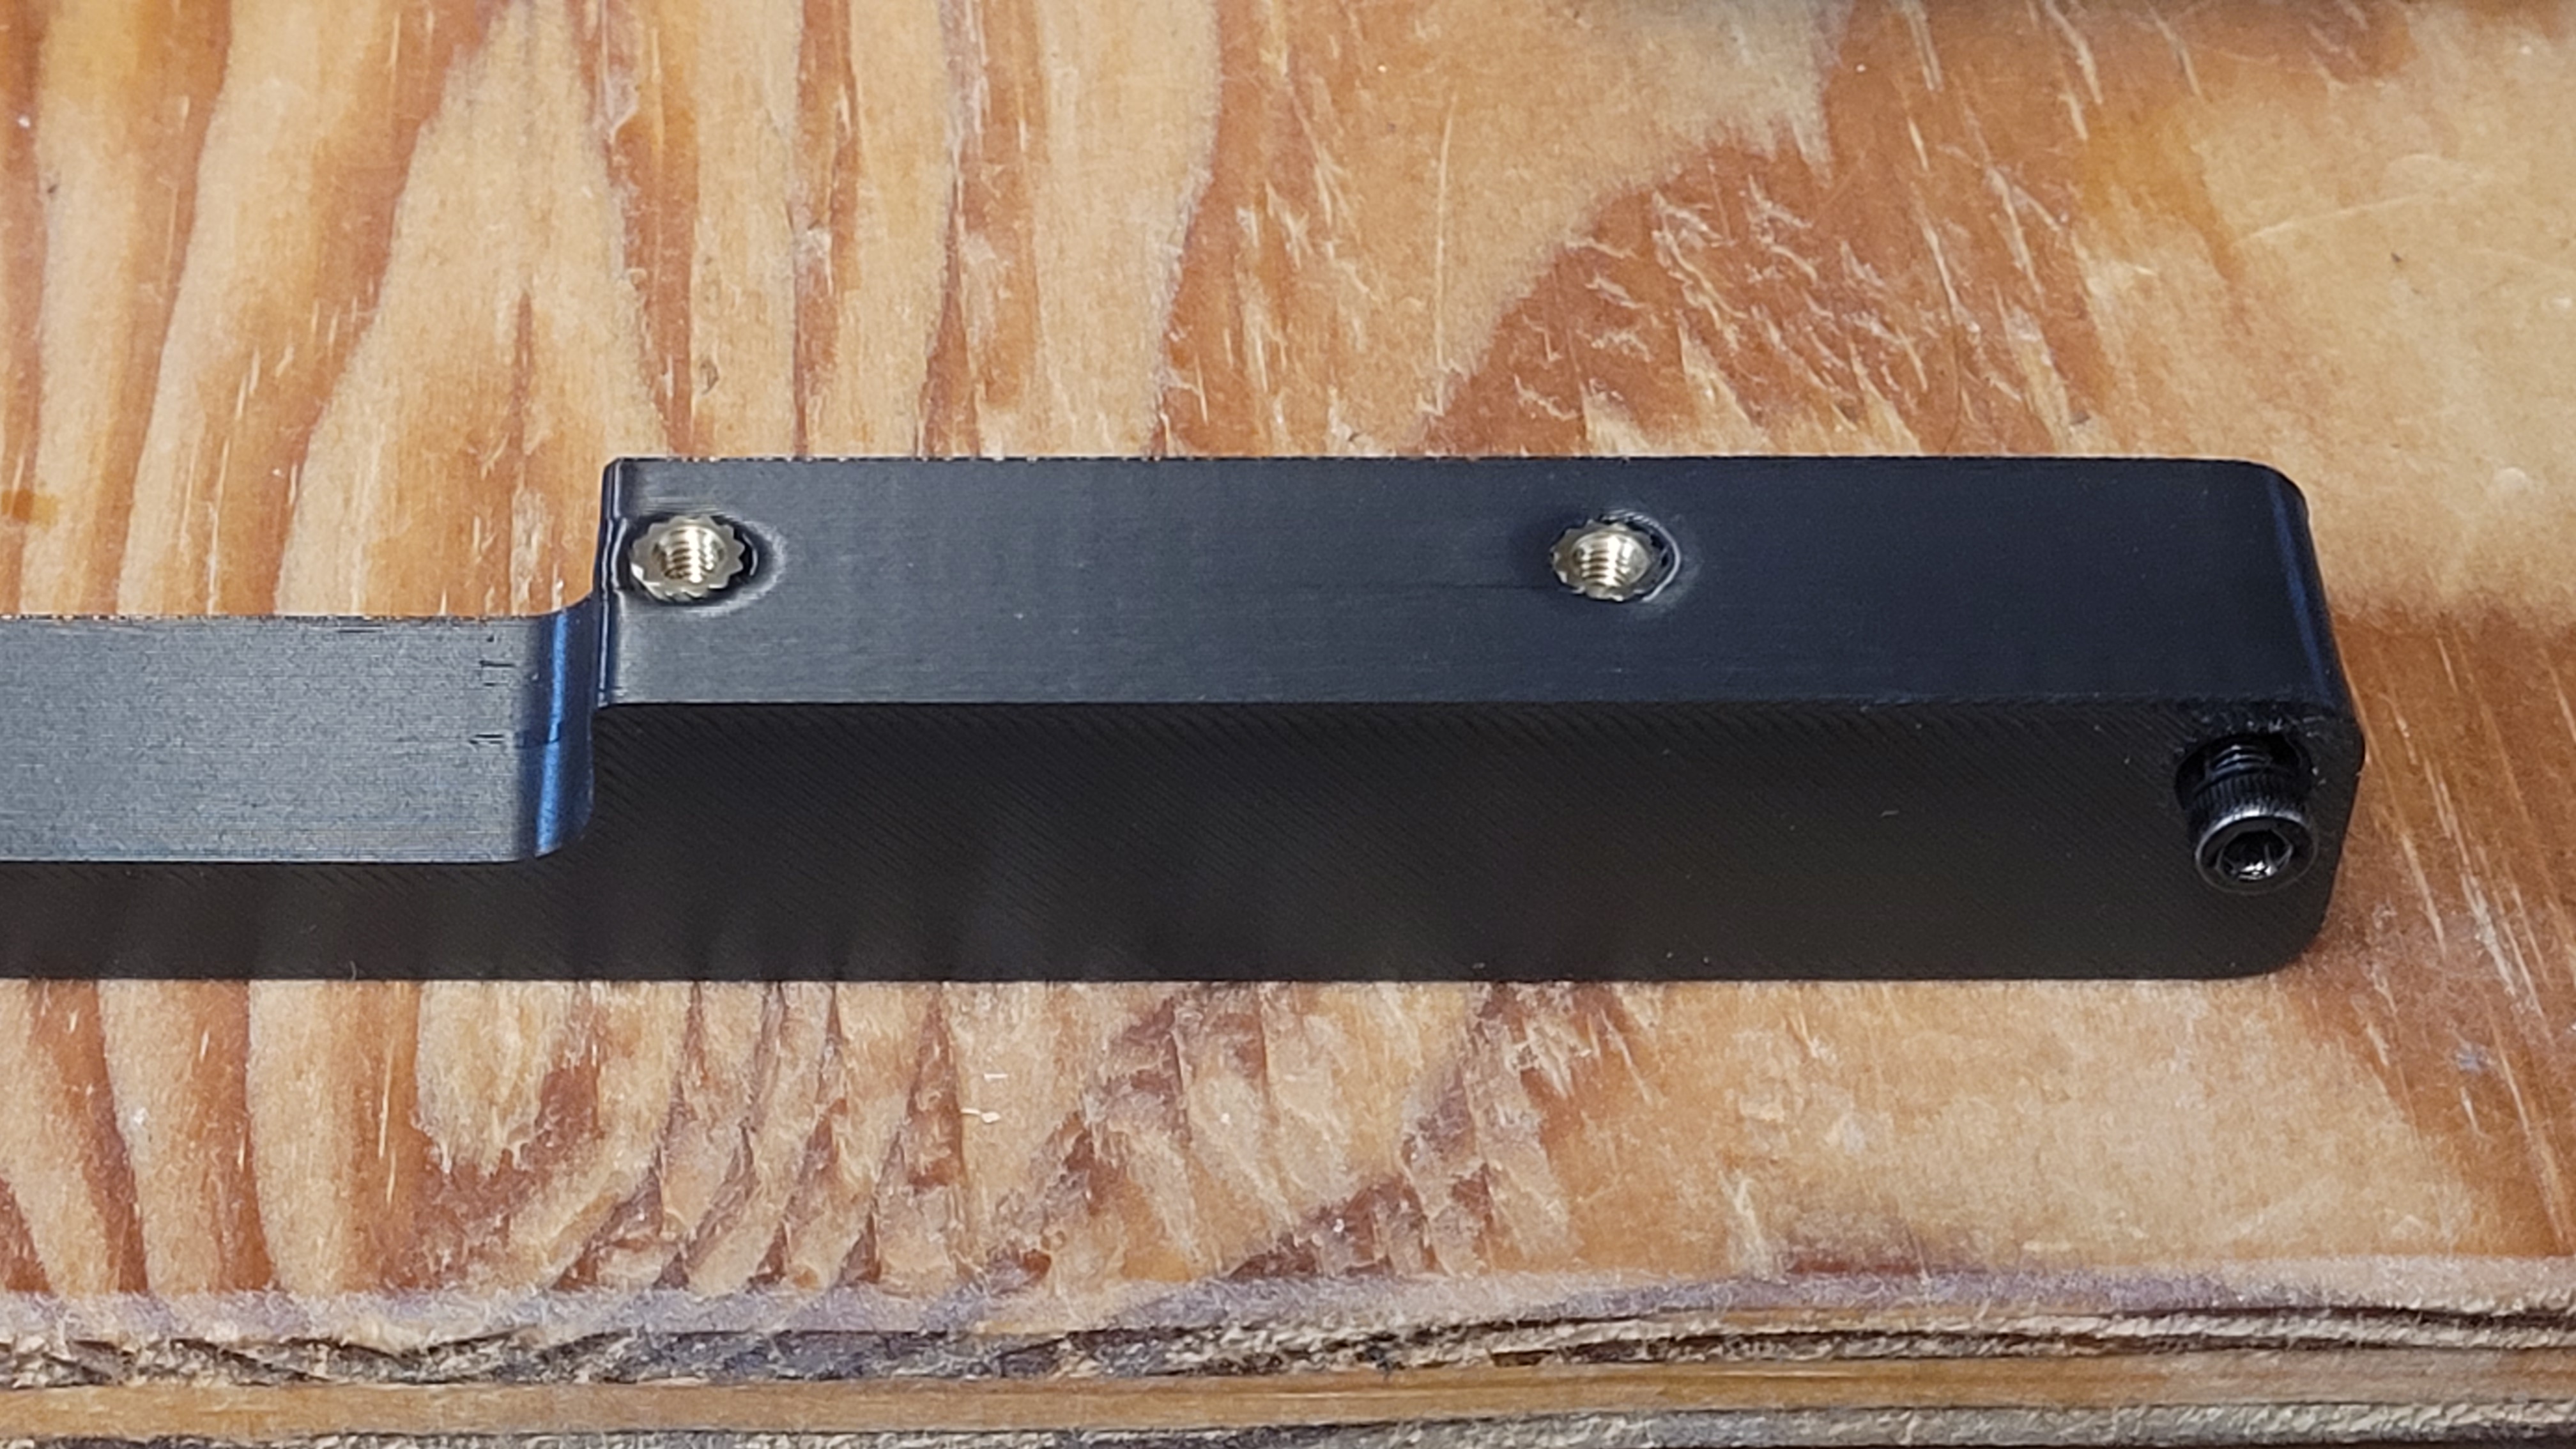
2. Install heat set inserts into the SATA mounting bracket.
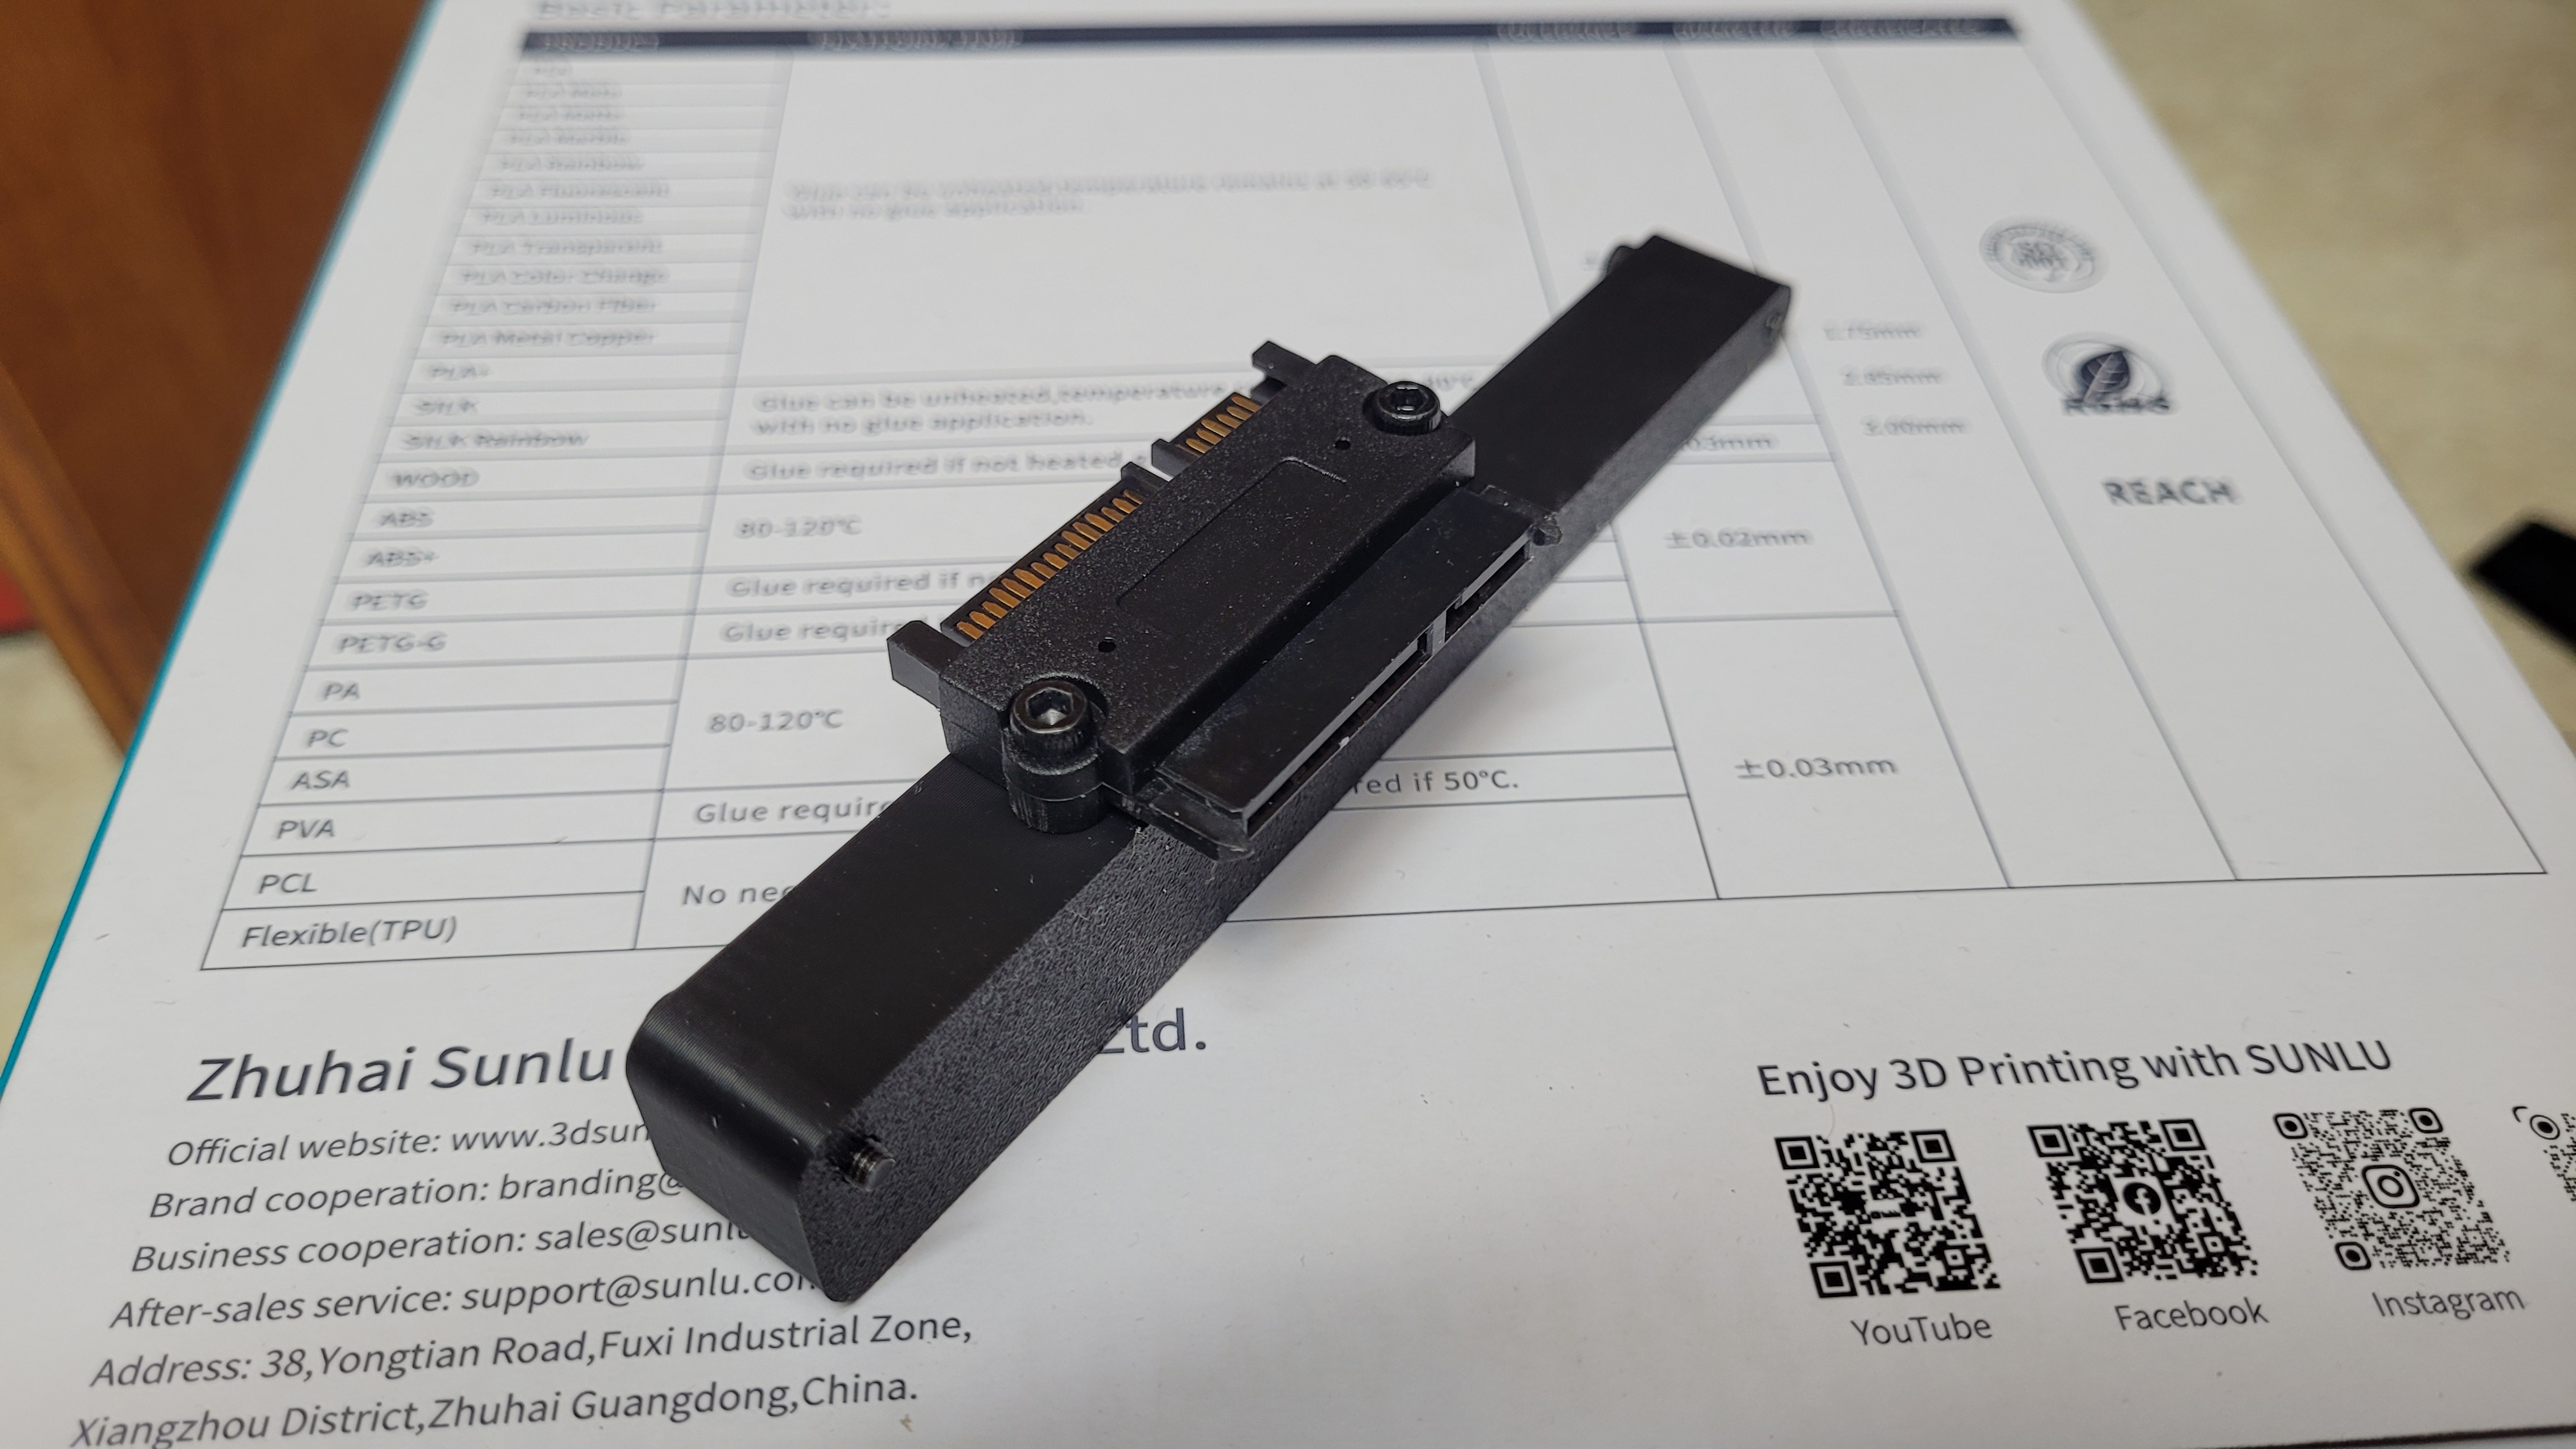
3. Use 2 of the M3x10 bolts to attach the SATA adapter to the SATA bracket.
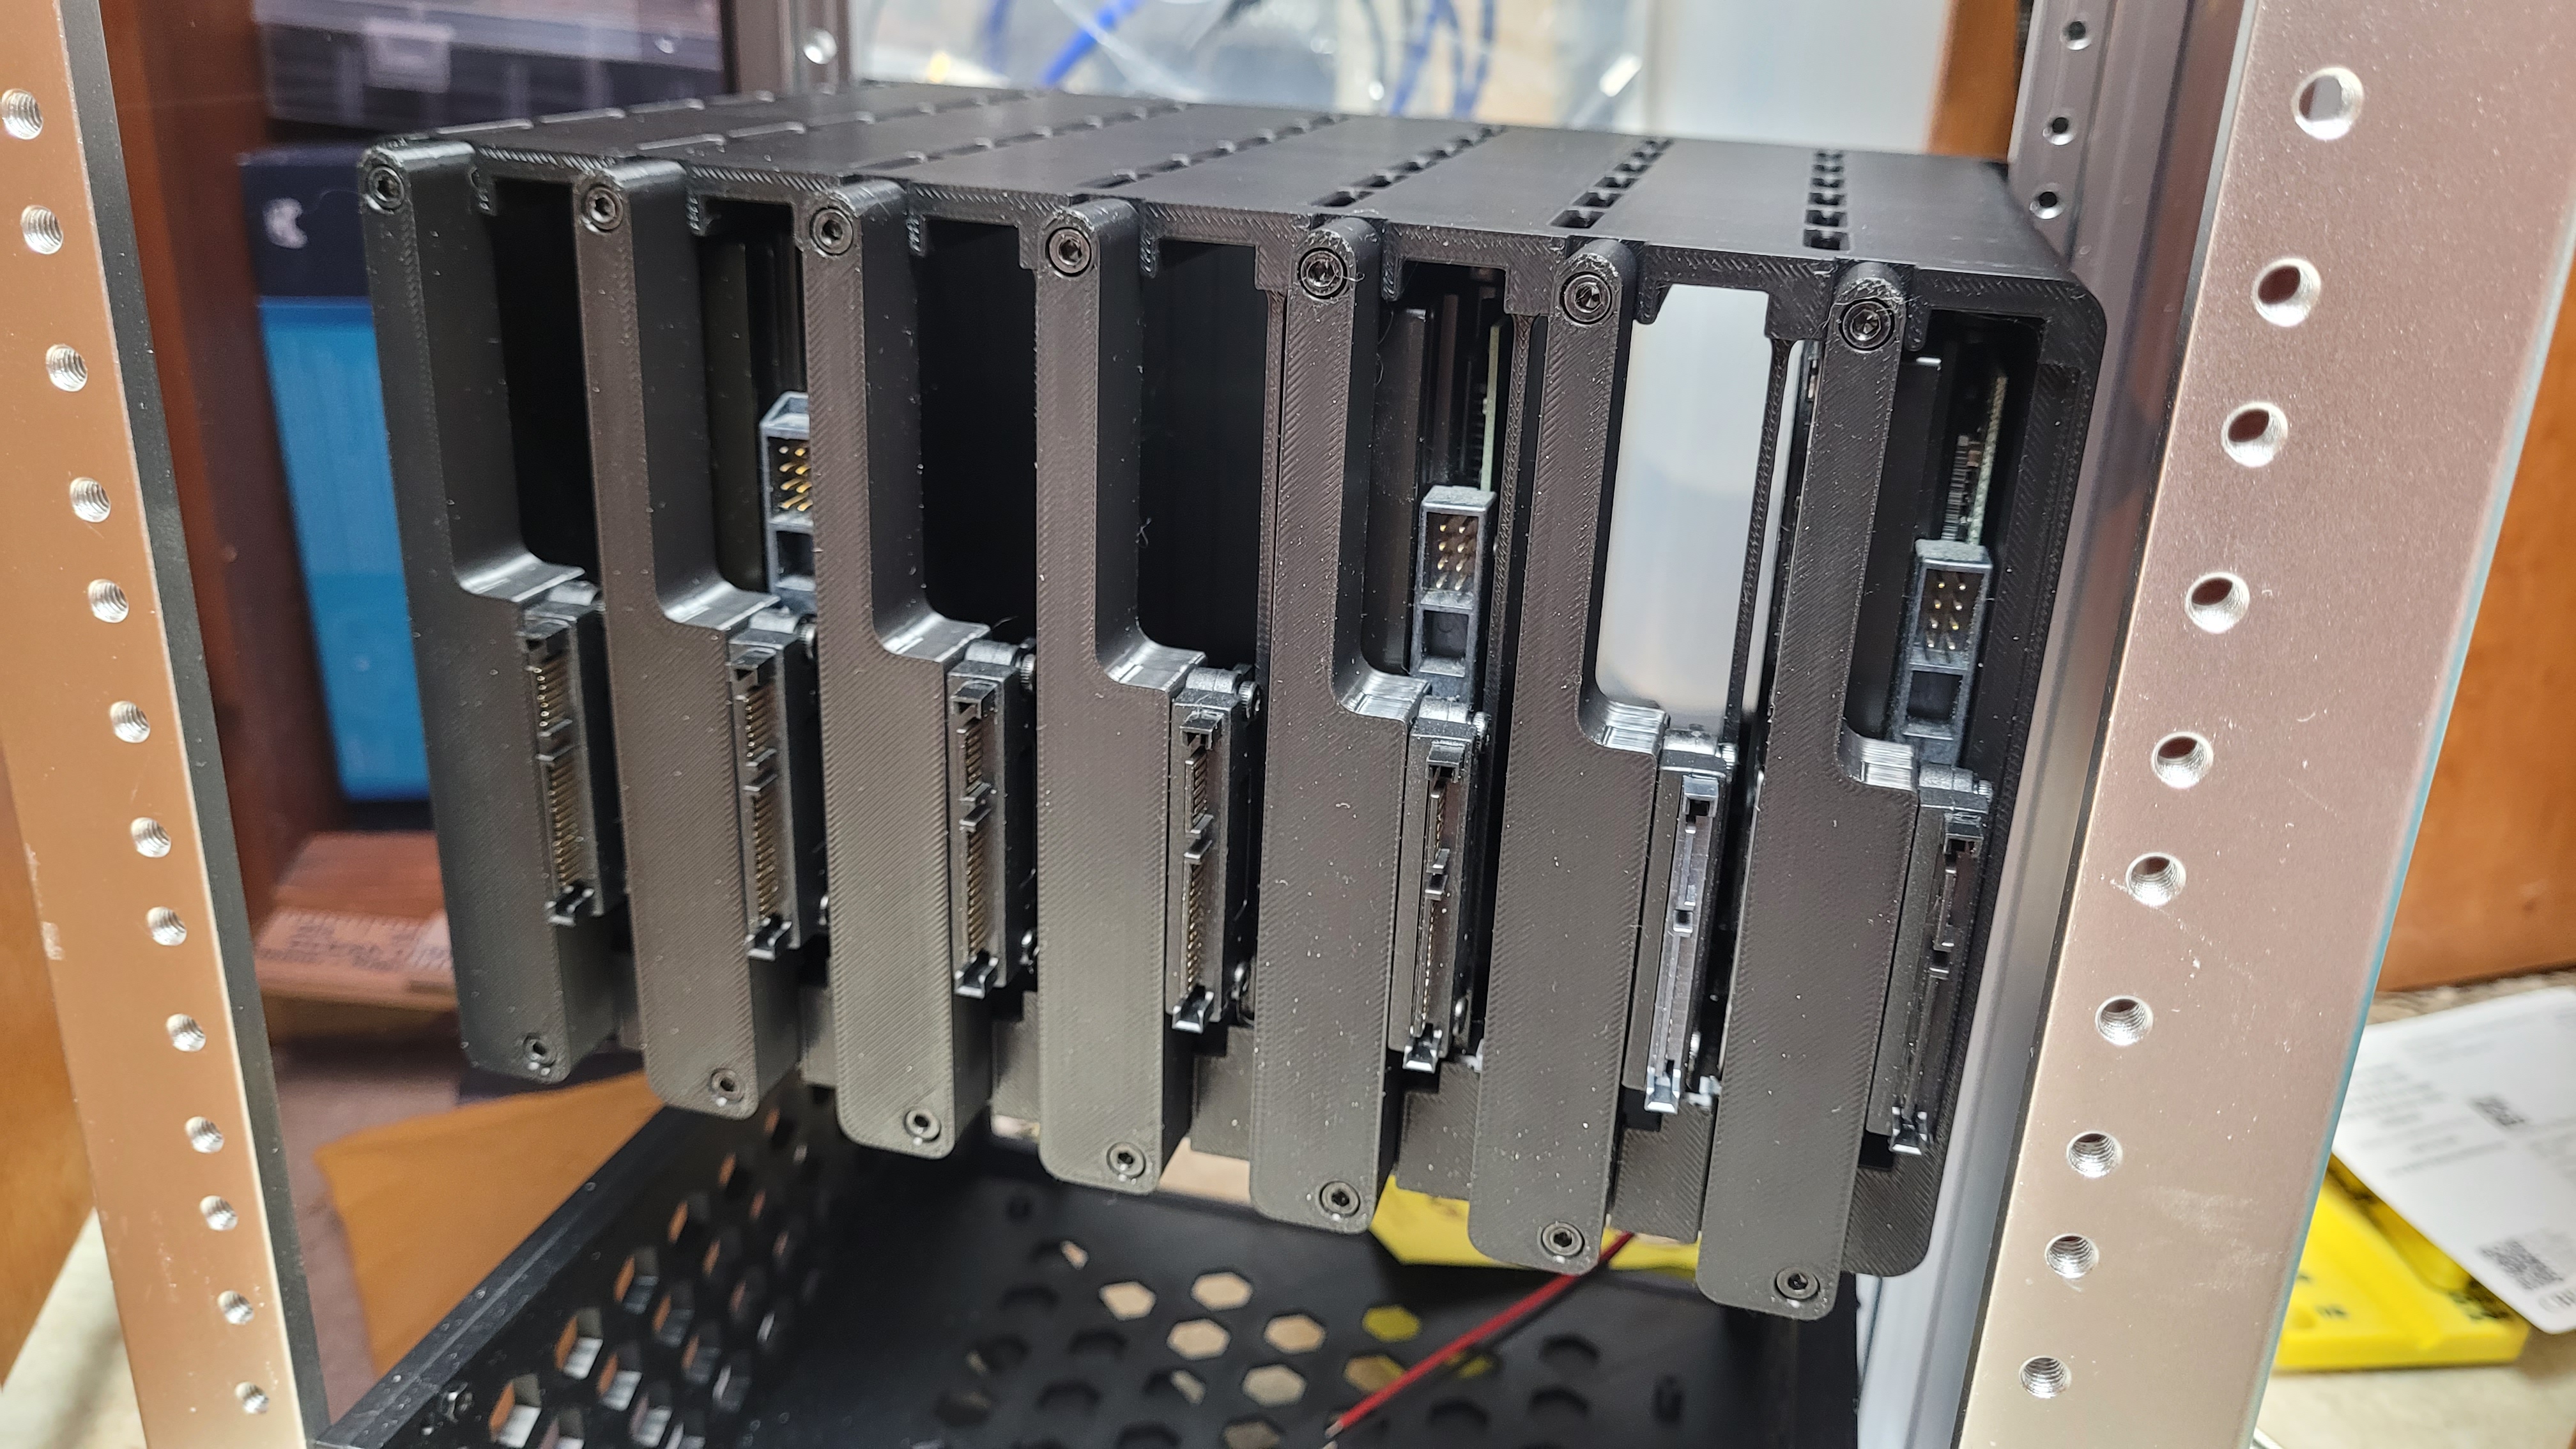
4. Use 2 of the M3x16 bolts to attach the SATA bracket to the back of the housing. Don't install bolts in the outer most holes on the top, and one in from left and one in from the right on the bottom (lines up with holes in fan housing).
5. Install 2 heat set inserts into the screw holes of your fans on the side that is fully open. Install them on opposite corners.
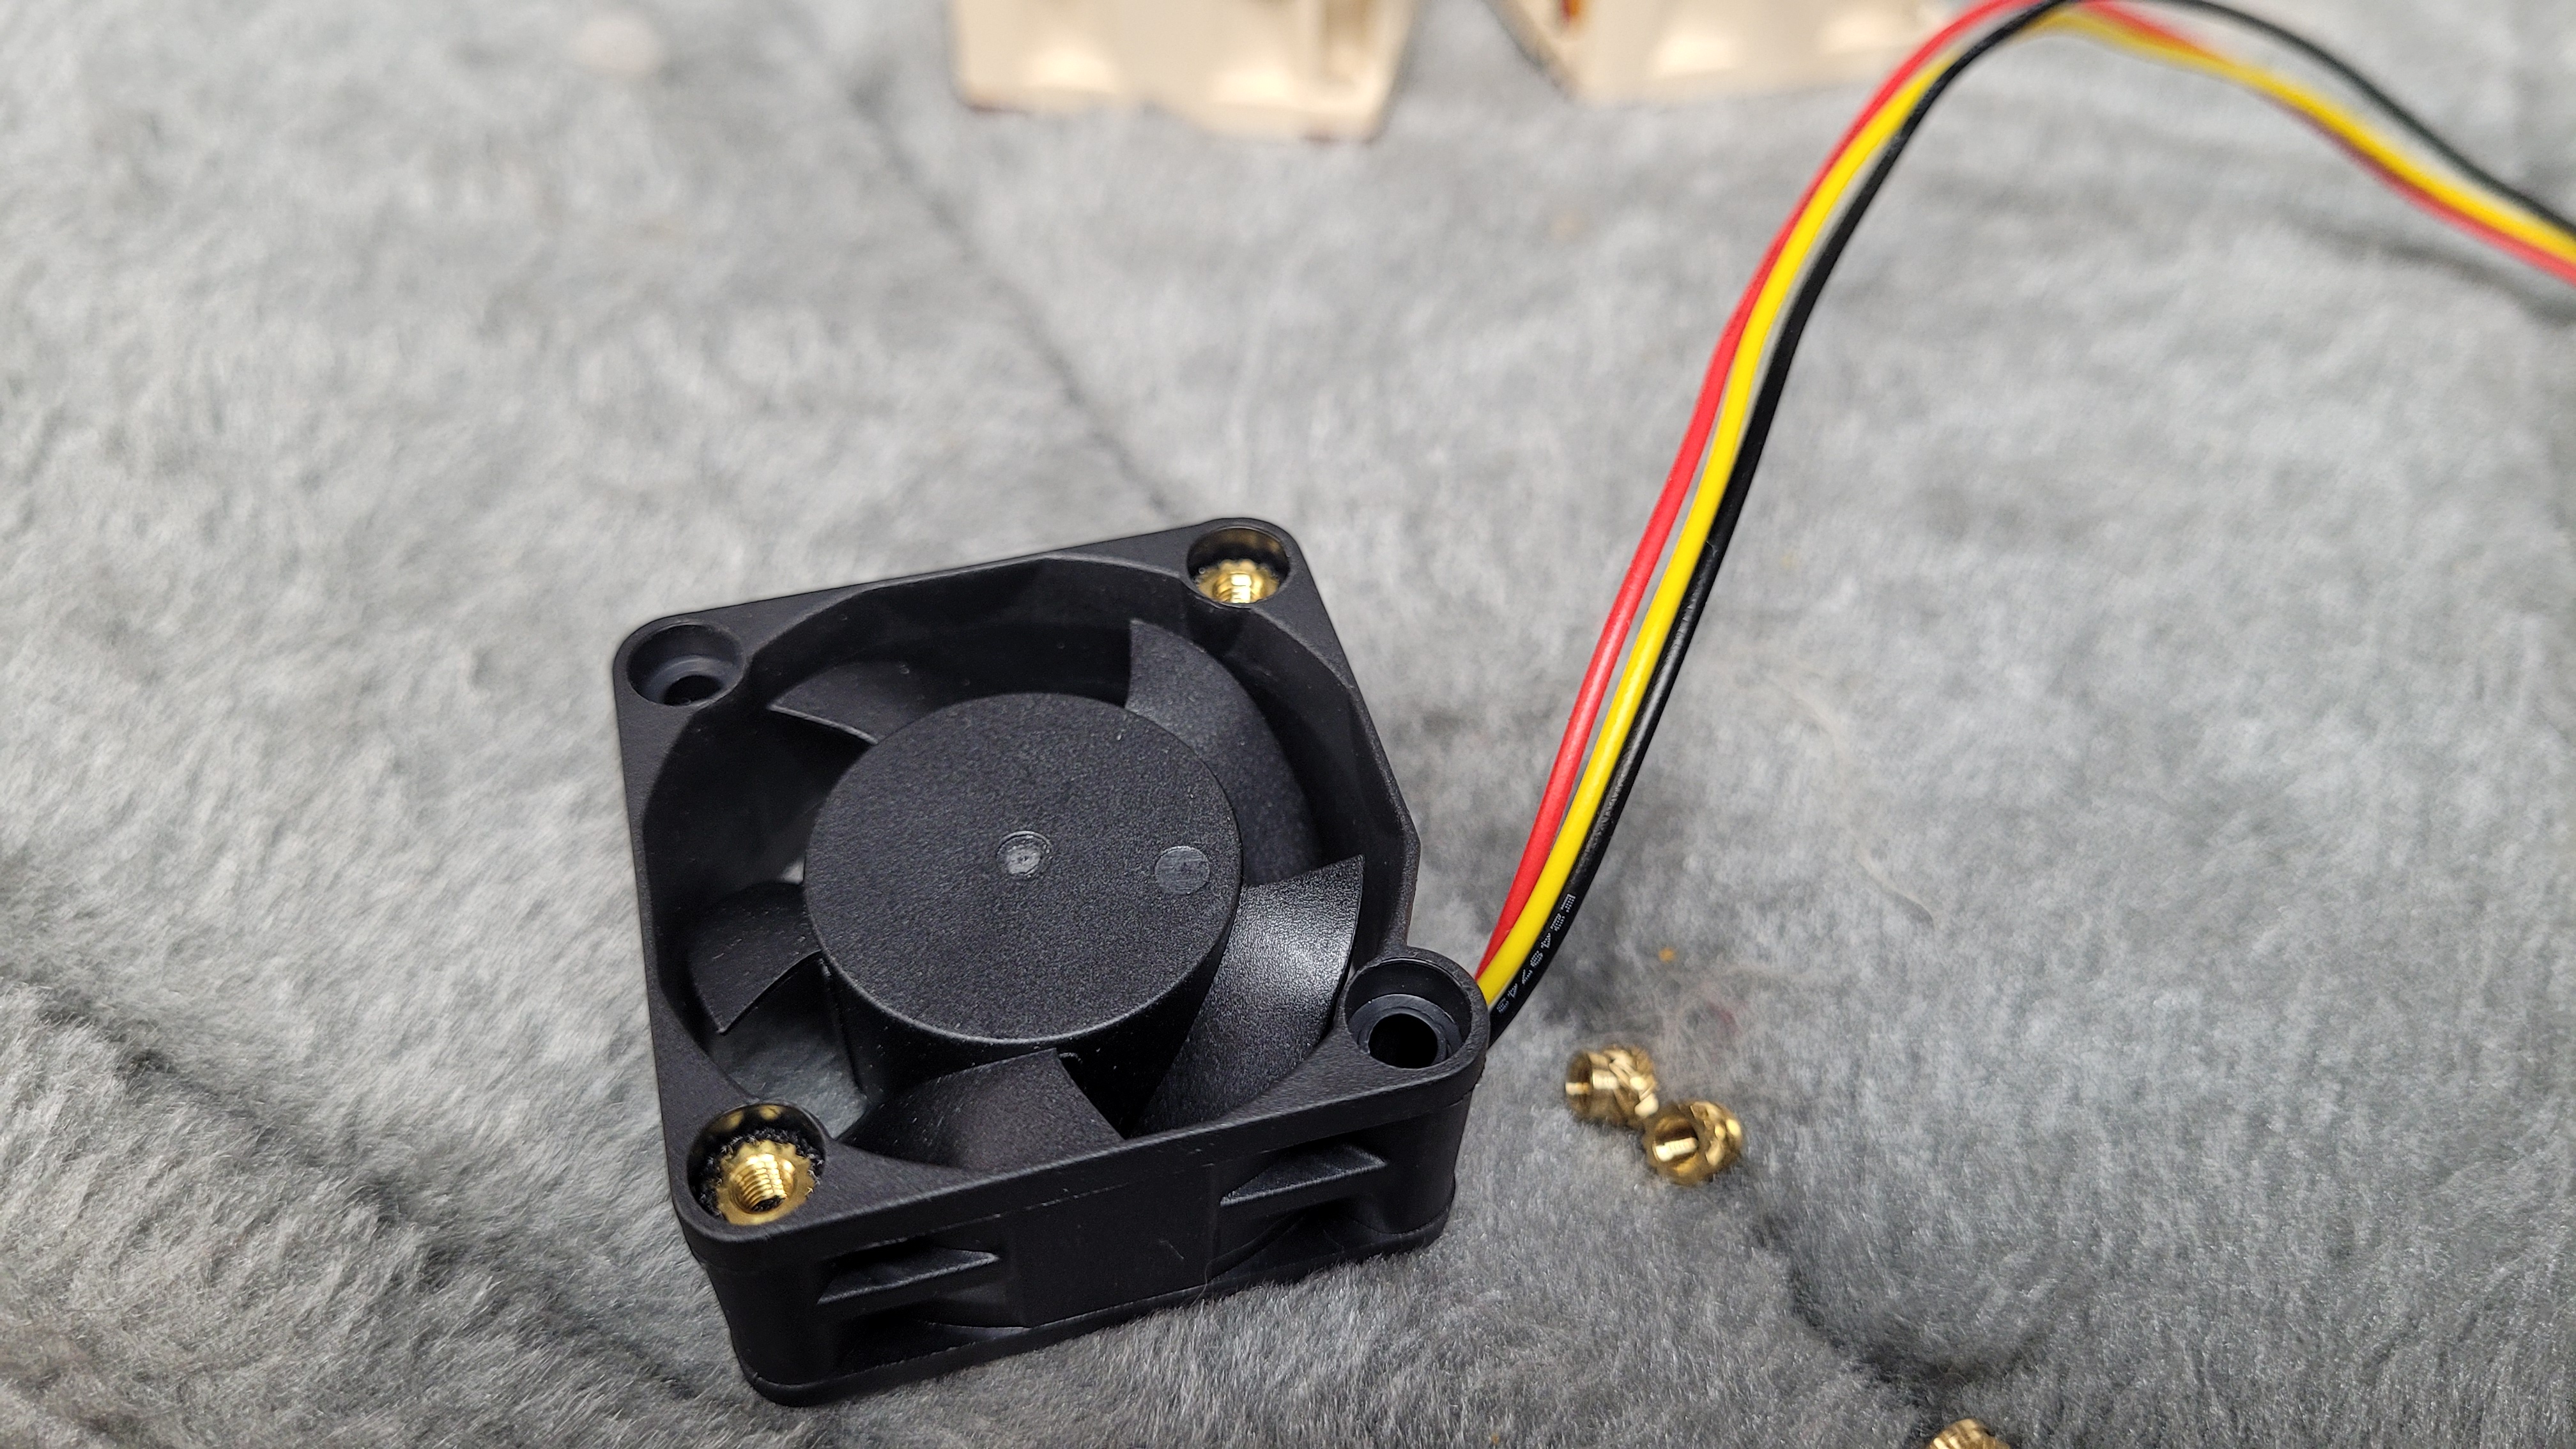
6. Slide the fans into the fan mounting, passing the wires through the holes first and lining the wires up with the flat sides of the fan holes
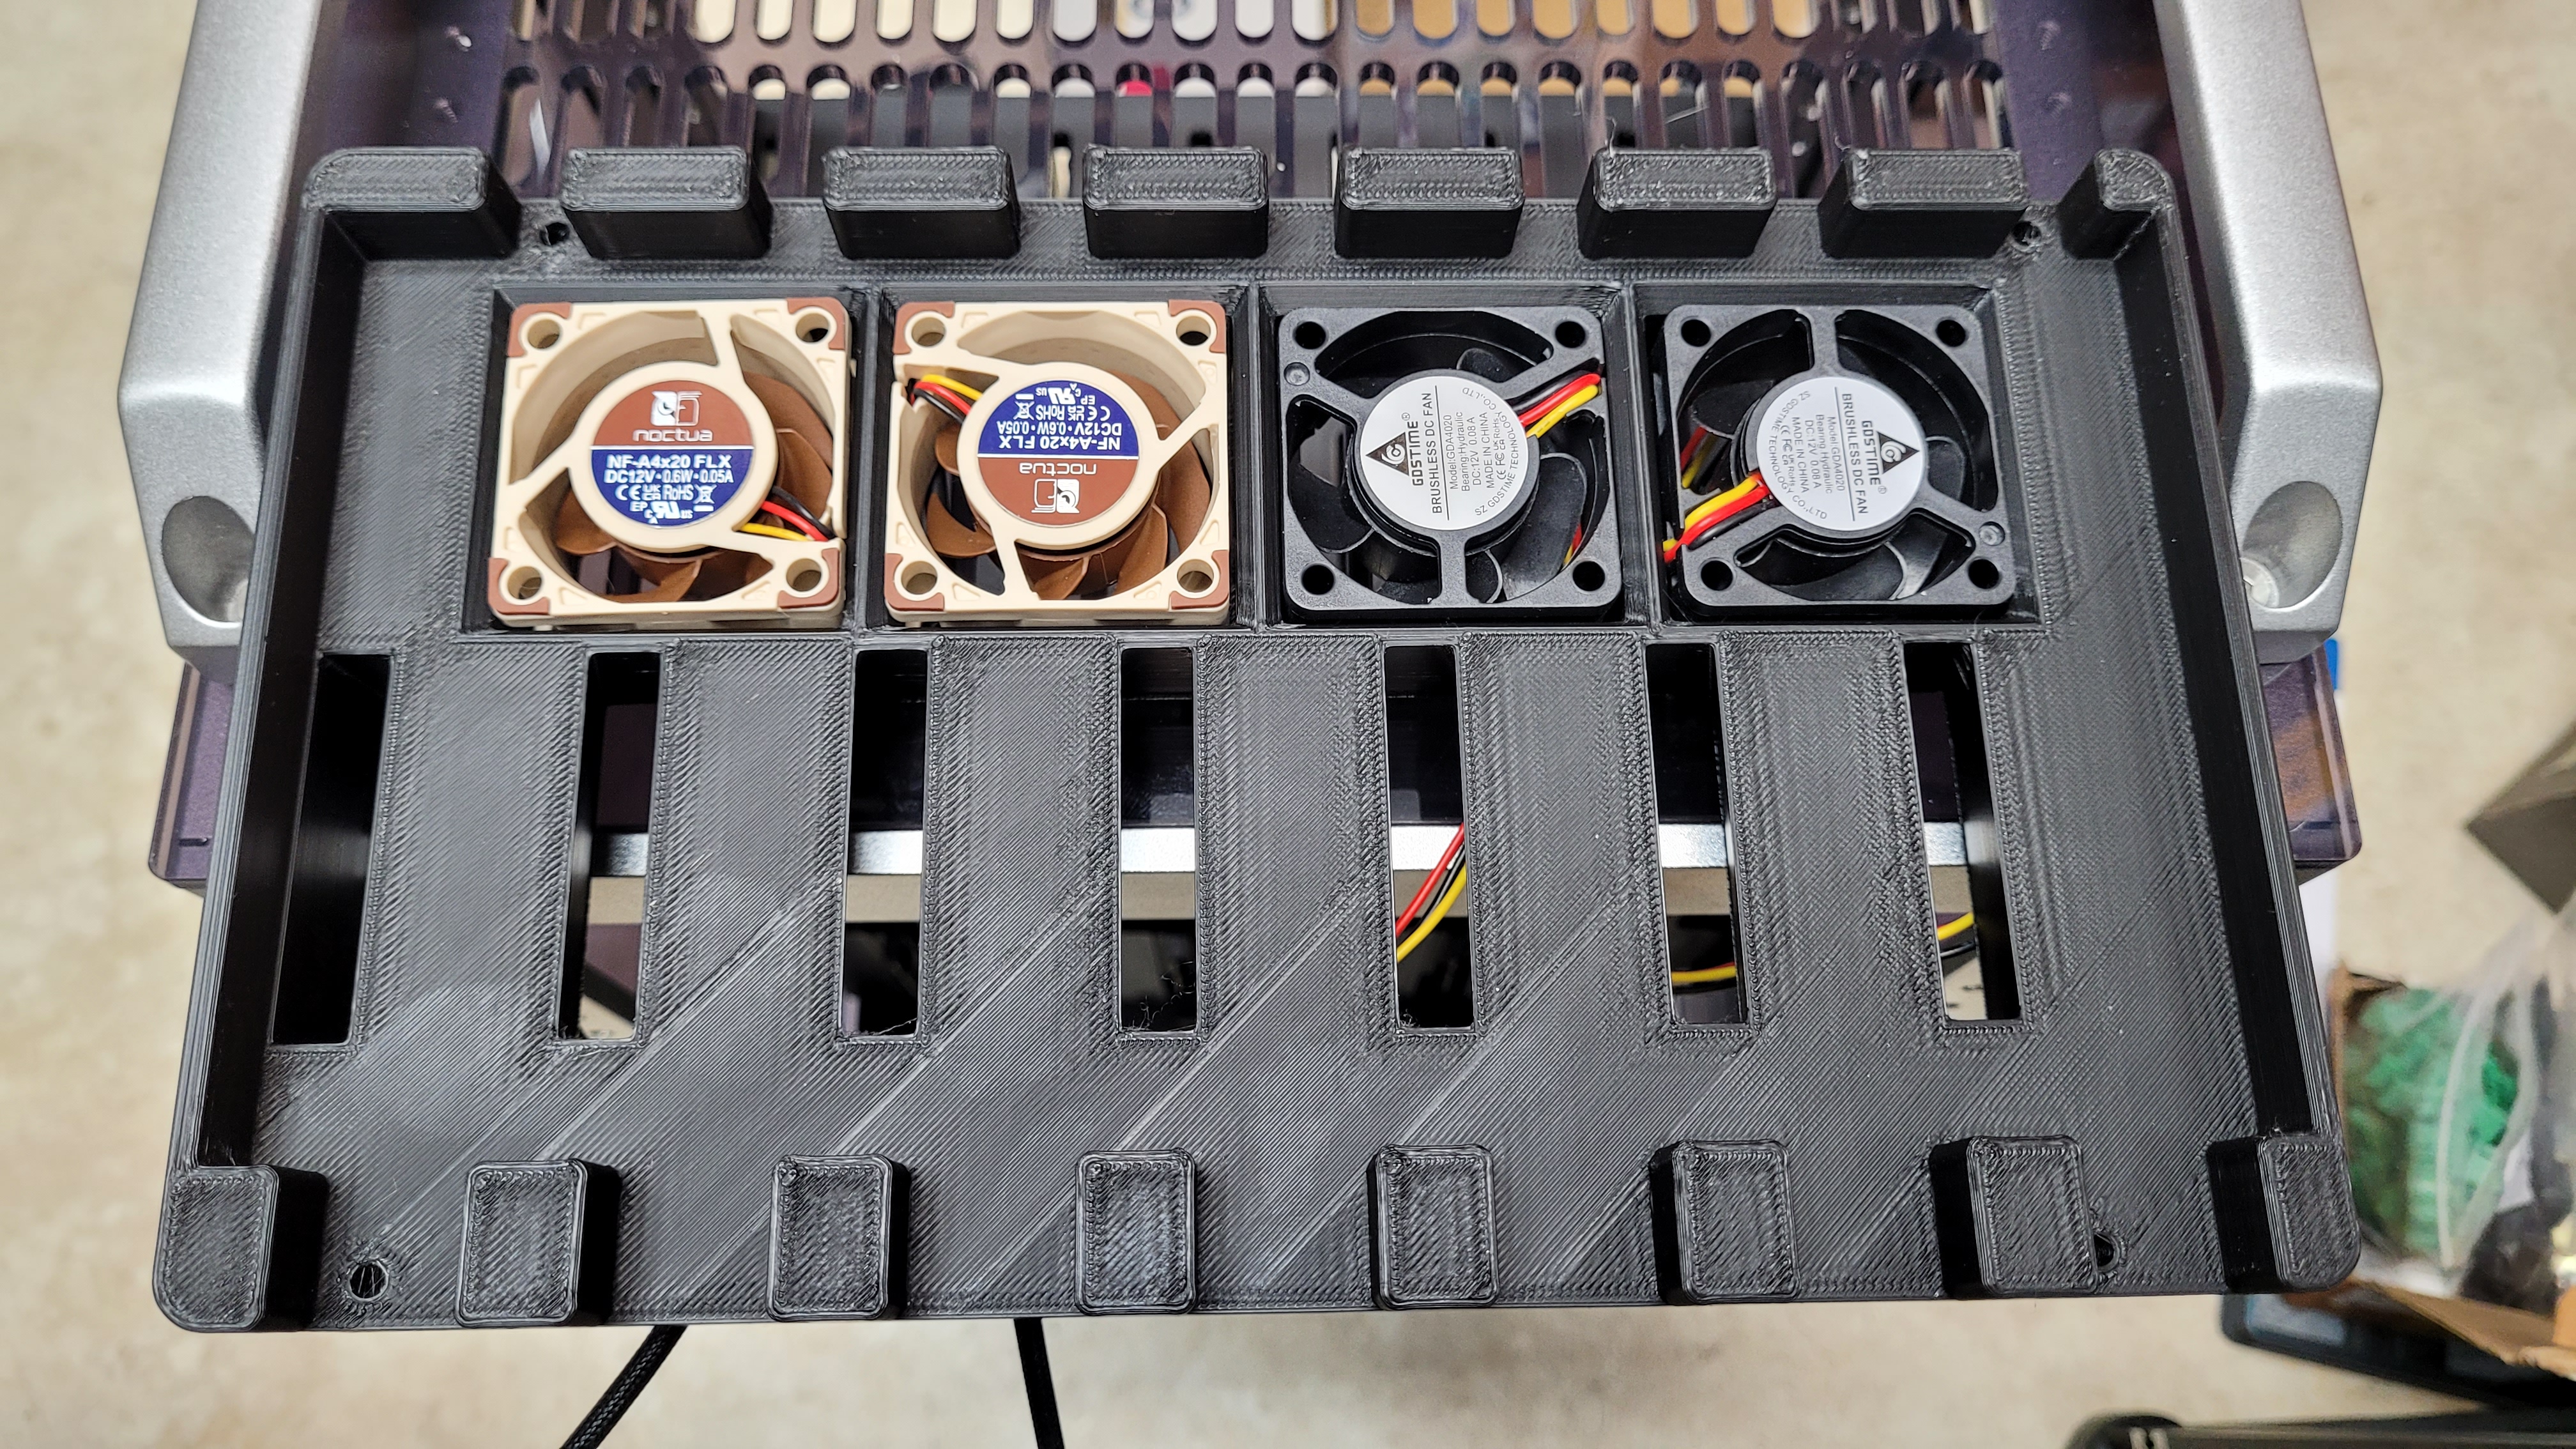
7. Install two bolts through the fan housing and into each of the fans, lined up with the heat set inserts.
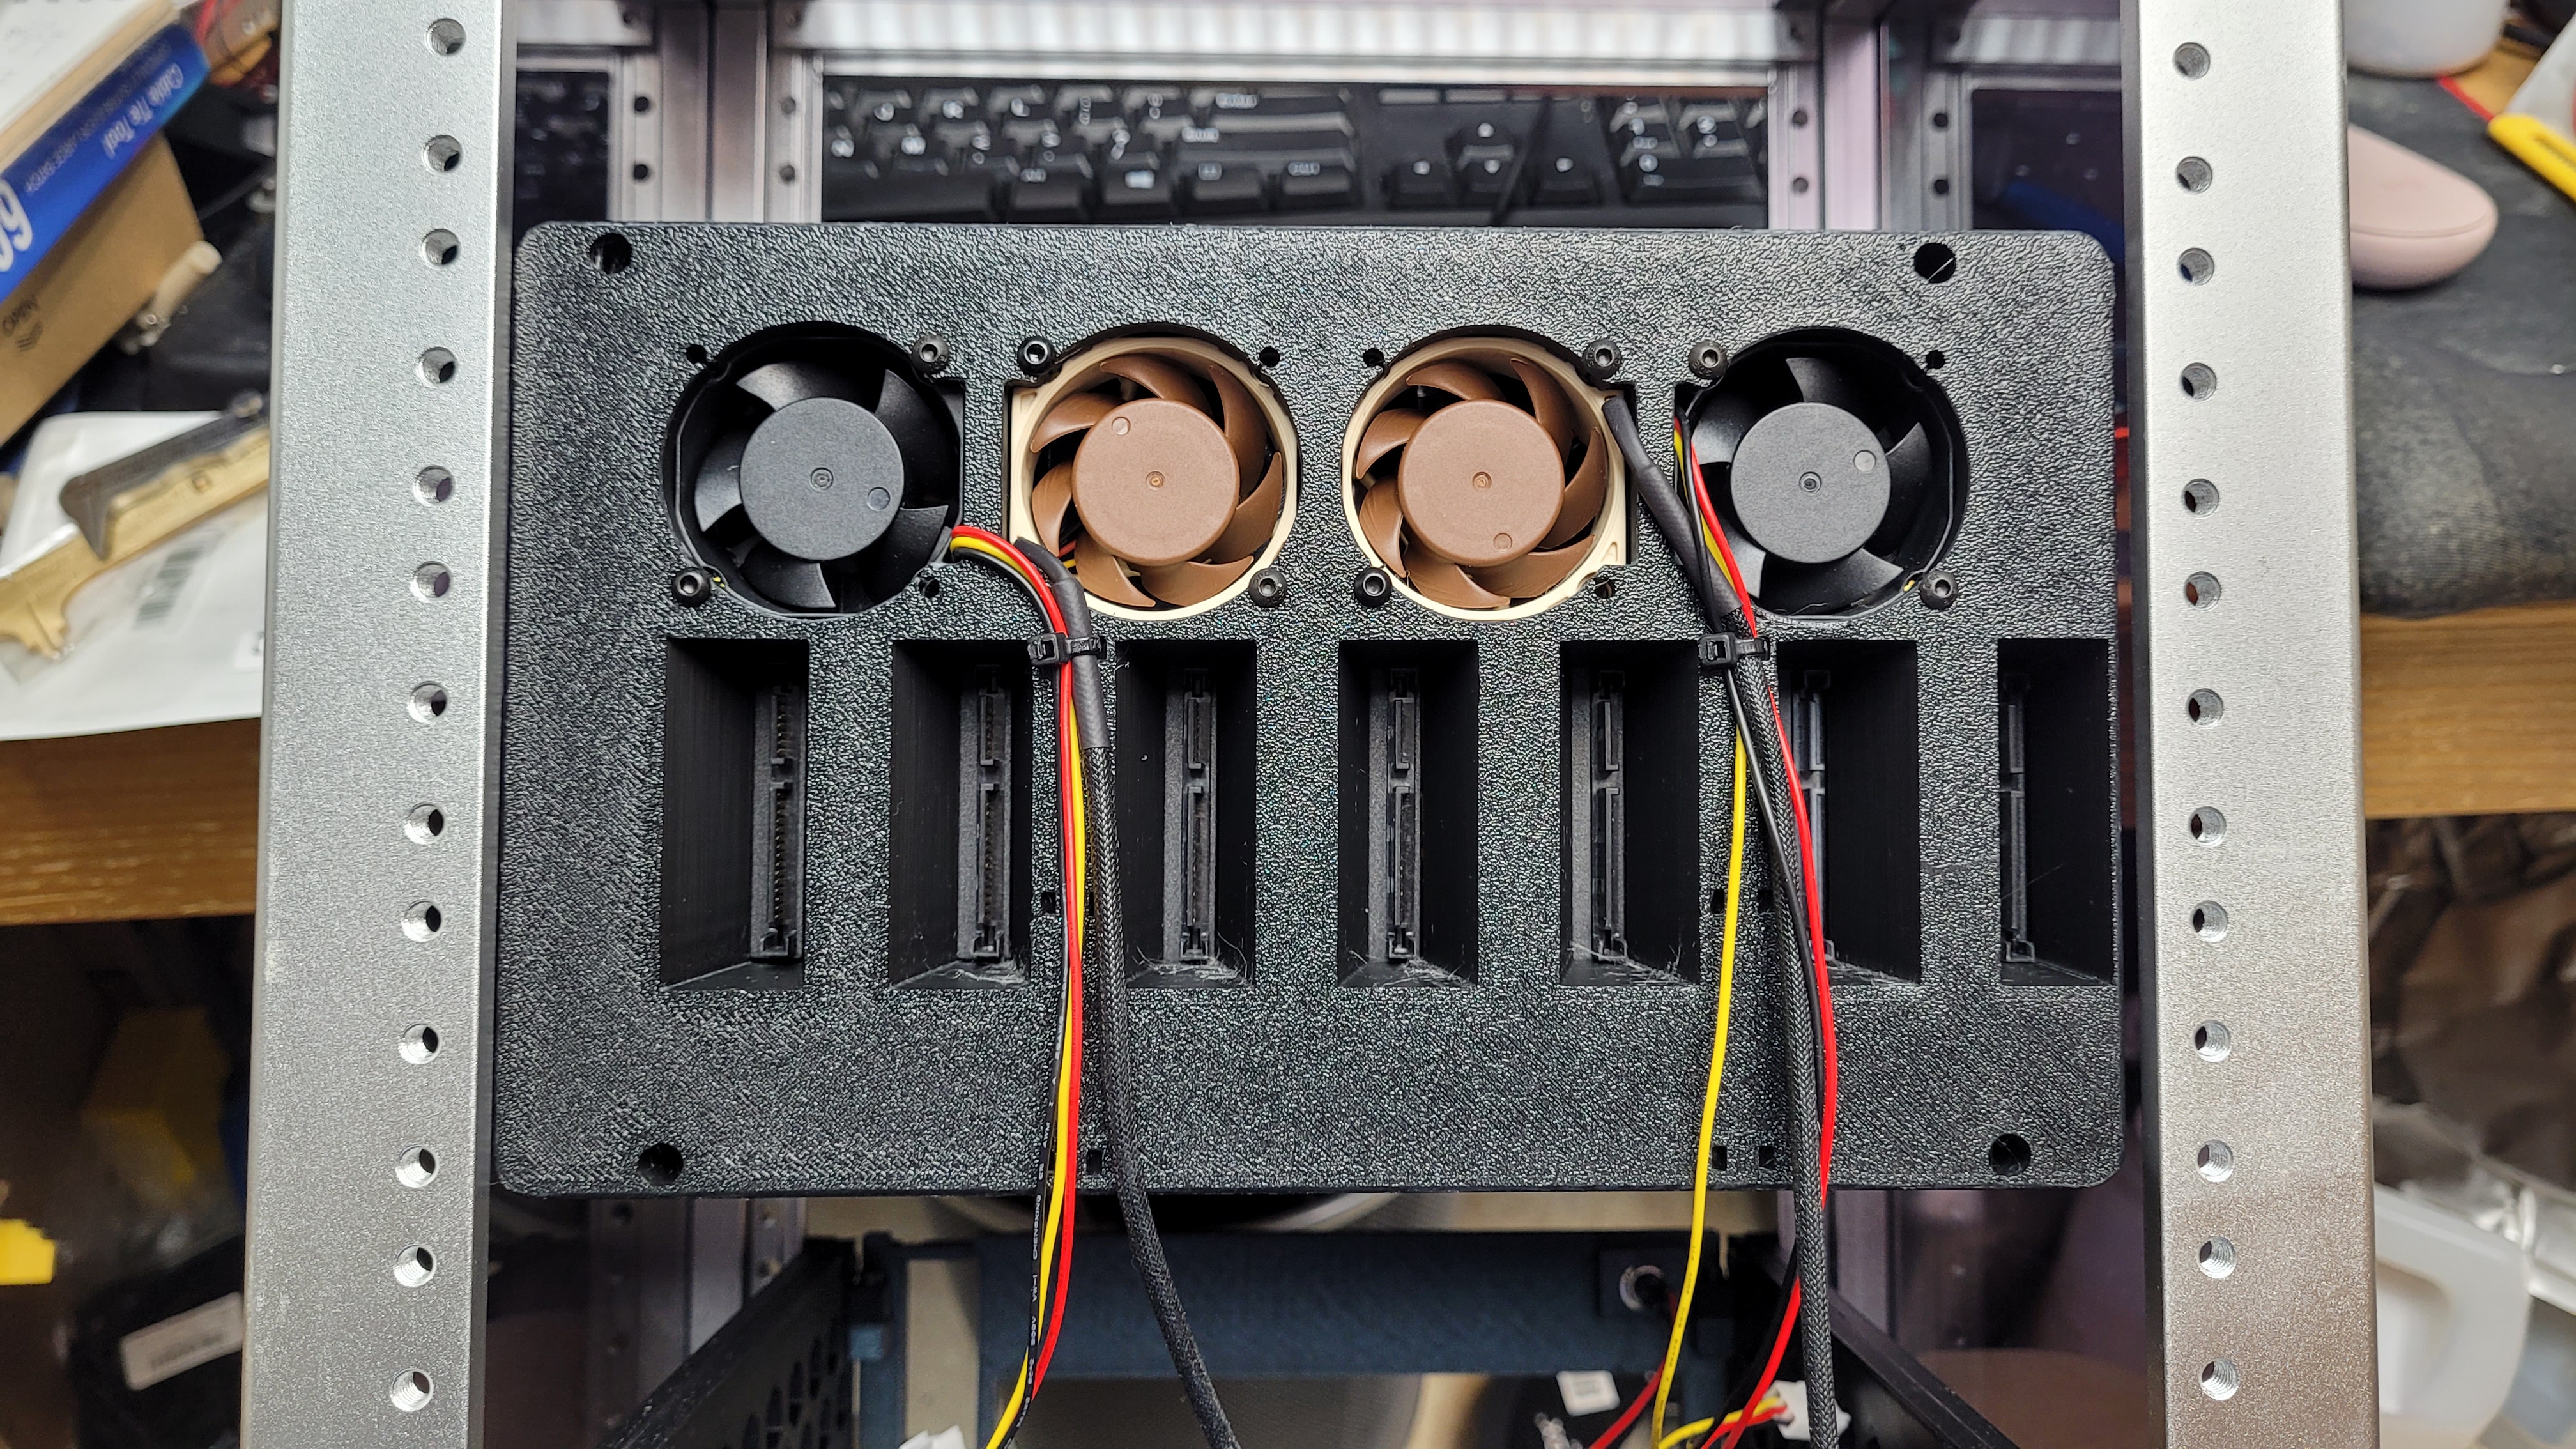
8. Slide the fan housing over the sata brackets and bolt into place with the four M3x25 bolts.
9. Zip tie the fan cables through the top zip tie spots.
10. Mount the housing to your rack using fasteners as appropriate for your rack system.
11. Plug in your PSU and HBA card / motherboard.
12. Use the lower zip tie locations to secure your sata data and power cables, along with the fan cables.
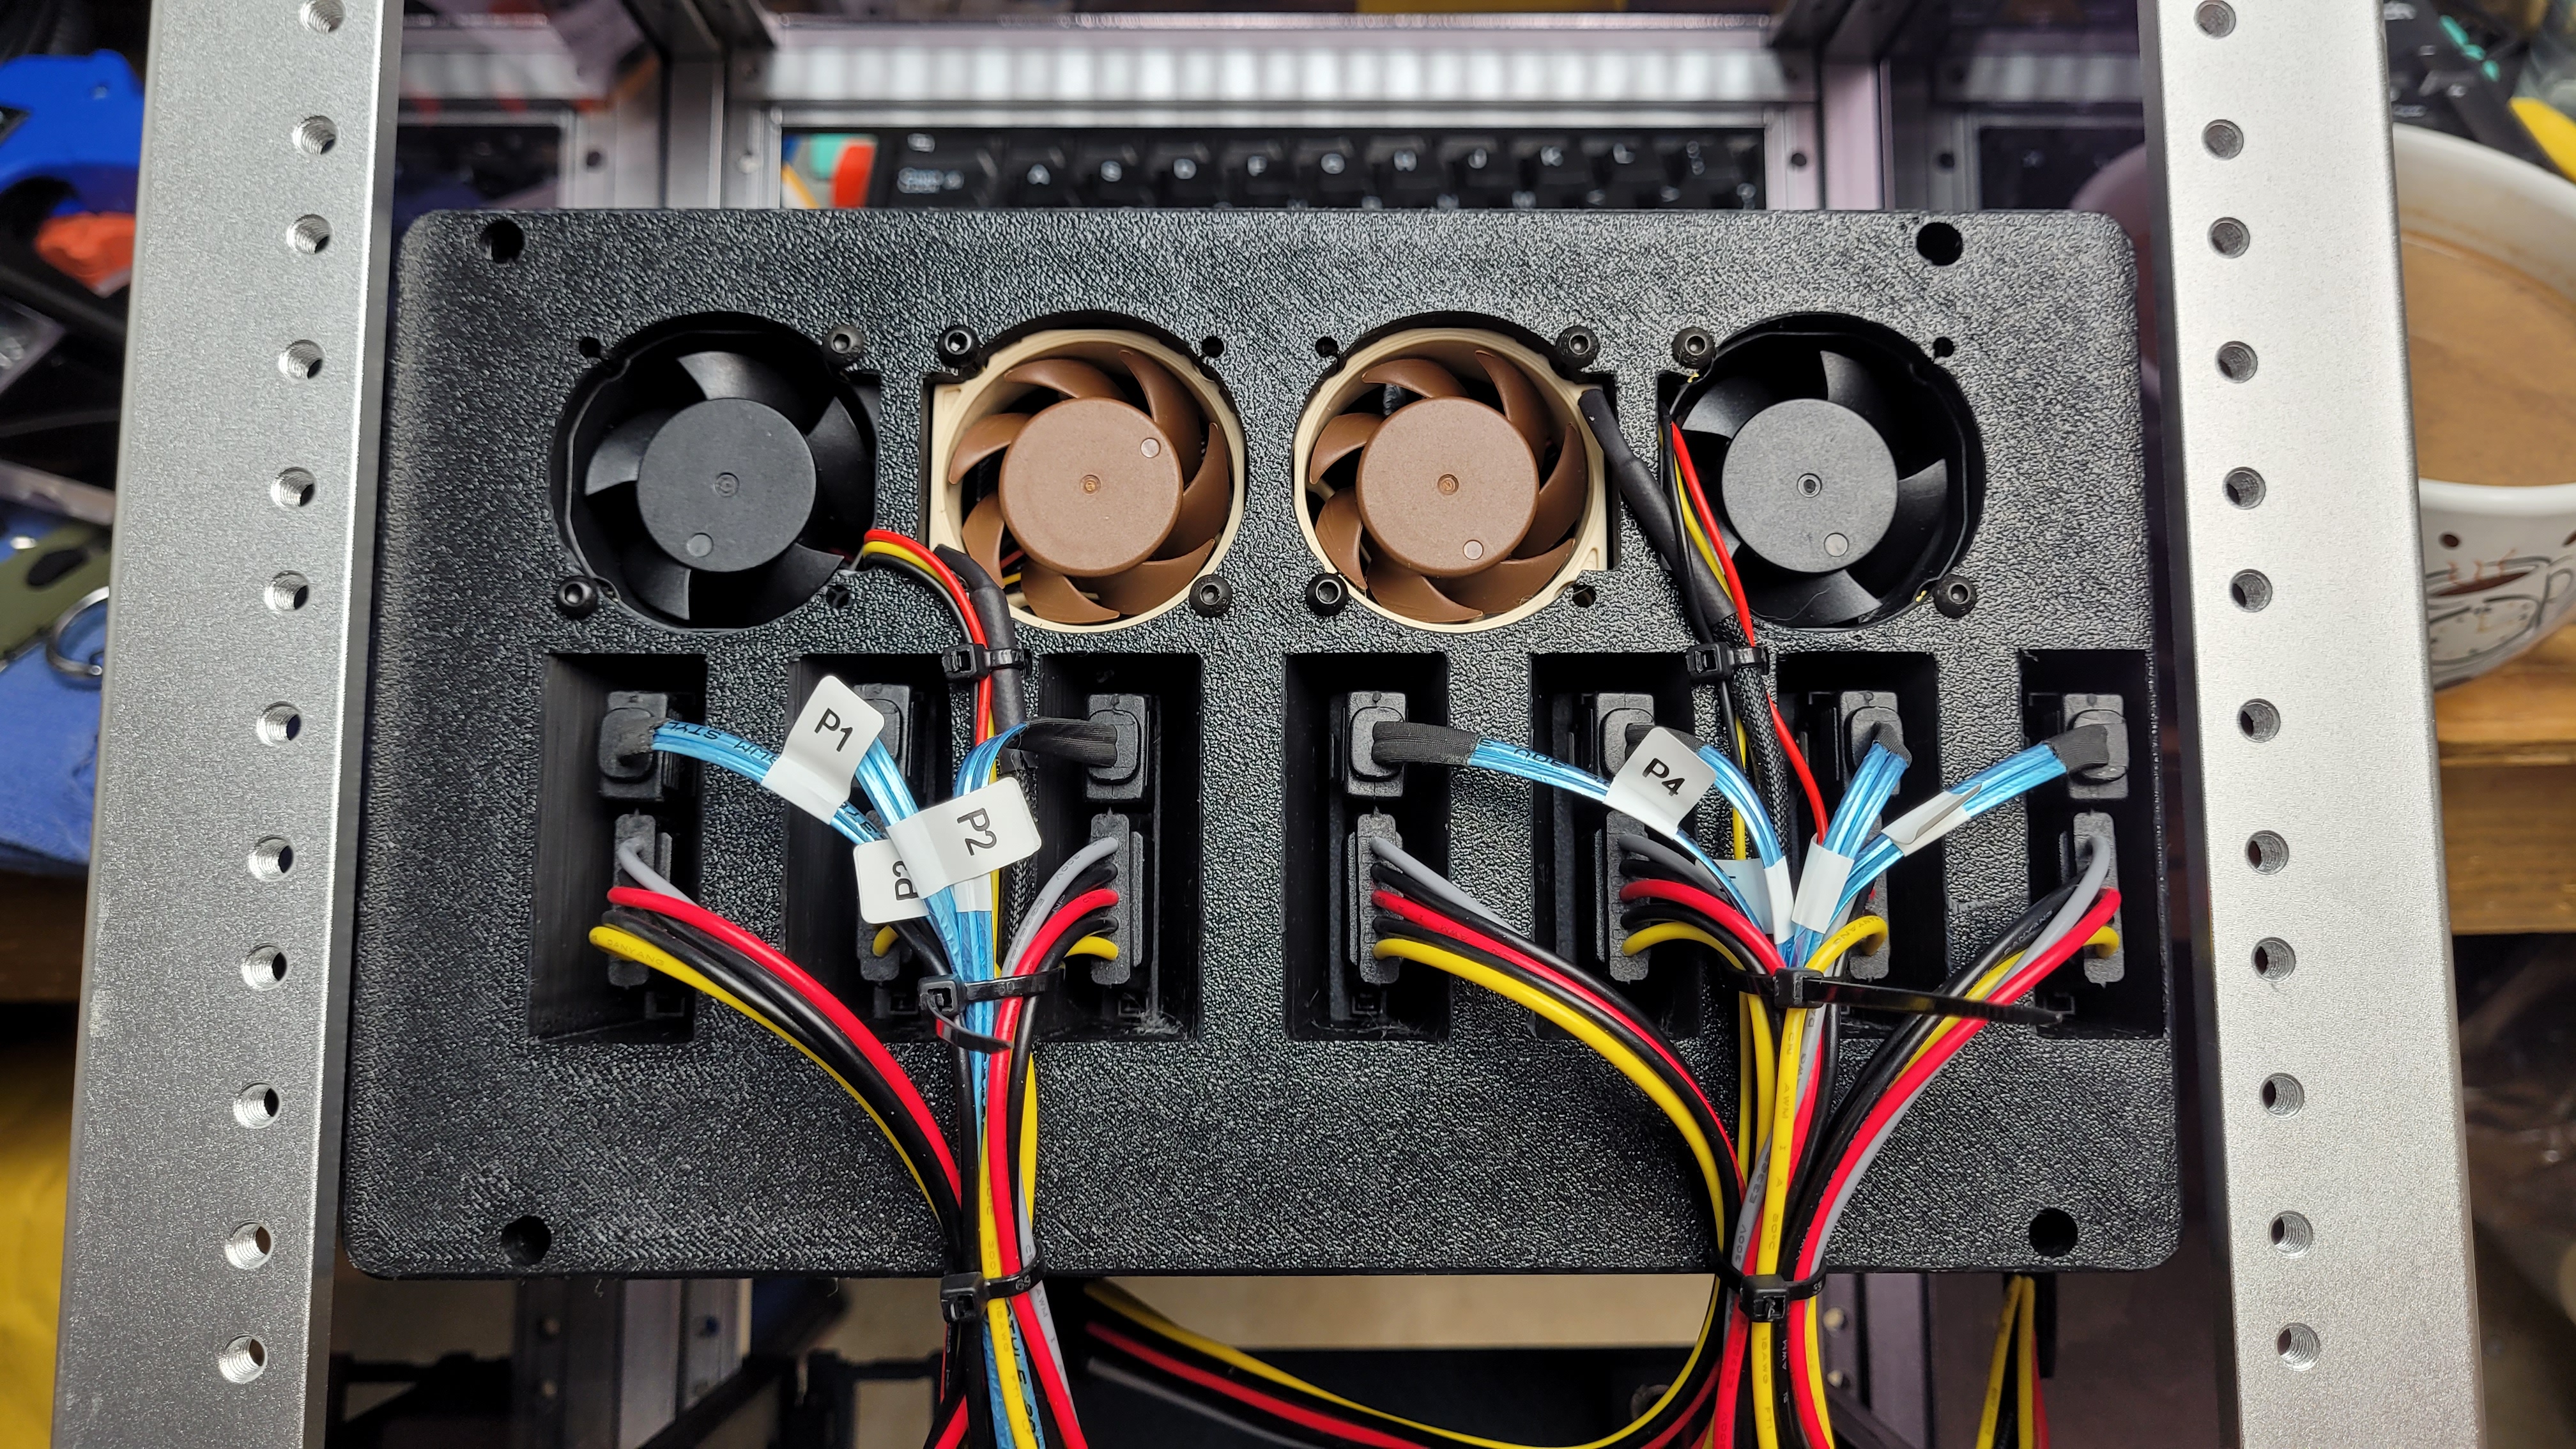
13. Install your drives onto your rail system of choice (see above options).
14. Slide your drives into the rack.
15. Done!
Design by RagingRoosevelt on MakerWorld (license: BY-SA).