
Turbine blower (two planetary gears 36:1 - faster)


Turbine blower (two planetary gears 36:1 - faster)
My hand cranked turbine blower is cool and works fine - however you have to crank it really fast for a nice blow. So i tried to add another planetary gearbox - and it works so much better (and unfortunately louder).
All parts are 3d printed - no additional hardware needed. If you want a bigger one - feel free to scale it up.
How it's working
Here is a video showing you how powerful (and a bit loud) it is :)
Left-handed or Right-handed
If you want to have a blower with the crank on the opposite site - just mirror all the pieces before printing.
How to print
I recommend setting Seam location to Random (just to avoid bumps in single spot and make the rotation even)
Also make sure to set Slice gap closing radius to ‘0’ - some parts are pretty close to each other - we don't want them to fuse together
Besides that just print it with the settings that works for you.
No supports required.
both planetary gears are designed to be printed in place - do not split them into individual parts - they cannot be assembled after printing separately.
After print
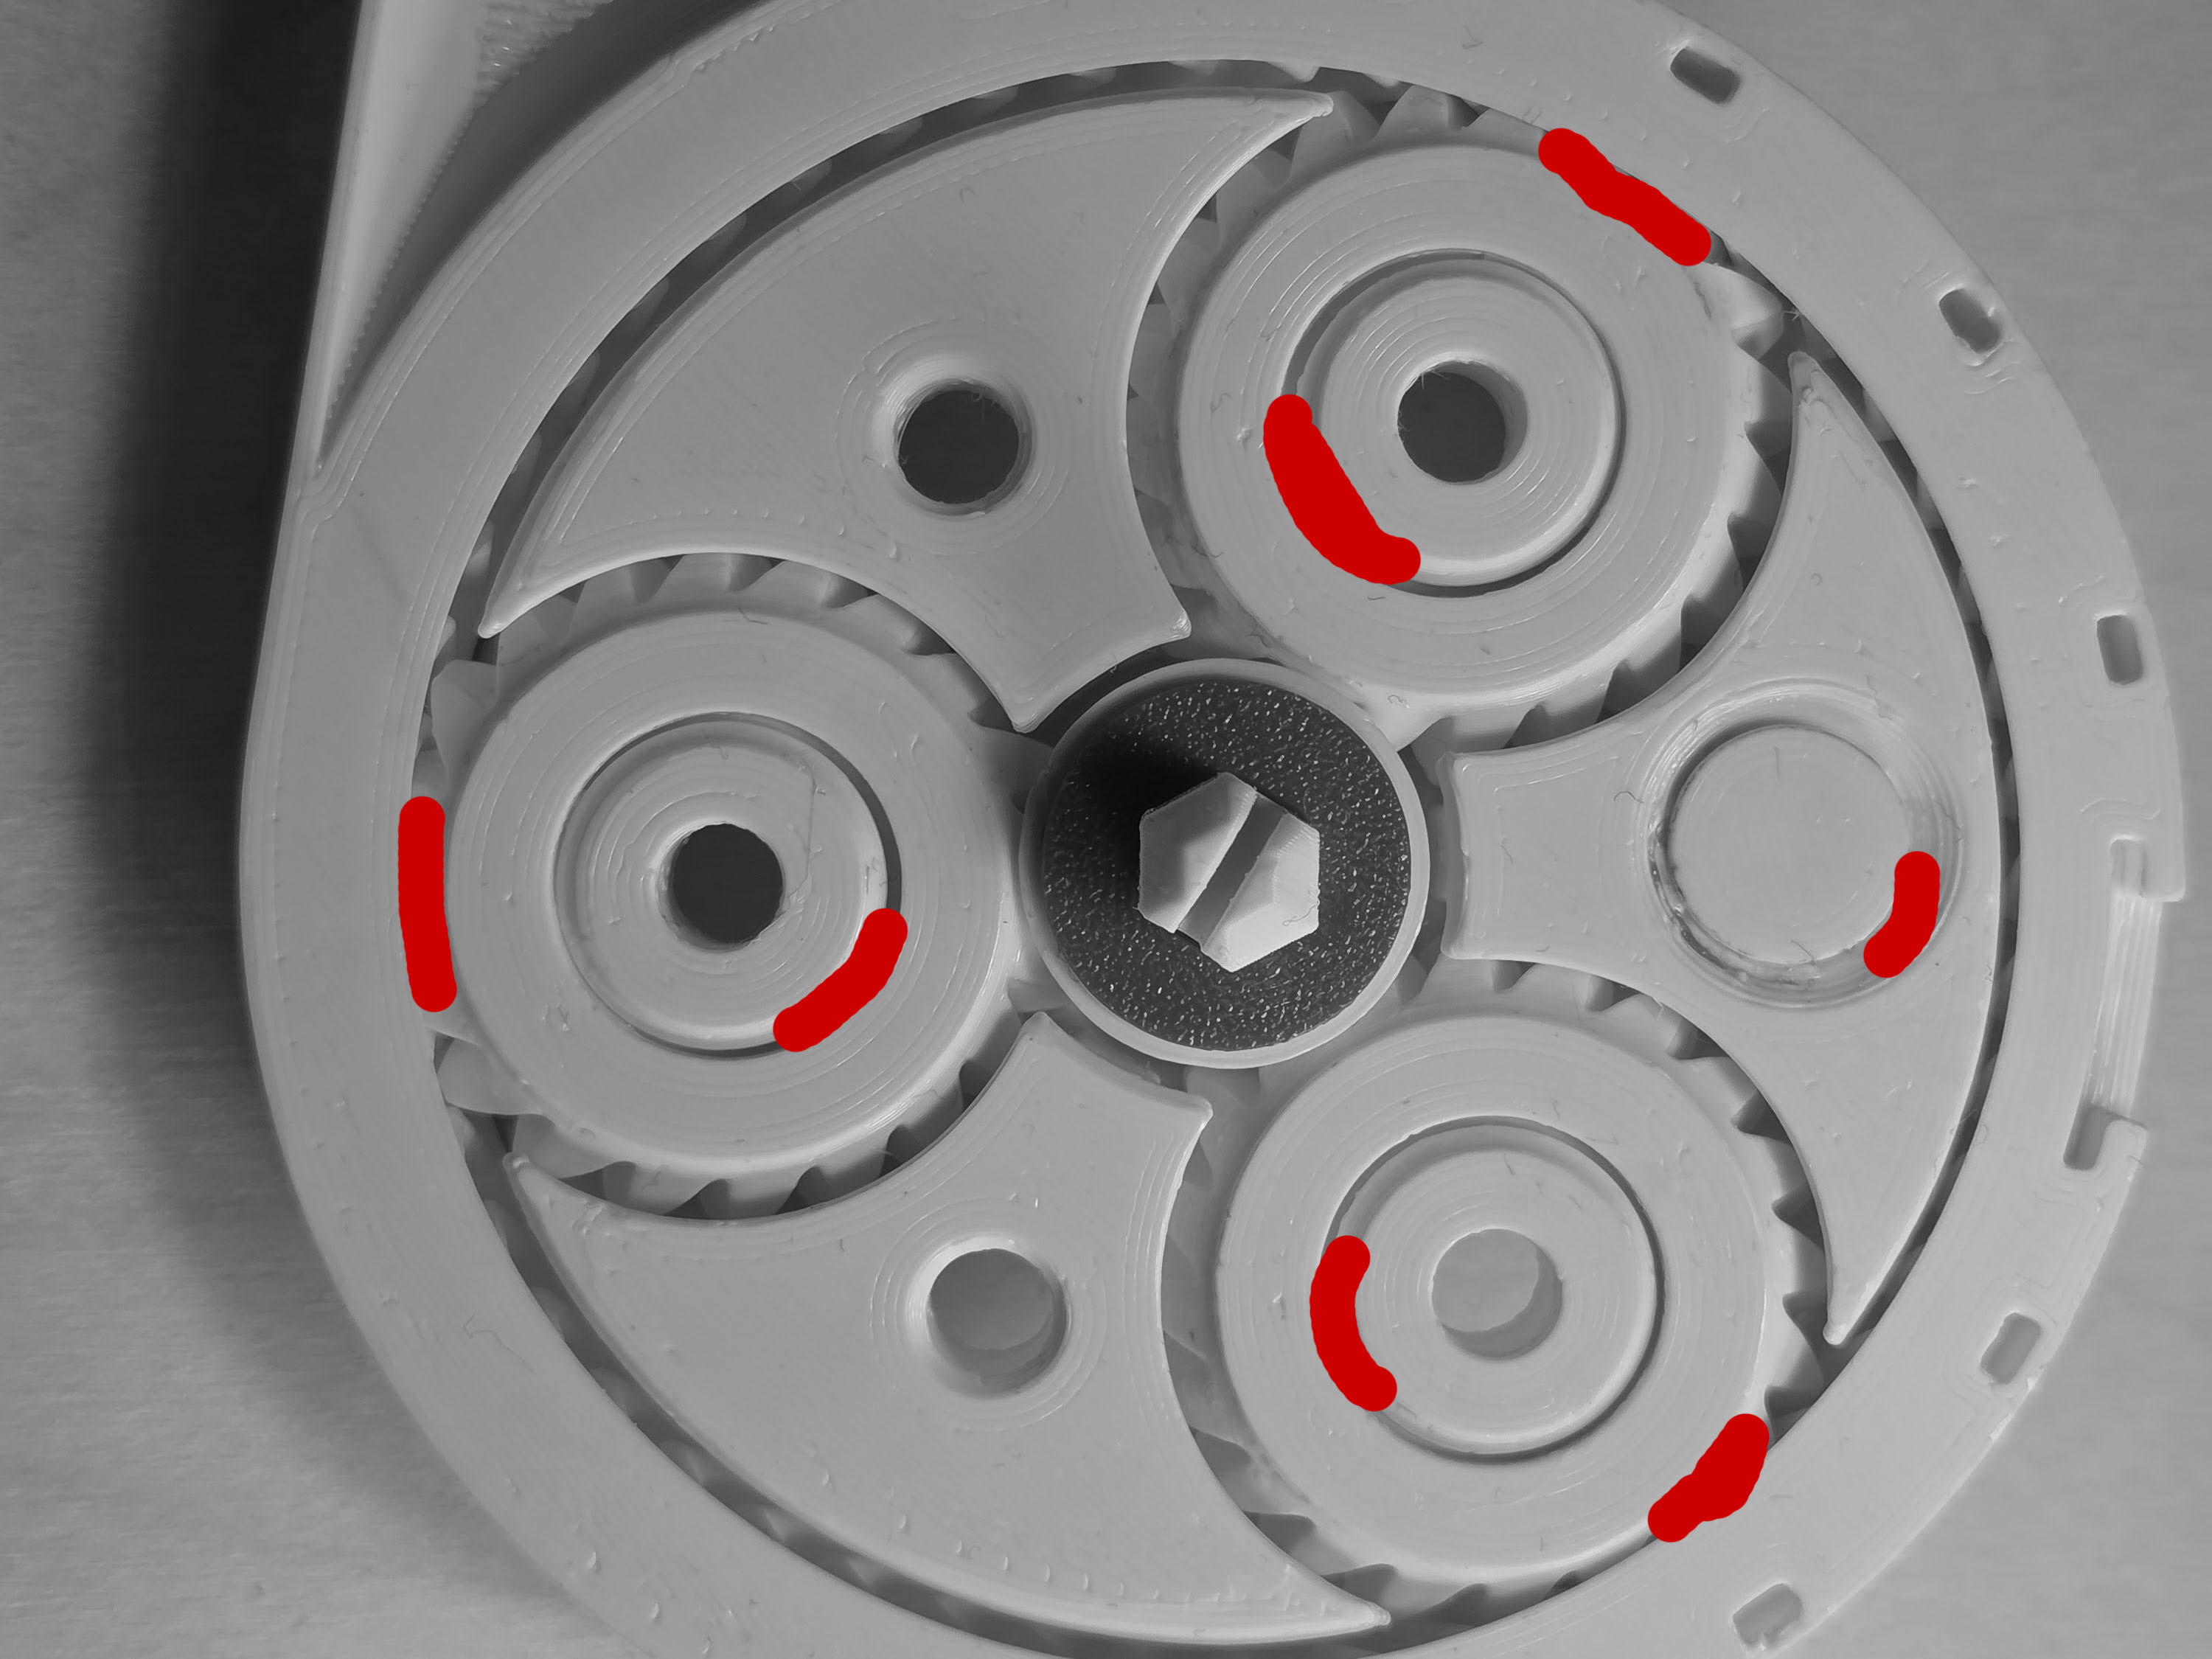
The planetary gear after printing can have parts fused together a bit. Just wiggle them back and forth carefully until they rotate smoothly. Adding a bit of grease can help a lot.
Here are the places when you can add a drop of lubricant (even cooking oil should work)
How to assemble
Step 1. Take the crank part and insert small snap connectors into the slots (15 pieces)
Step 2. connect to second gear
Step 3. Insert the core joint into the hexagonal hole of the second gear
Step 4. Add the round spacer
Step 5. Place the rotor (thing with blades) on the core joint
Step 6. Insert the handle in the slot
Step 7. Insert small snap connectors into the slots in second gear (7 pieces)
Step 8. Place the cover on top and make sure all the joints are in the right place
Step 9. push firmly the cover to snap in. And that's it.
I will upload photos soon, but here is a simple animation to help you understand assembly process
After project thoughts
I am no aerodynamics expert. I designed the turbine the way I think it should work. The air flow is pretty decent, but I am sure this can be tweaked to work even better. If you have any thoughts - let me know.
Update Log:
30.06.2025 - I added some internal structures to the second_gear part - it should help with all the bridges that are there
Design by Tomek on MakerWorld (license: BY).