

Drybox my version - Ikea box 10,6l


Drybox my version - Ikea box 10,6l
- Made to order — 3D printed after you buy
- Free shipping on orders over $25
- Quality checked before it ships
- Questions? Contact us · Returns
Let’s start with everything you’ll need.
-
Printed parts:
- Folder – spoolholder: print all parts 2x
- Folder - Filament pass-through: print all parts 2x
- Original spoolholder rails: 2x
- Original spoolholder base: 6x
- Silica gel container. I have this one (D60 H60): 1x
- Parts to buy:
- Bearing 8x22x7 608ZZ: 8x
- Self-adhesive Velcro: optional
- PTFE tube : 2x
- Humidity meter: 1x
- M3x12 screw (4x)
- M3x20 screw (2x)
- M3x8 screw (4x)
- M3n nut (6x)
- Ikea box 10,6l + lid: https://www.ikea.com/gb/en/p/ikea-365-food-container-with-lid-rectangular-plastic-s79276760/
- Silica gel
1 Step:
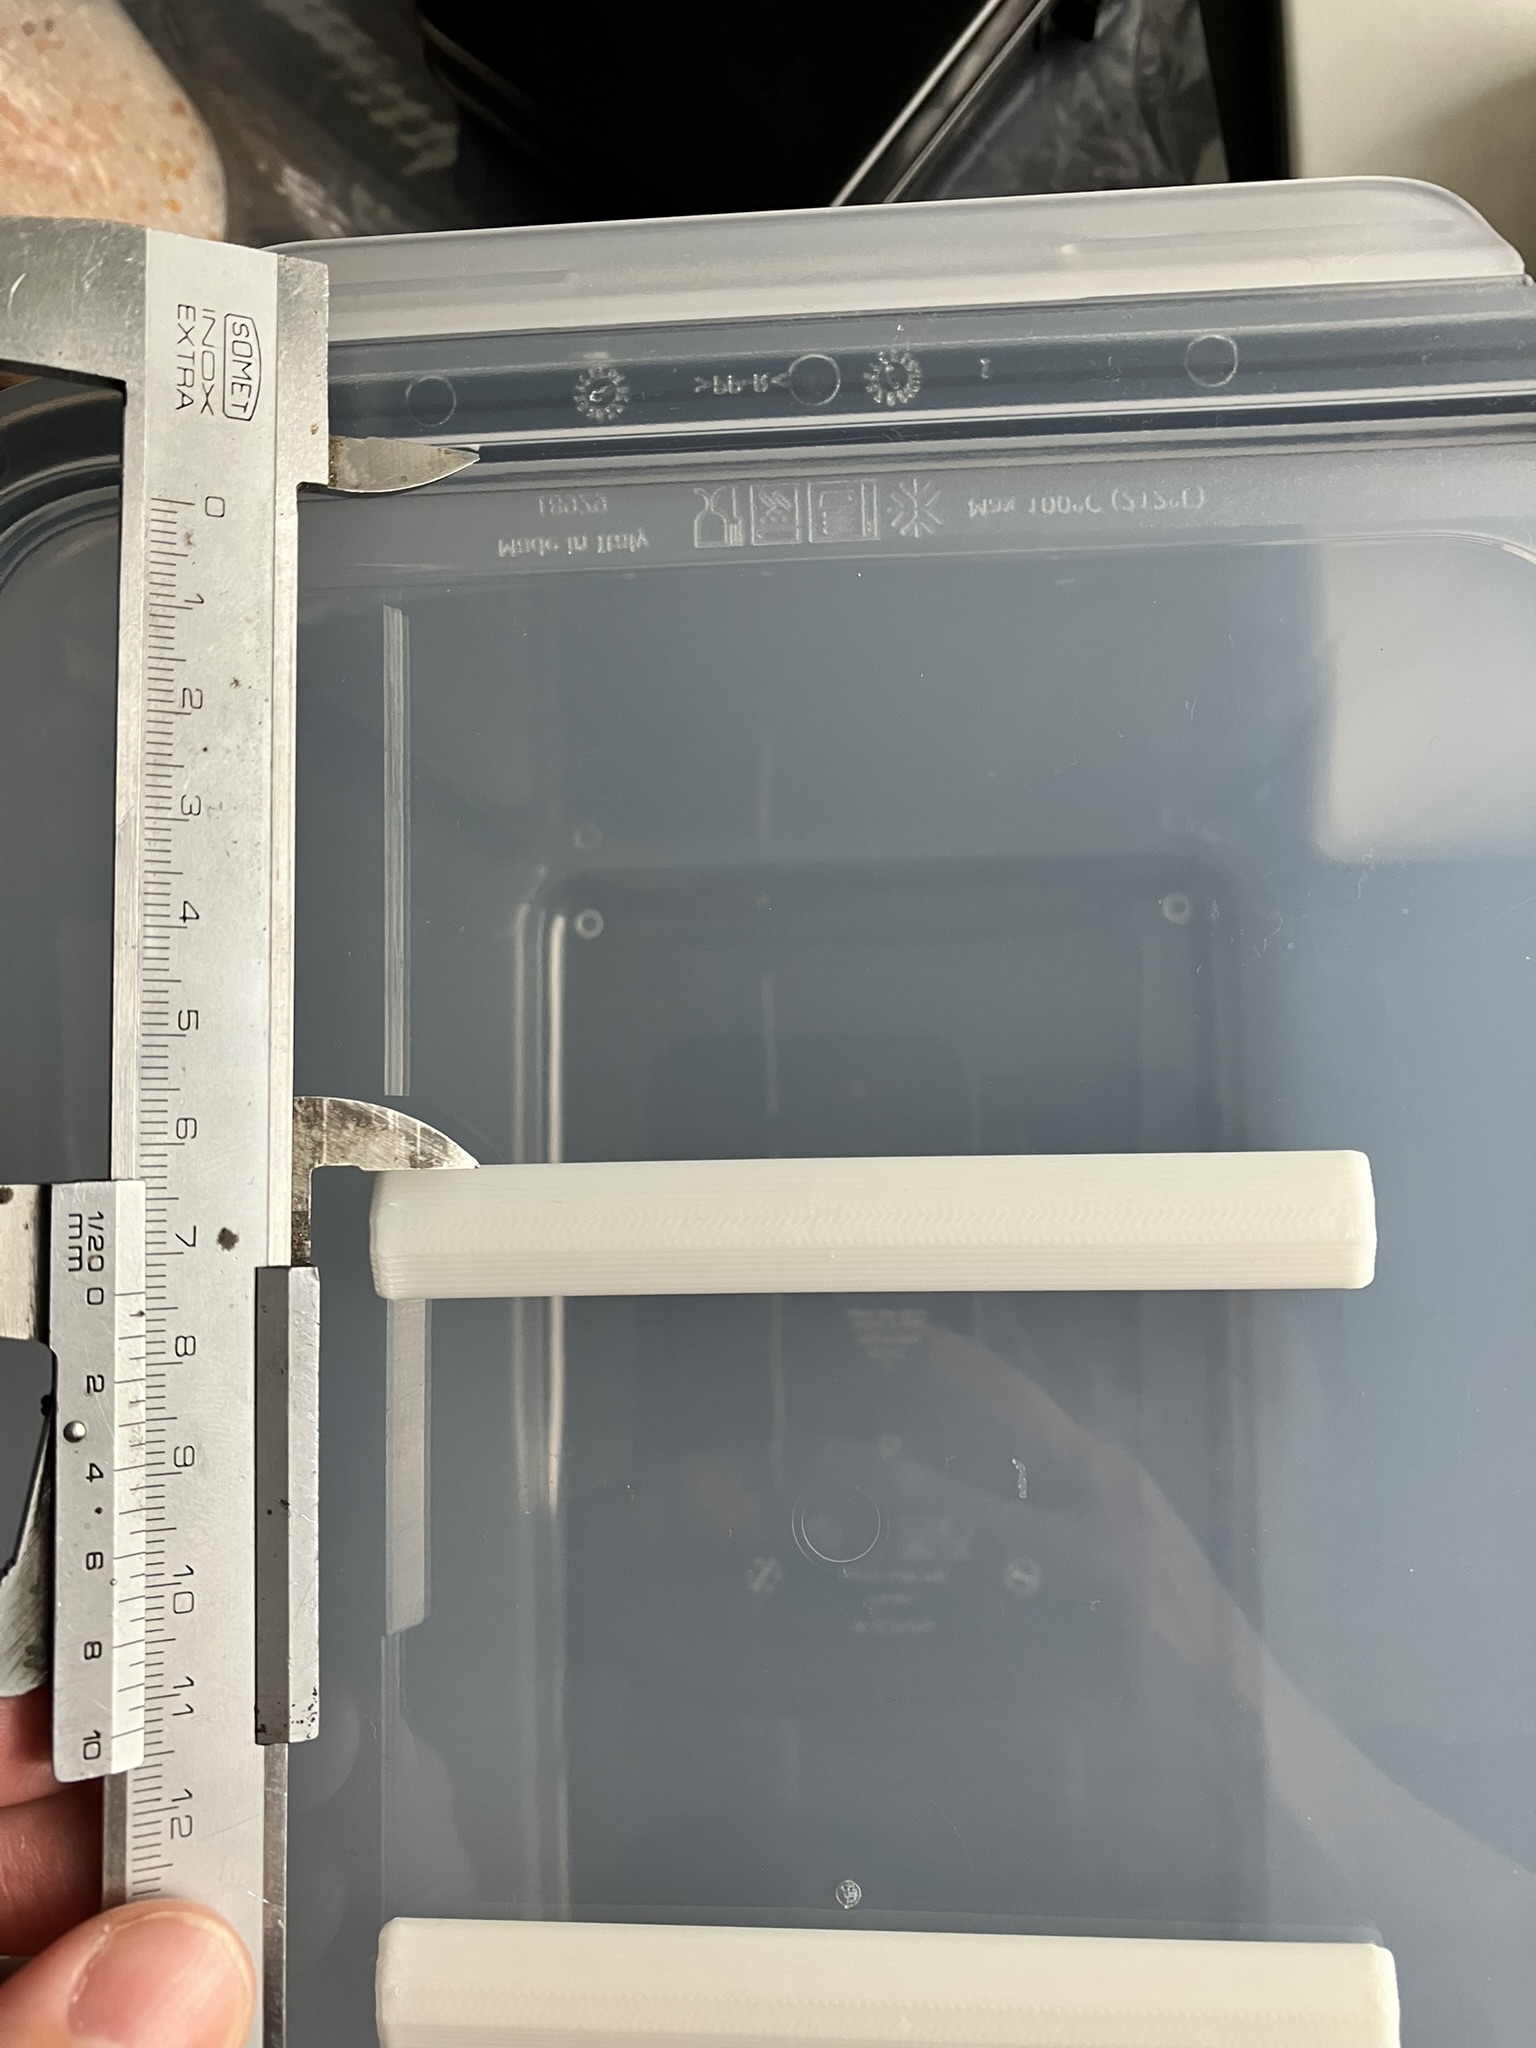
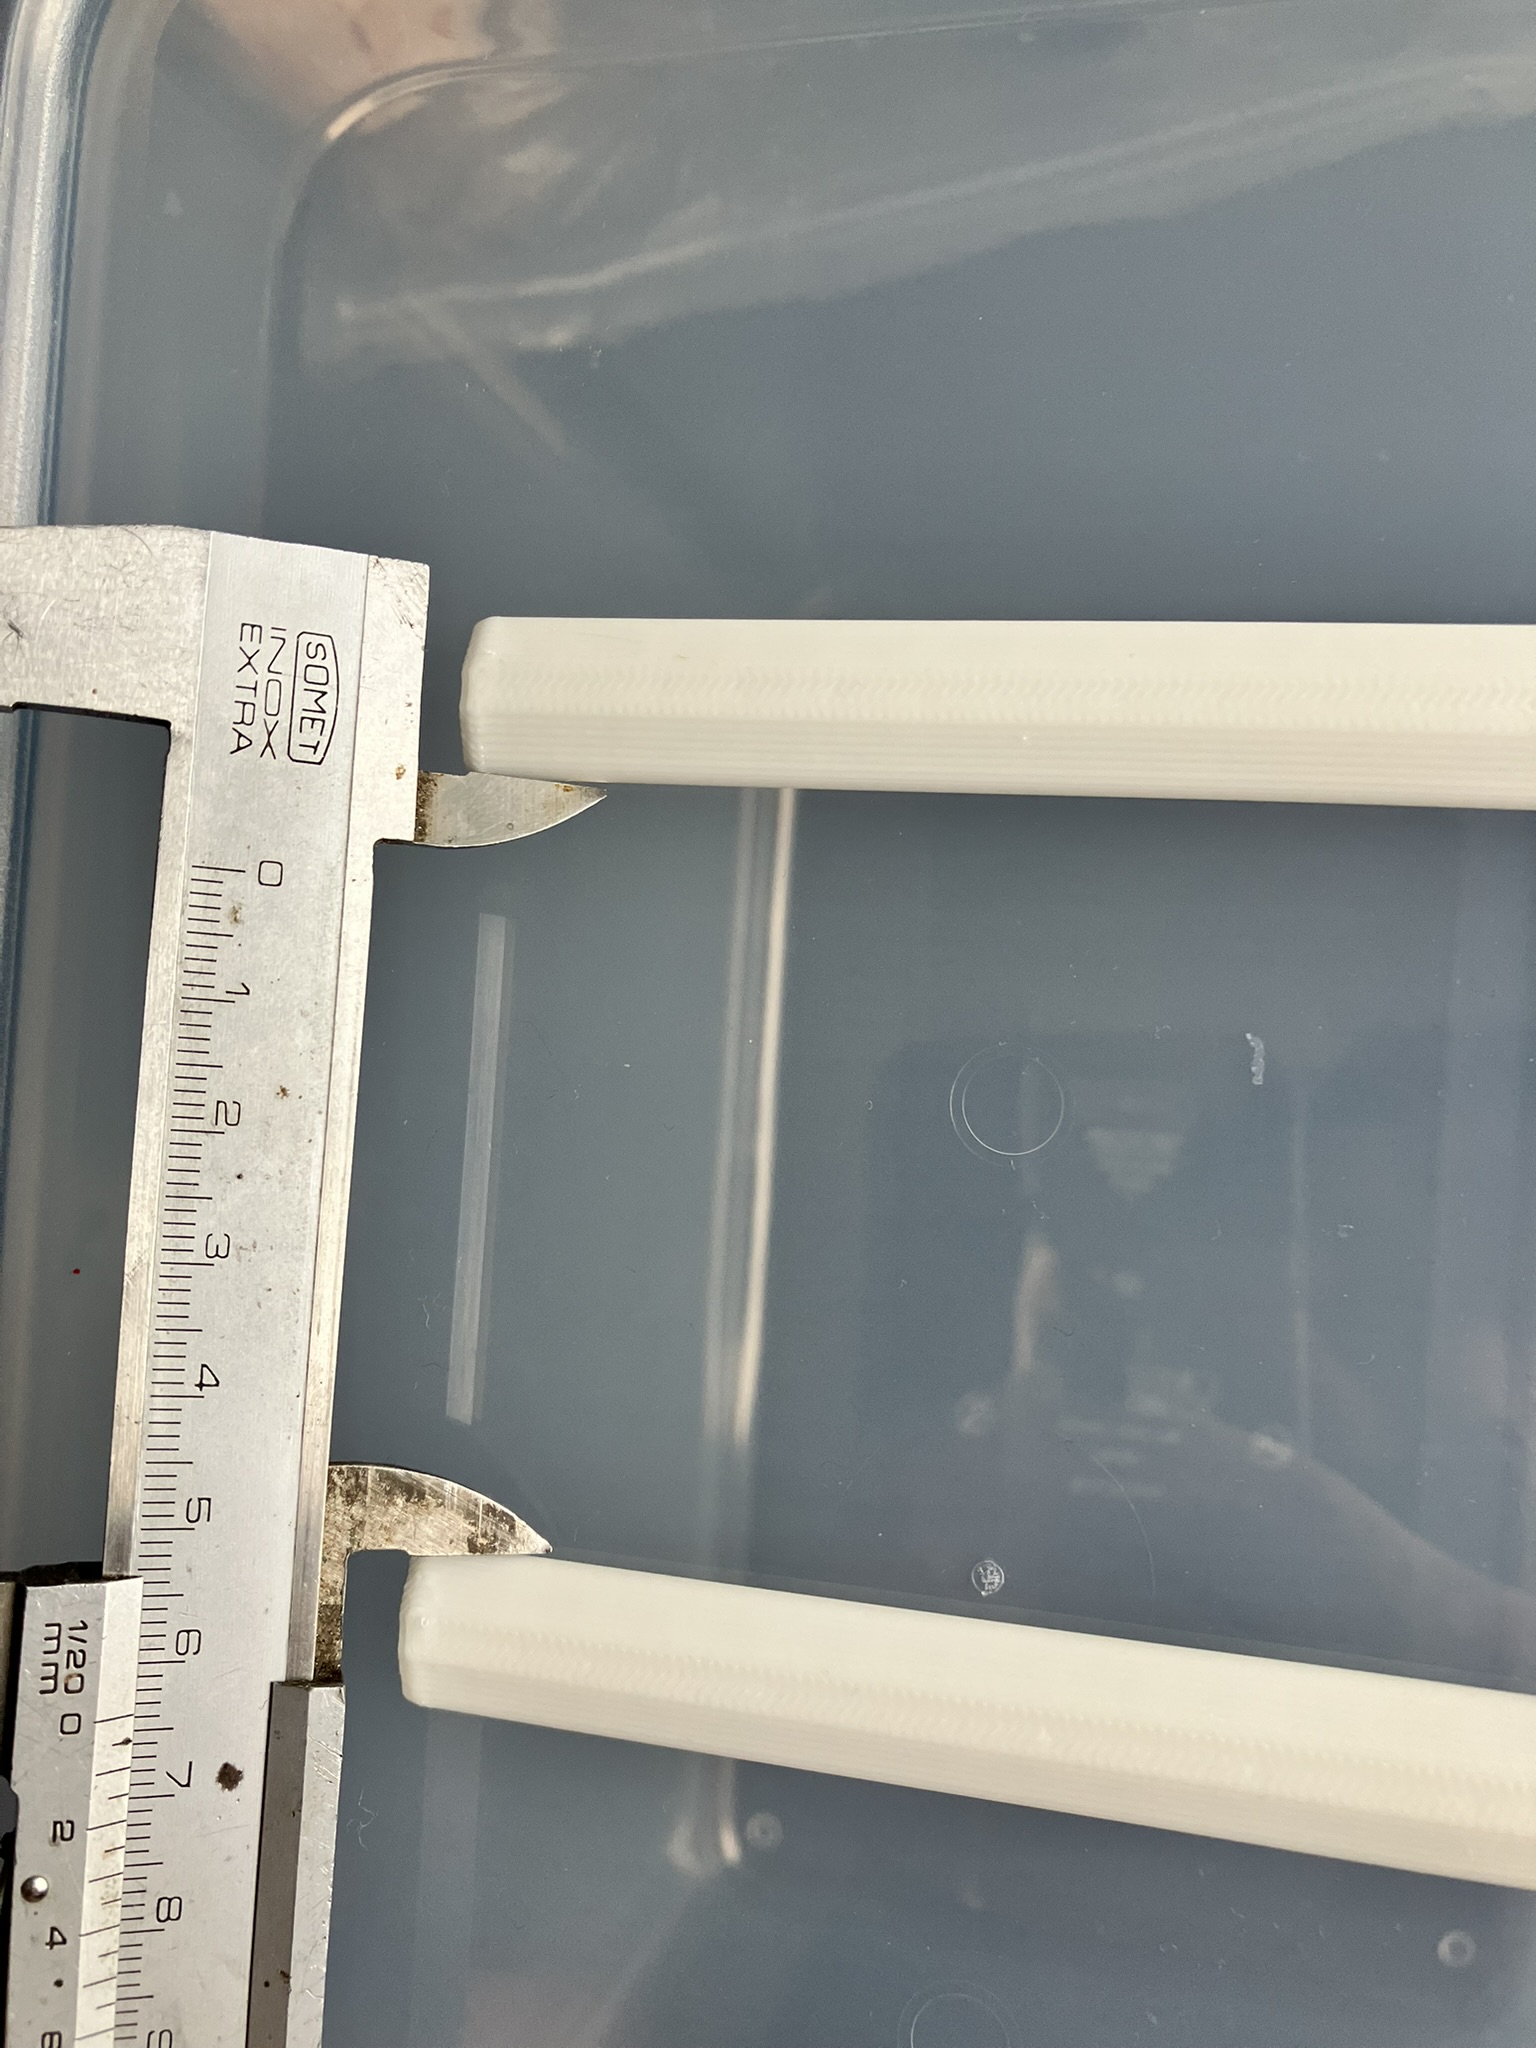
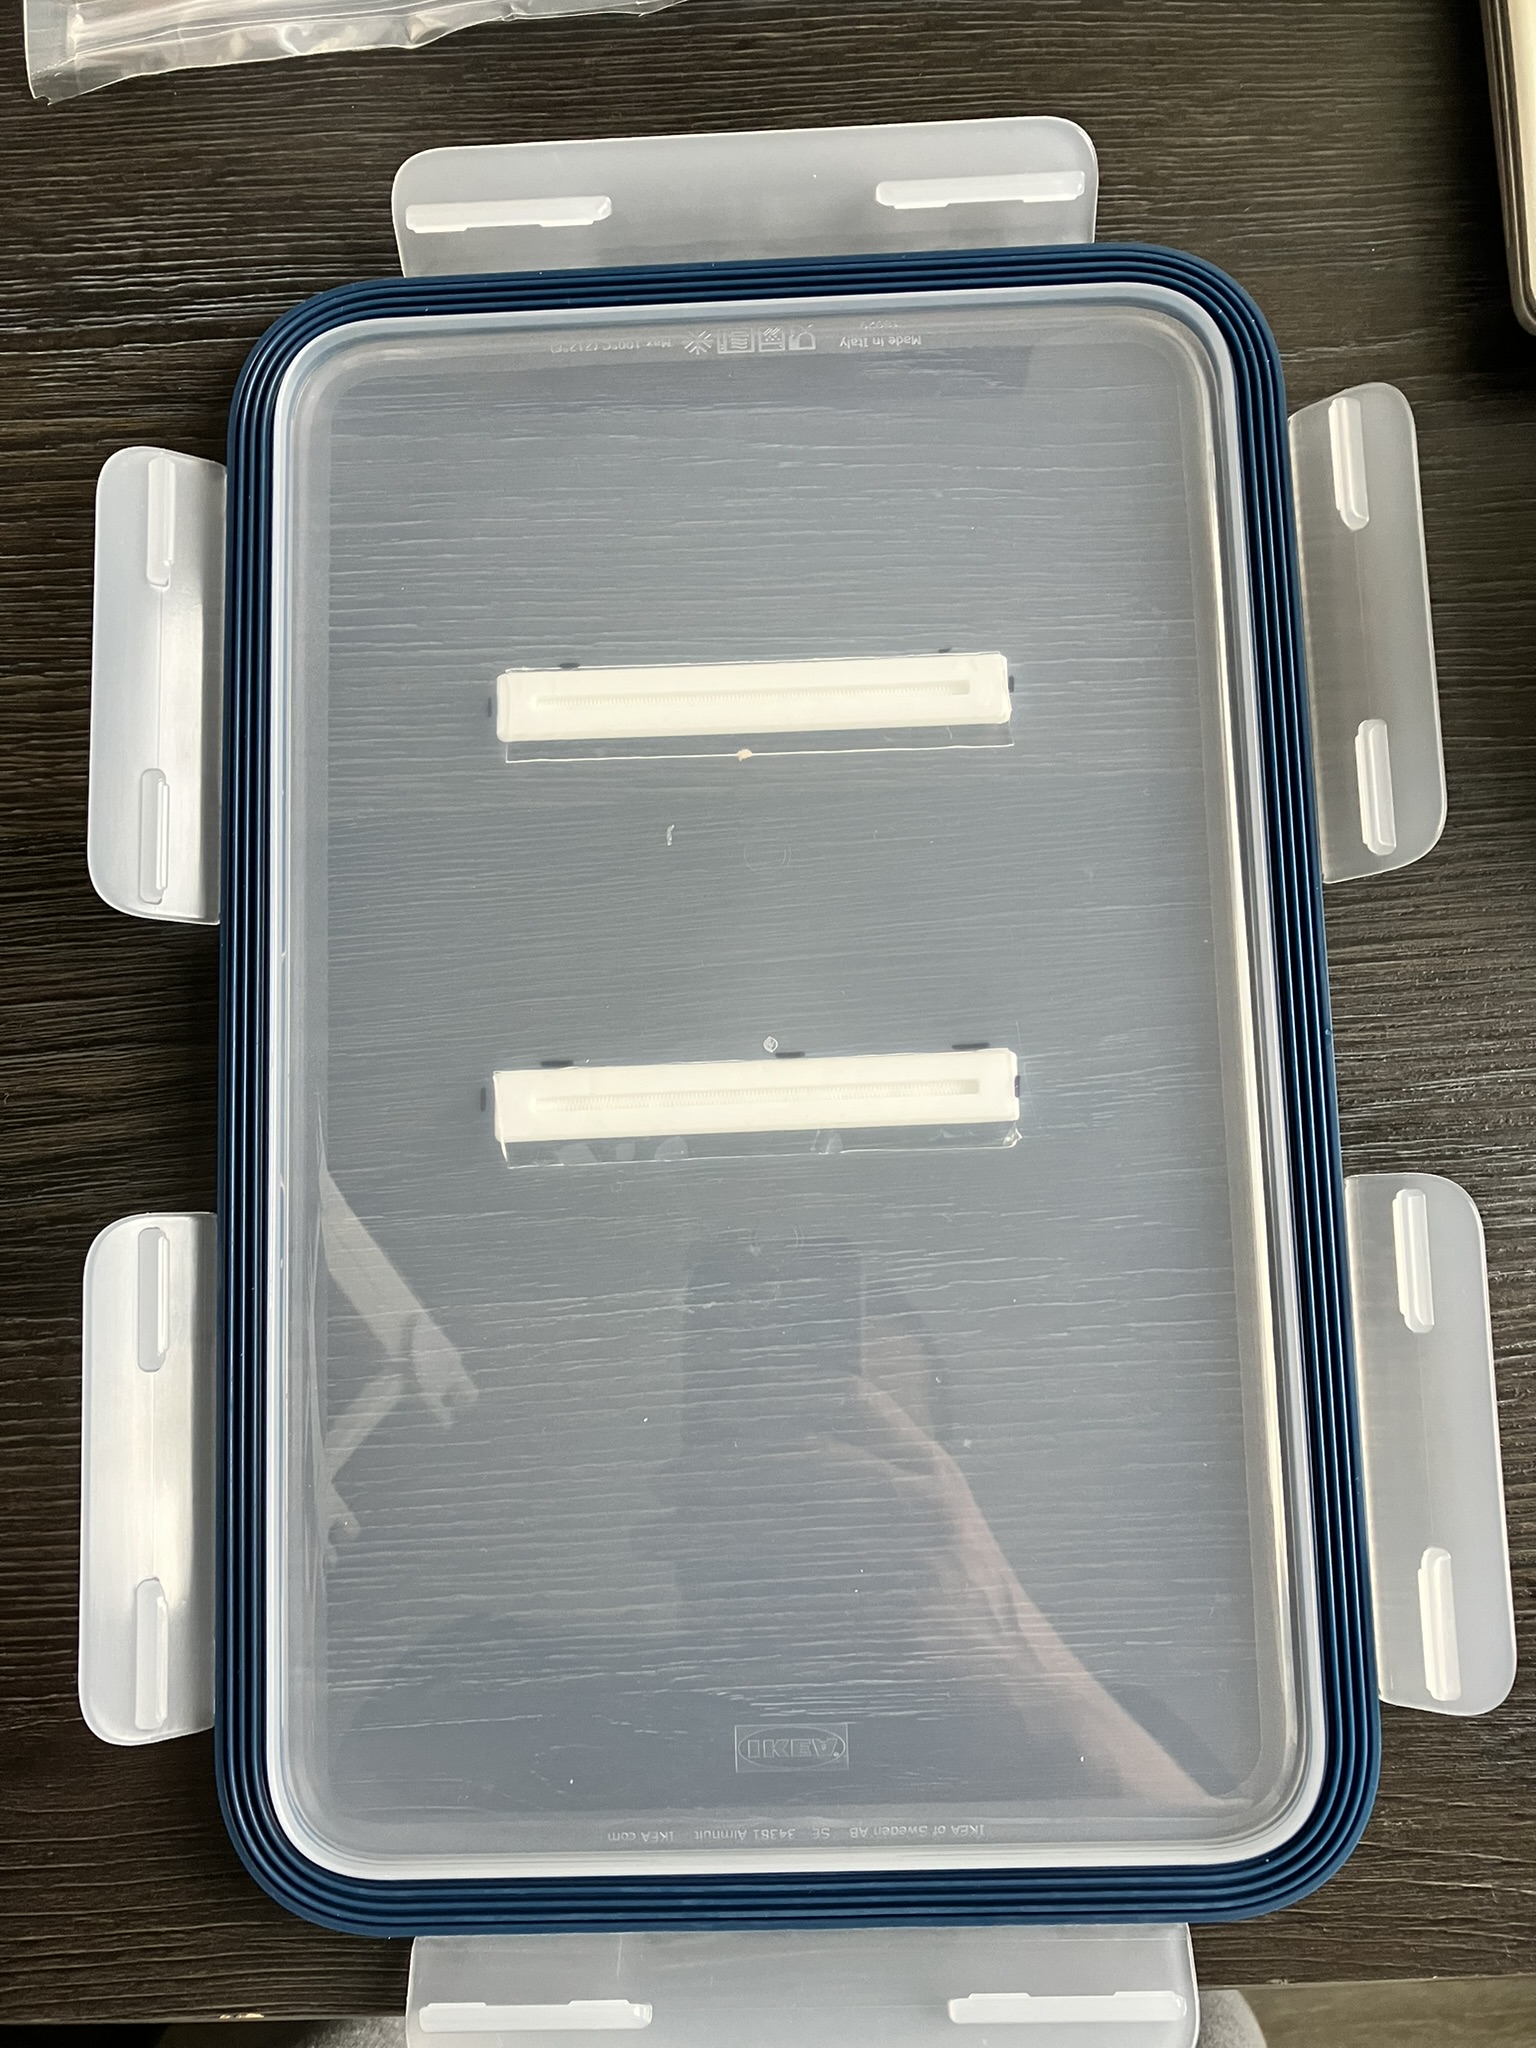
First, you need to start by reinforcing the lid, which ultimately serves as the base the entire structure stands on. Use the original spoolholder rails (2x) and attach them to the outside using double-sided adhesive tape, as shown in the picture.
2 Step:
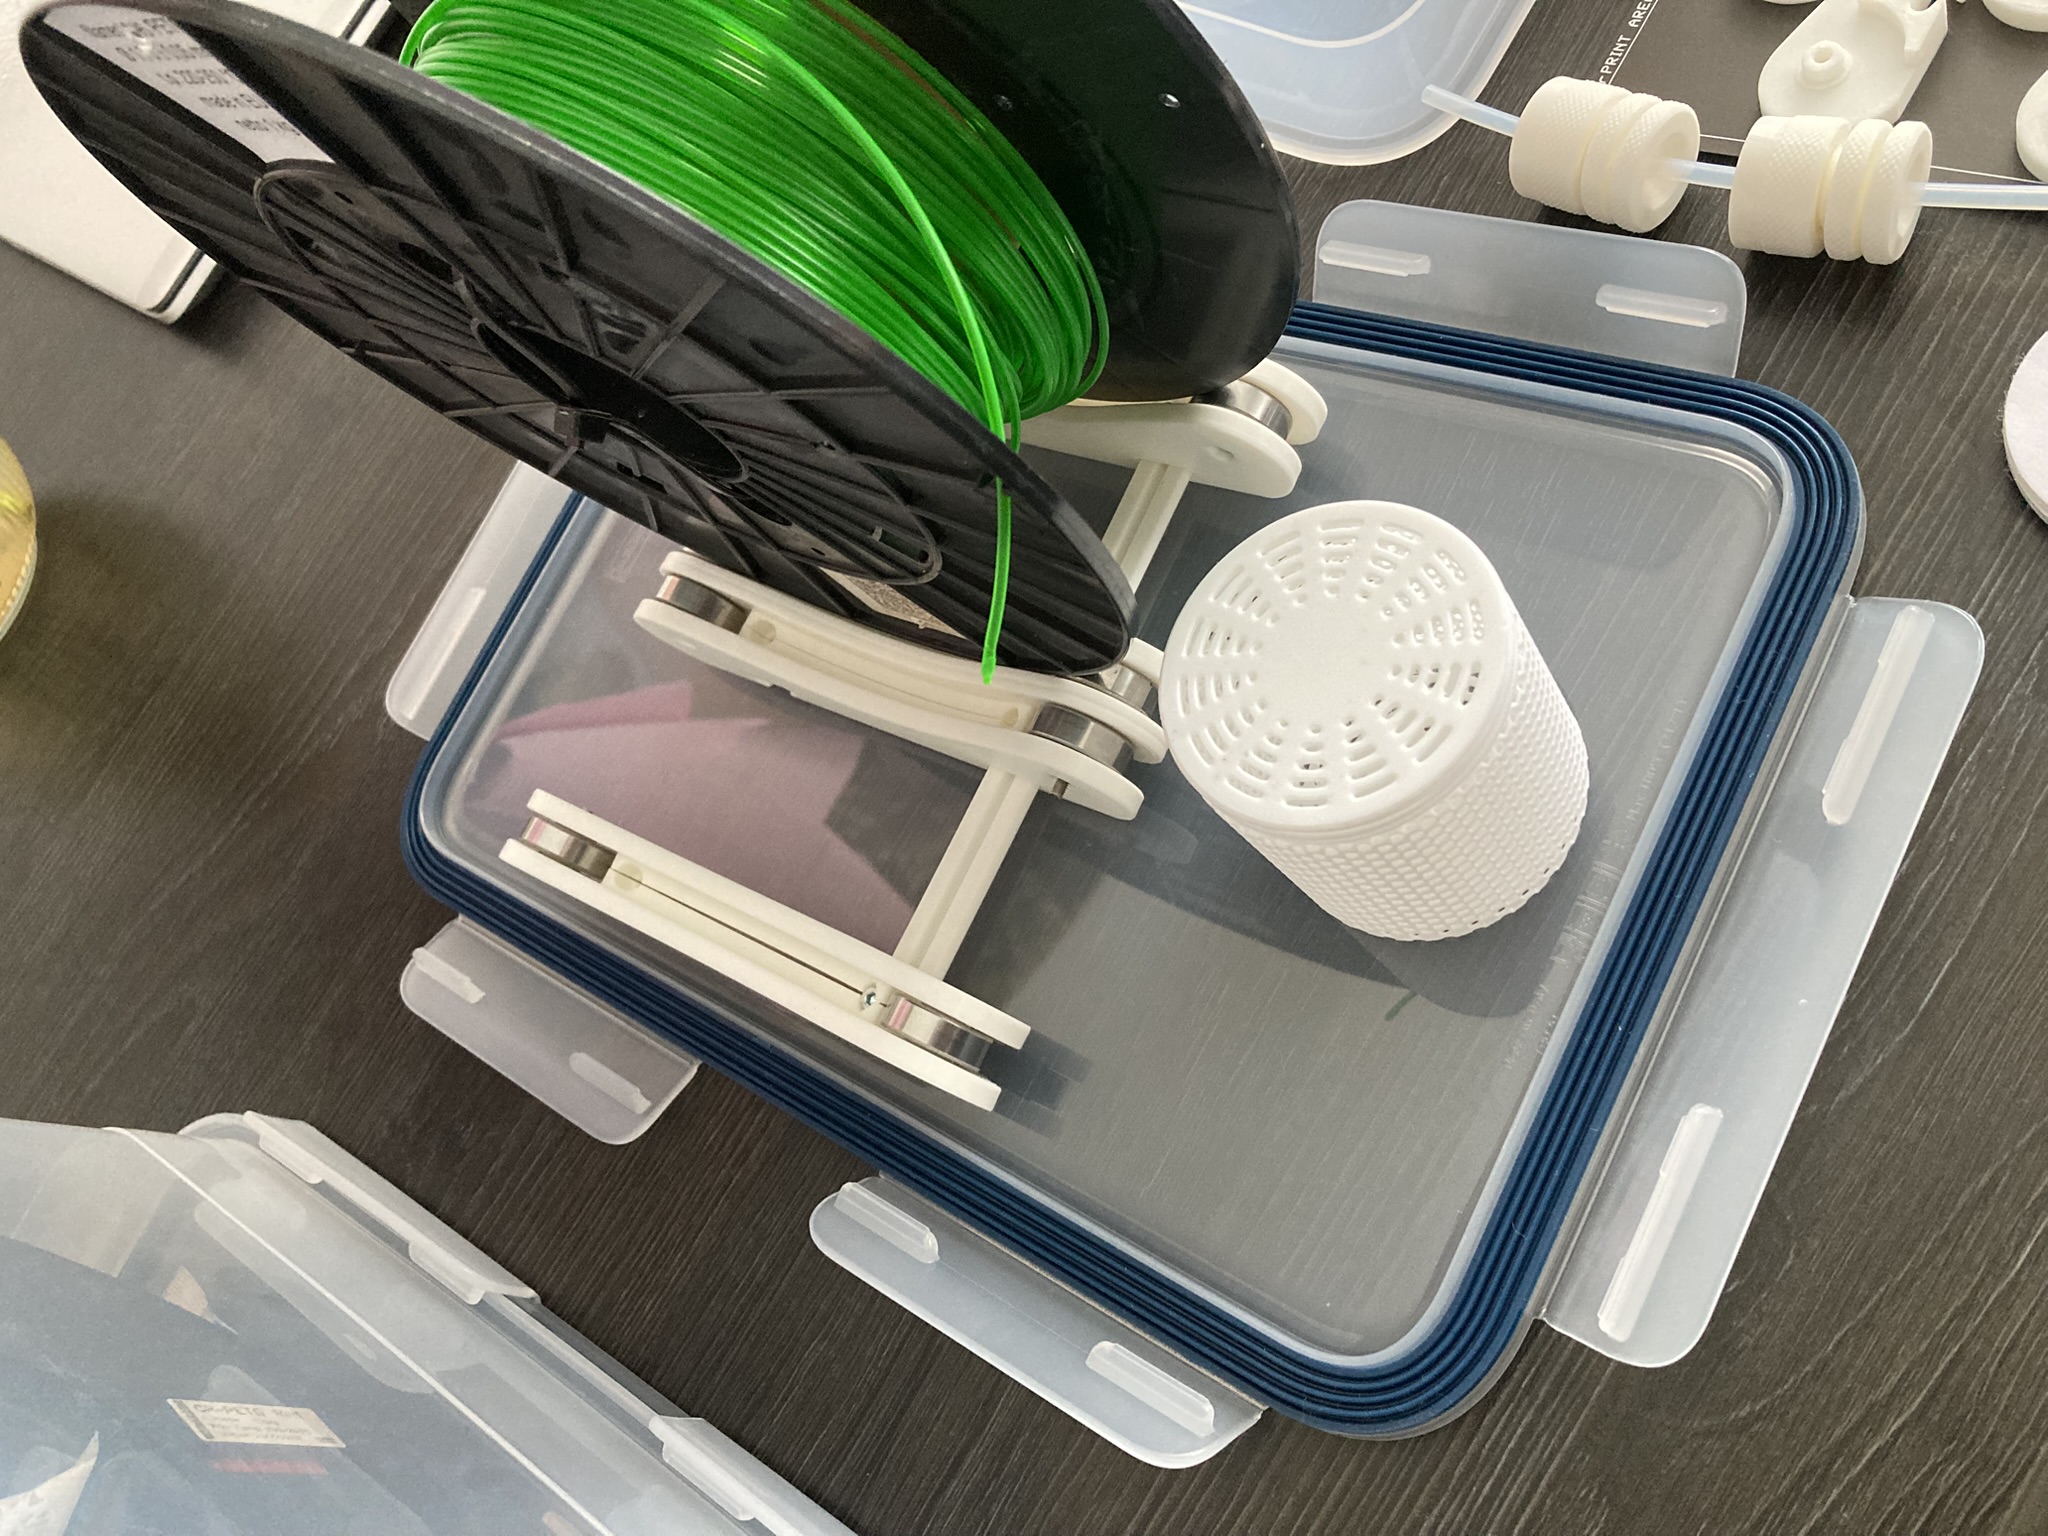
Assemble the spool holder. You can find the assembly guide on the Prusa website. Use 160 mm rails (2x) and the original spoolholder bases (6x). In the center, place the base-spoolholder_middle_parts (2x). At this stage, you'll also use all the required screws and nuts.
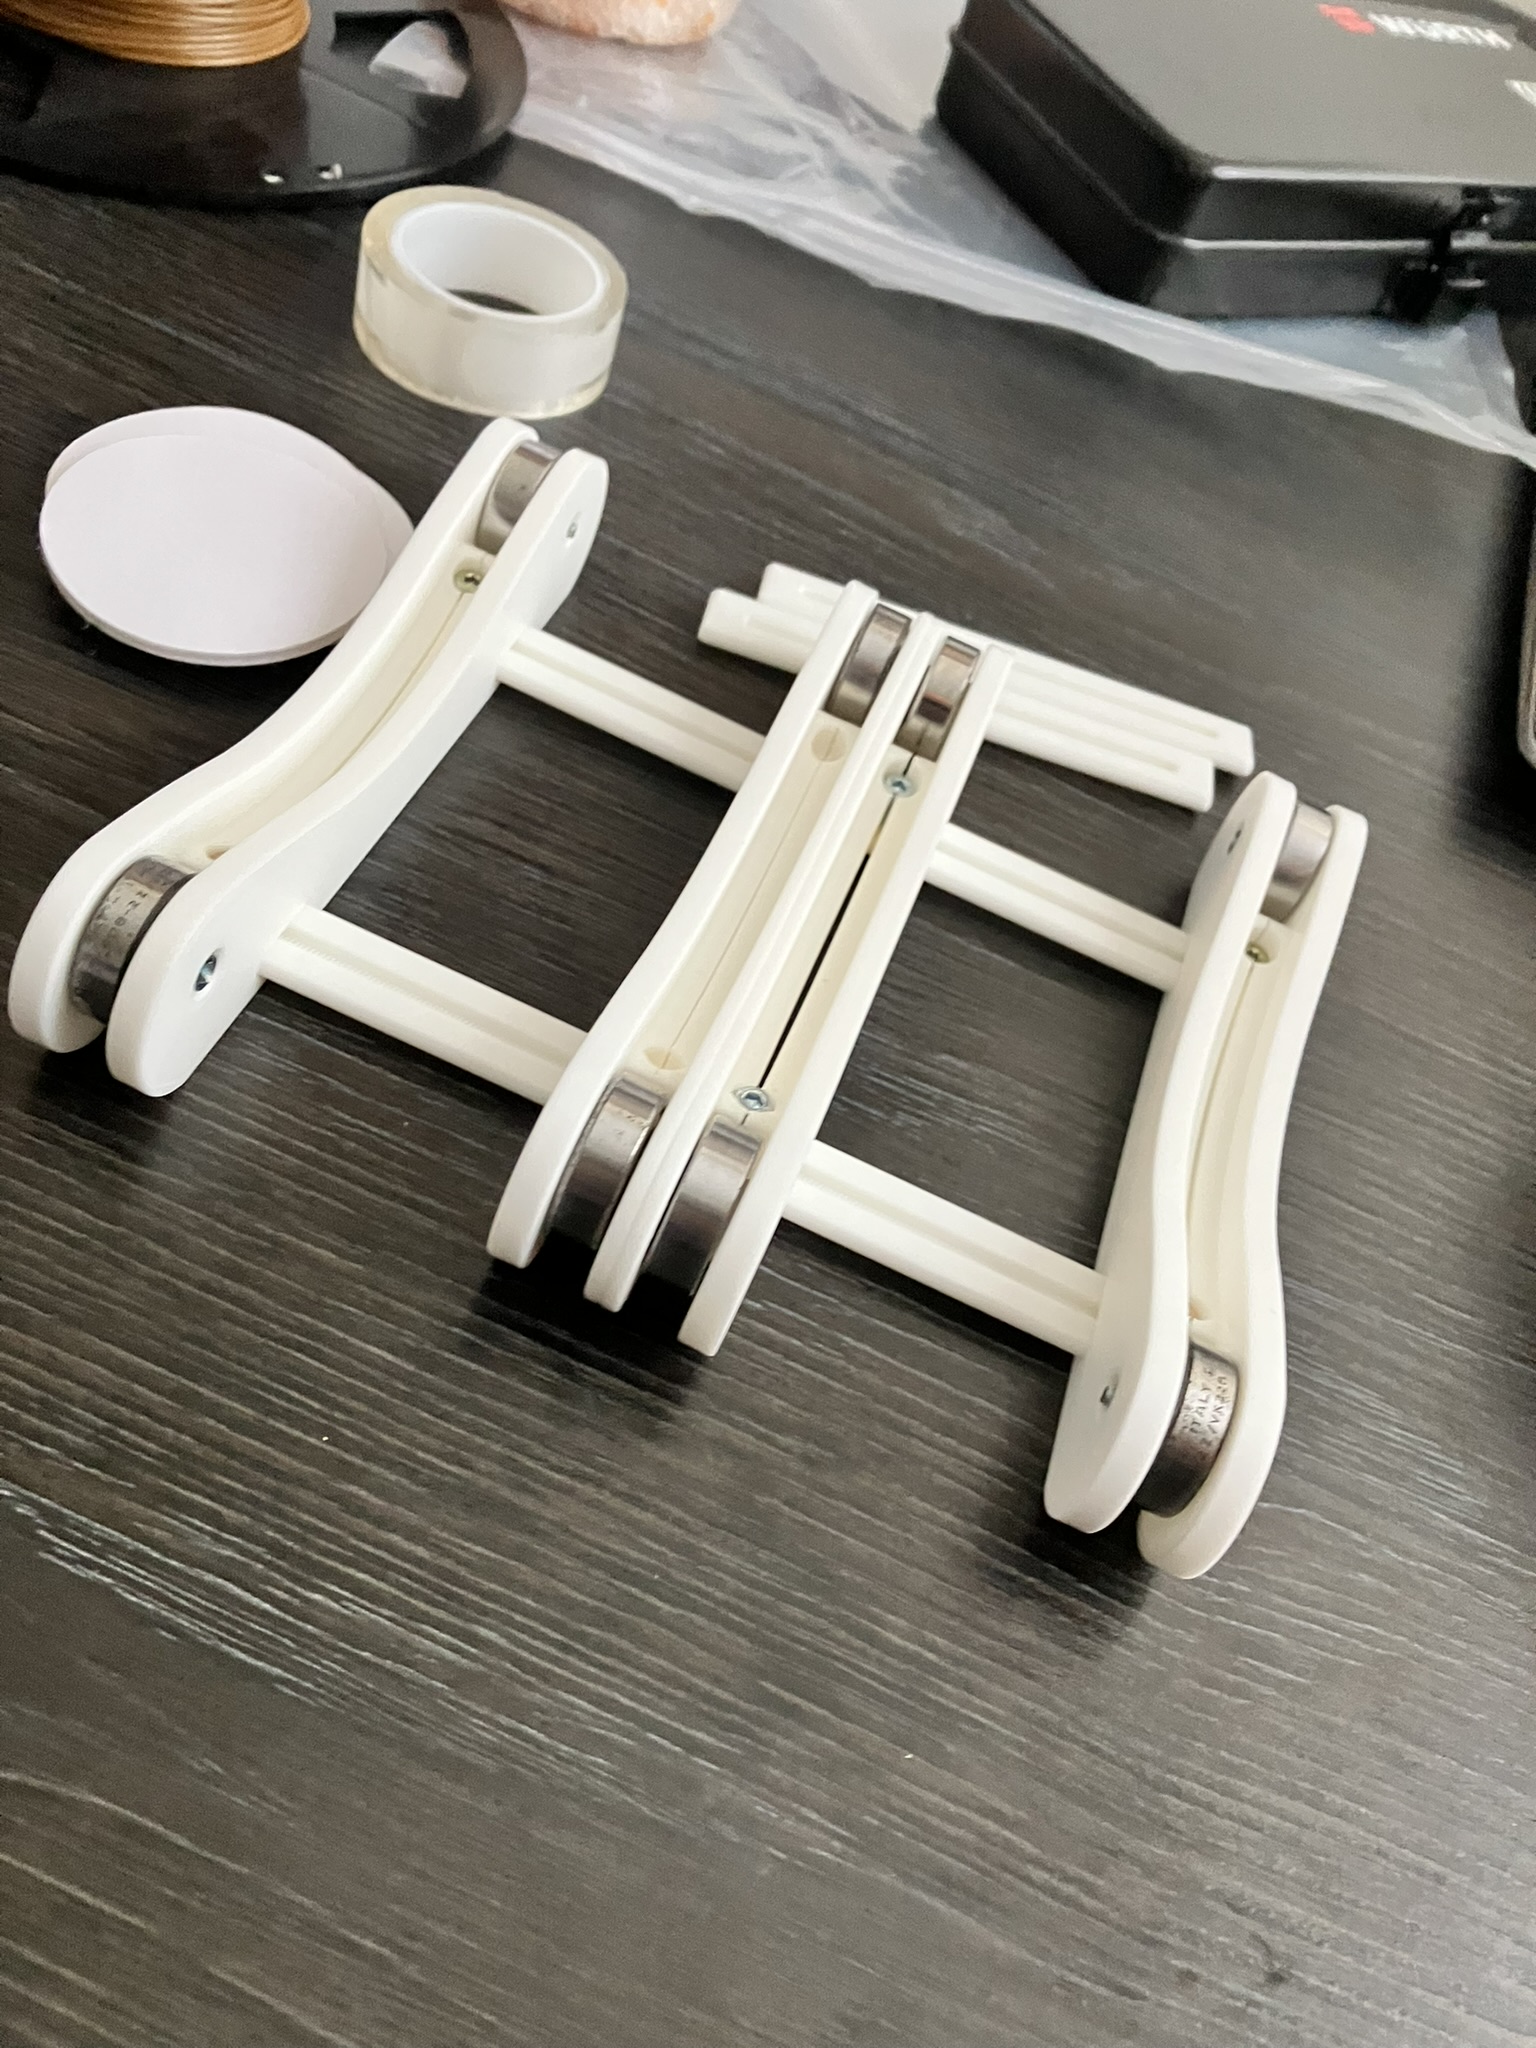
Next, attach the hook-and-loop fasteners (Velcro) as shown in the picture, and stick them to the inside of the box lid in such a way that the spool holder aligns approximately with the external reinforcement rails.
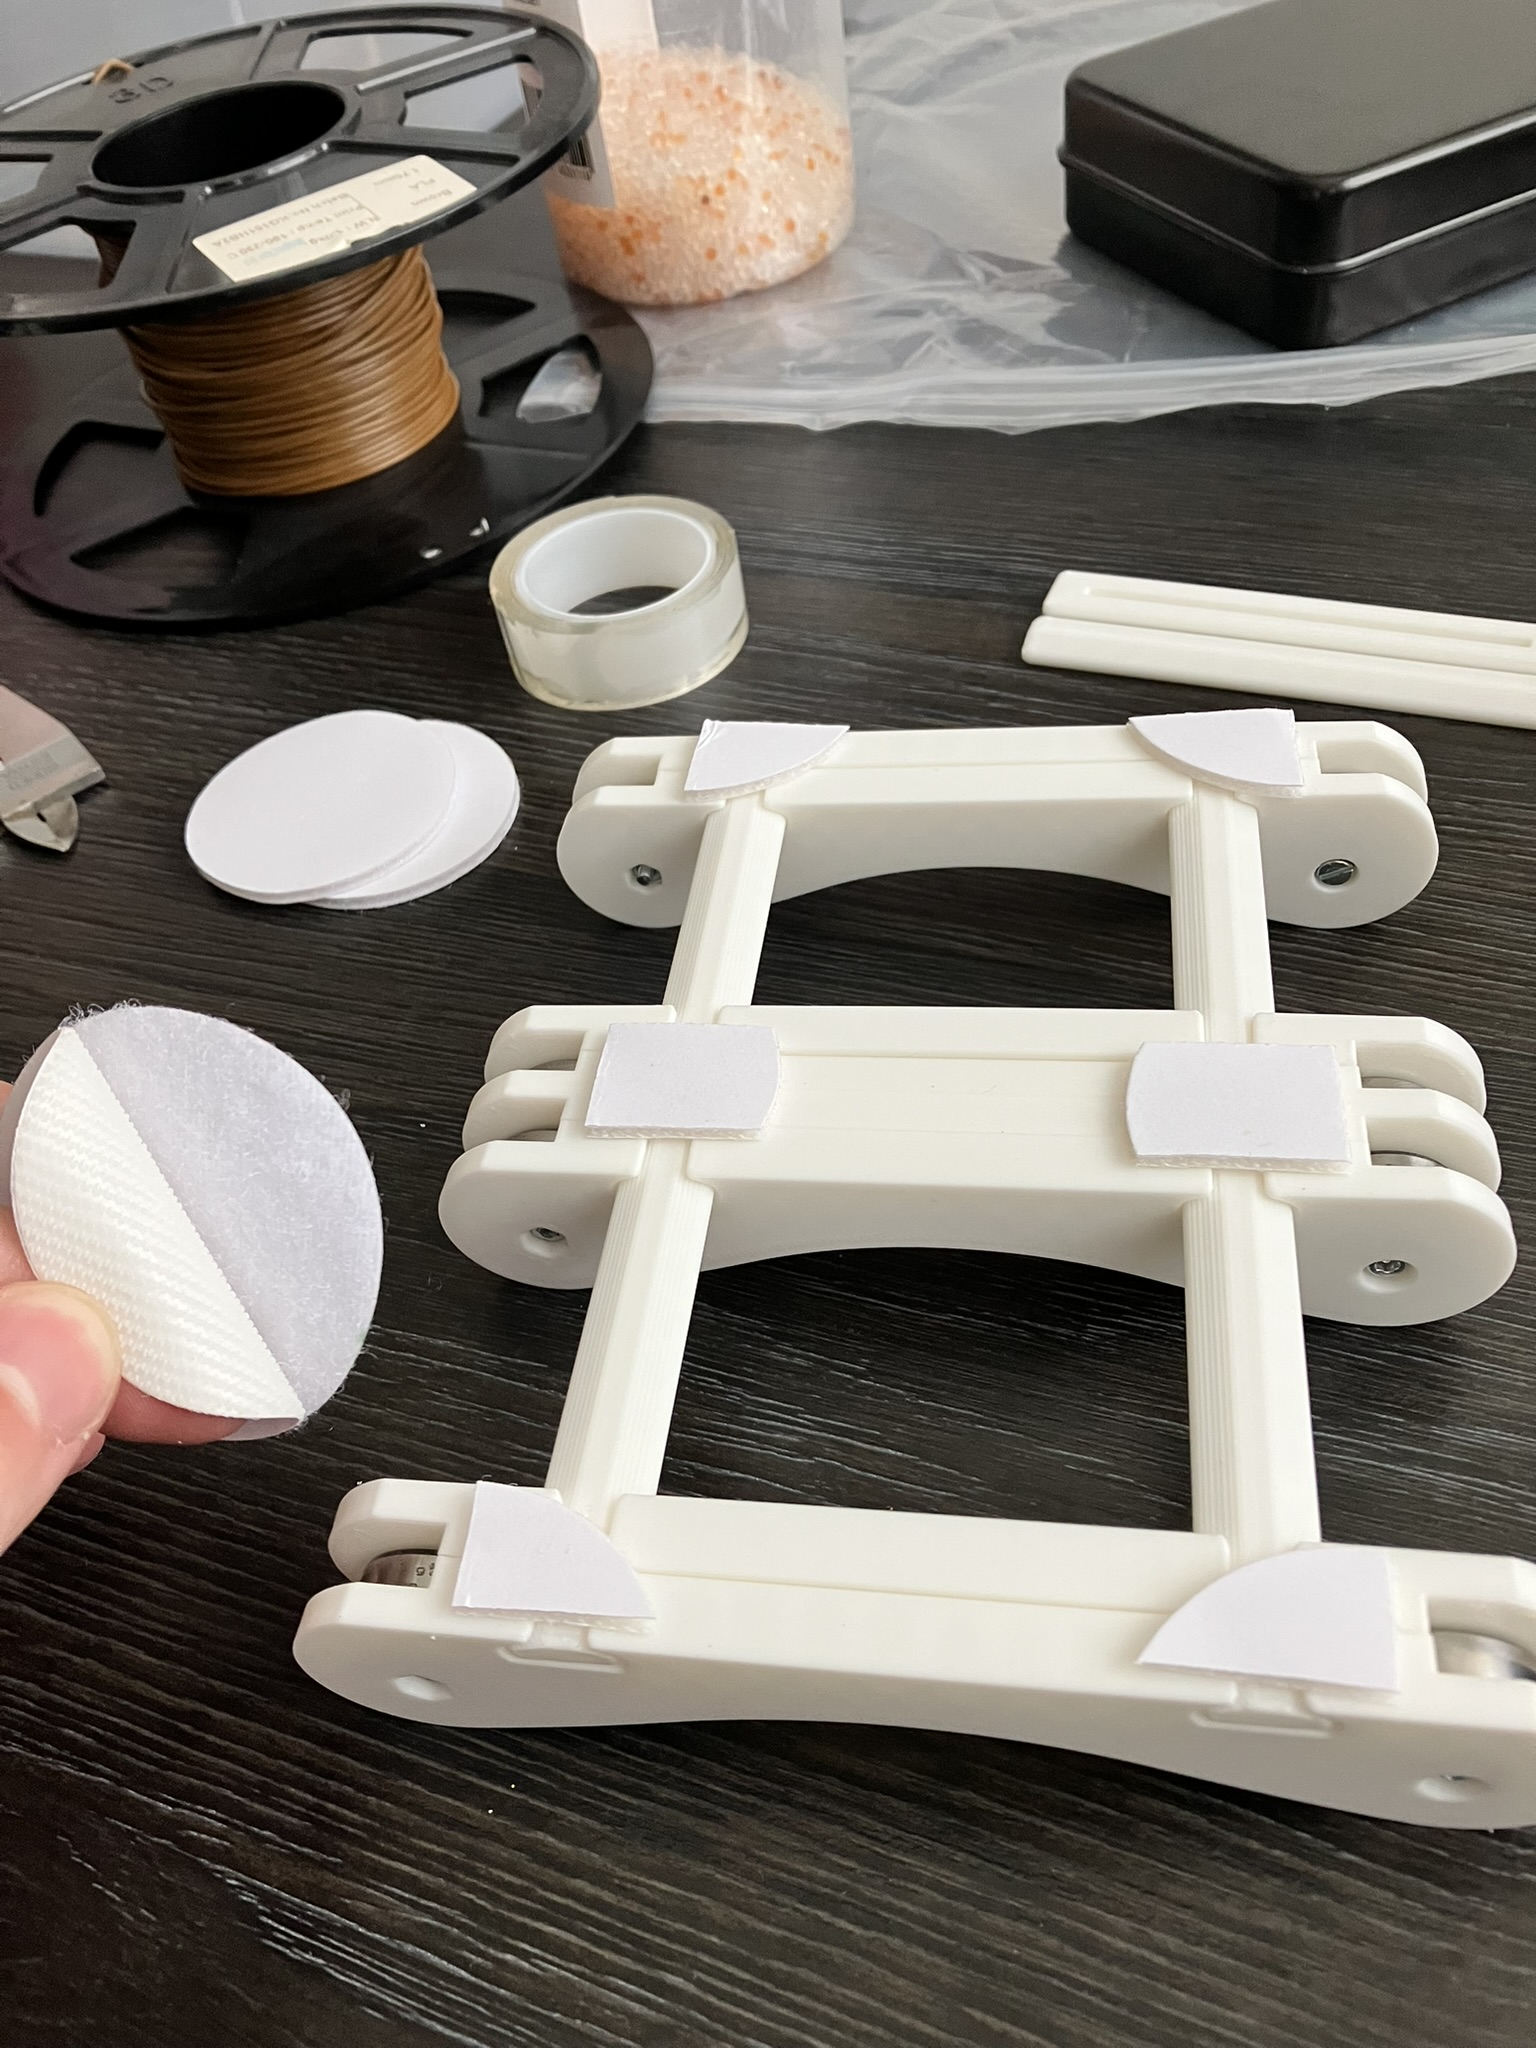
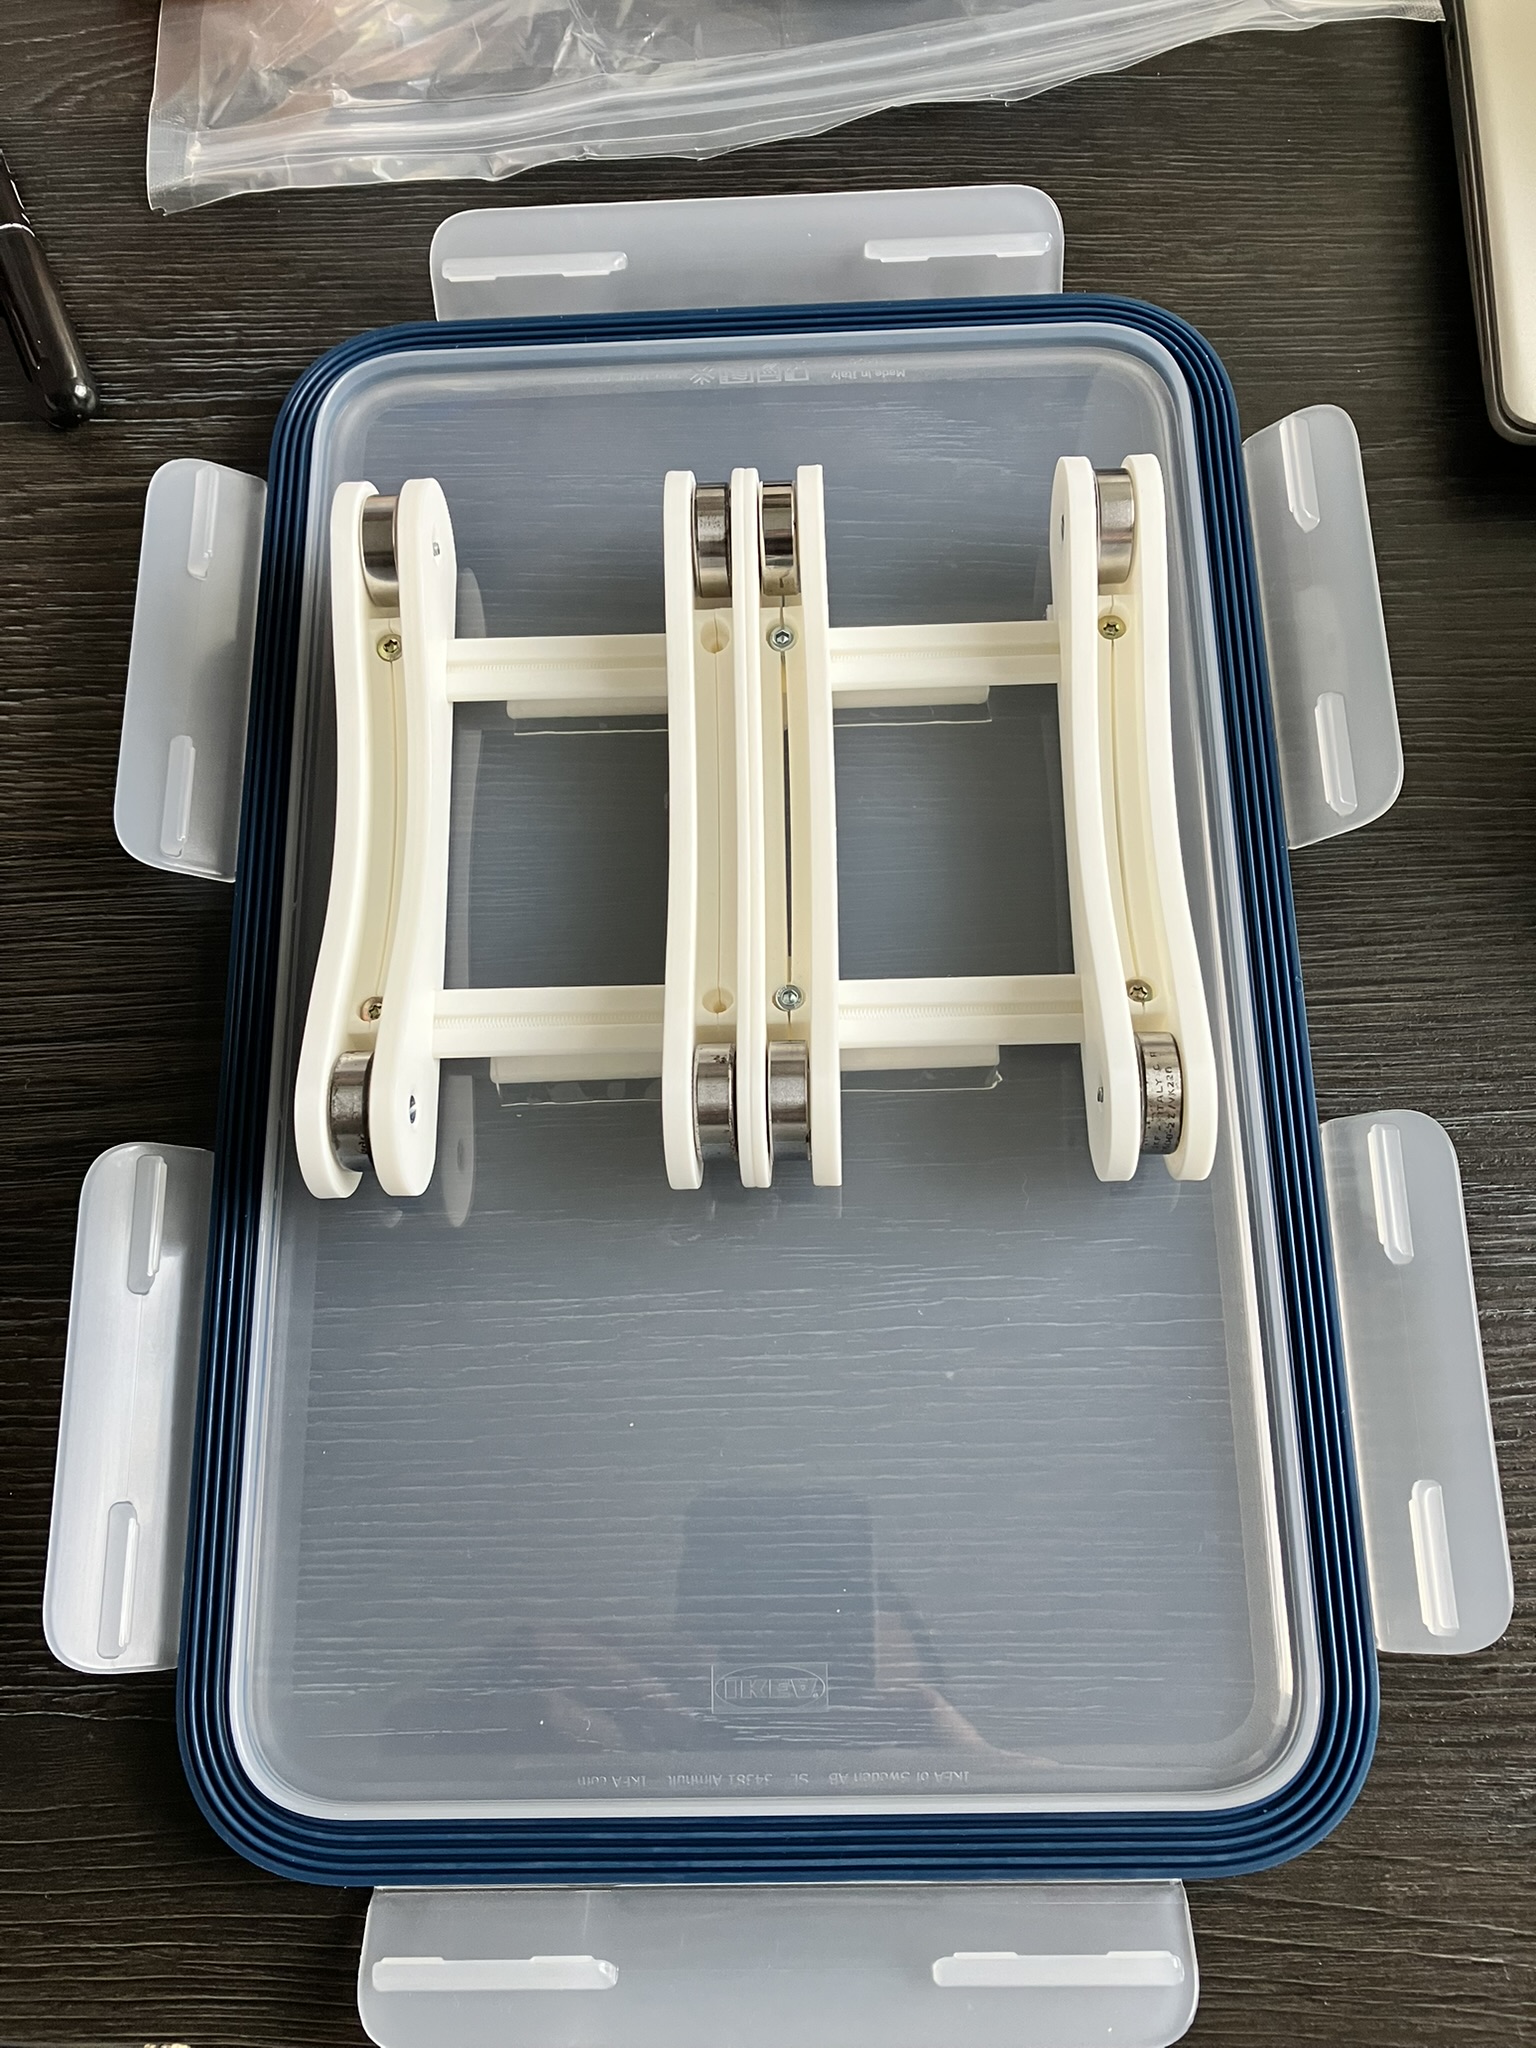
3 Step:
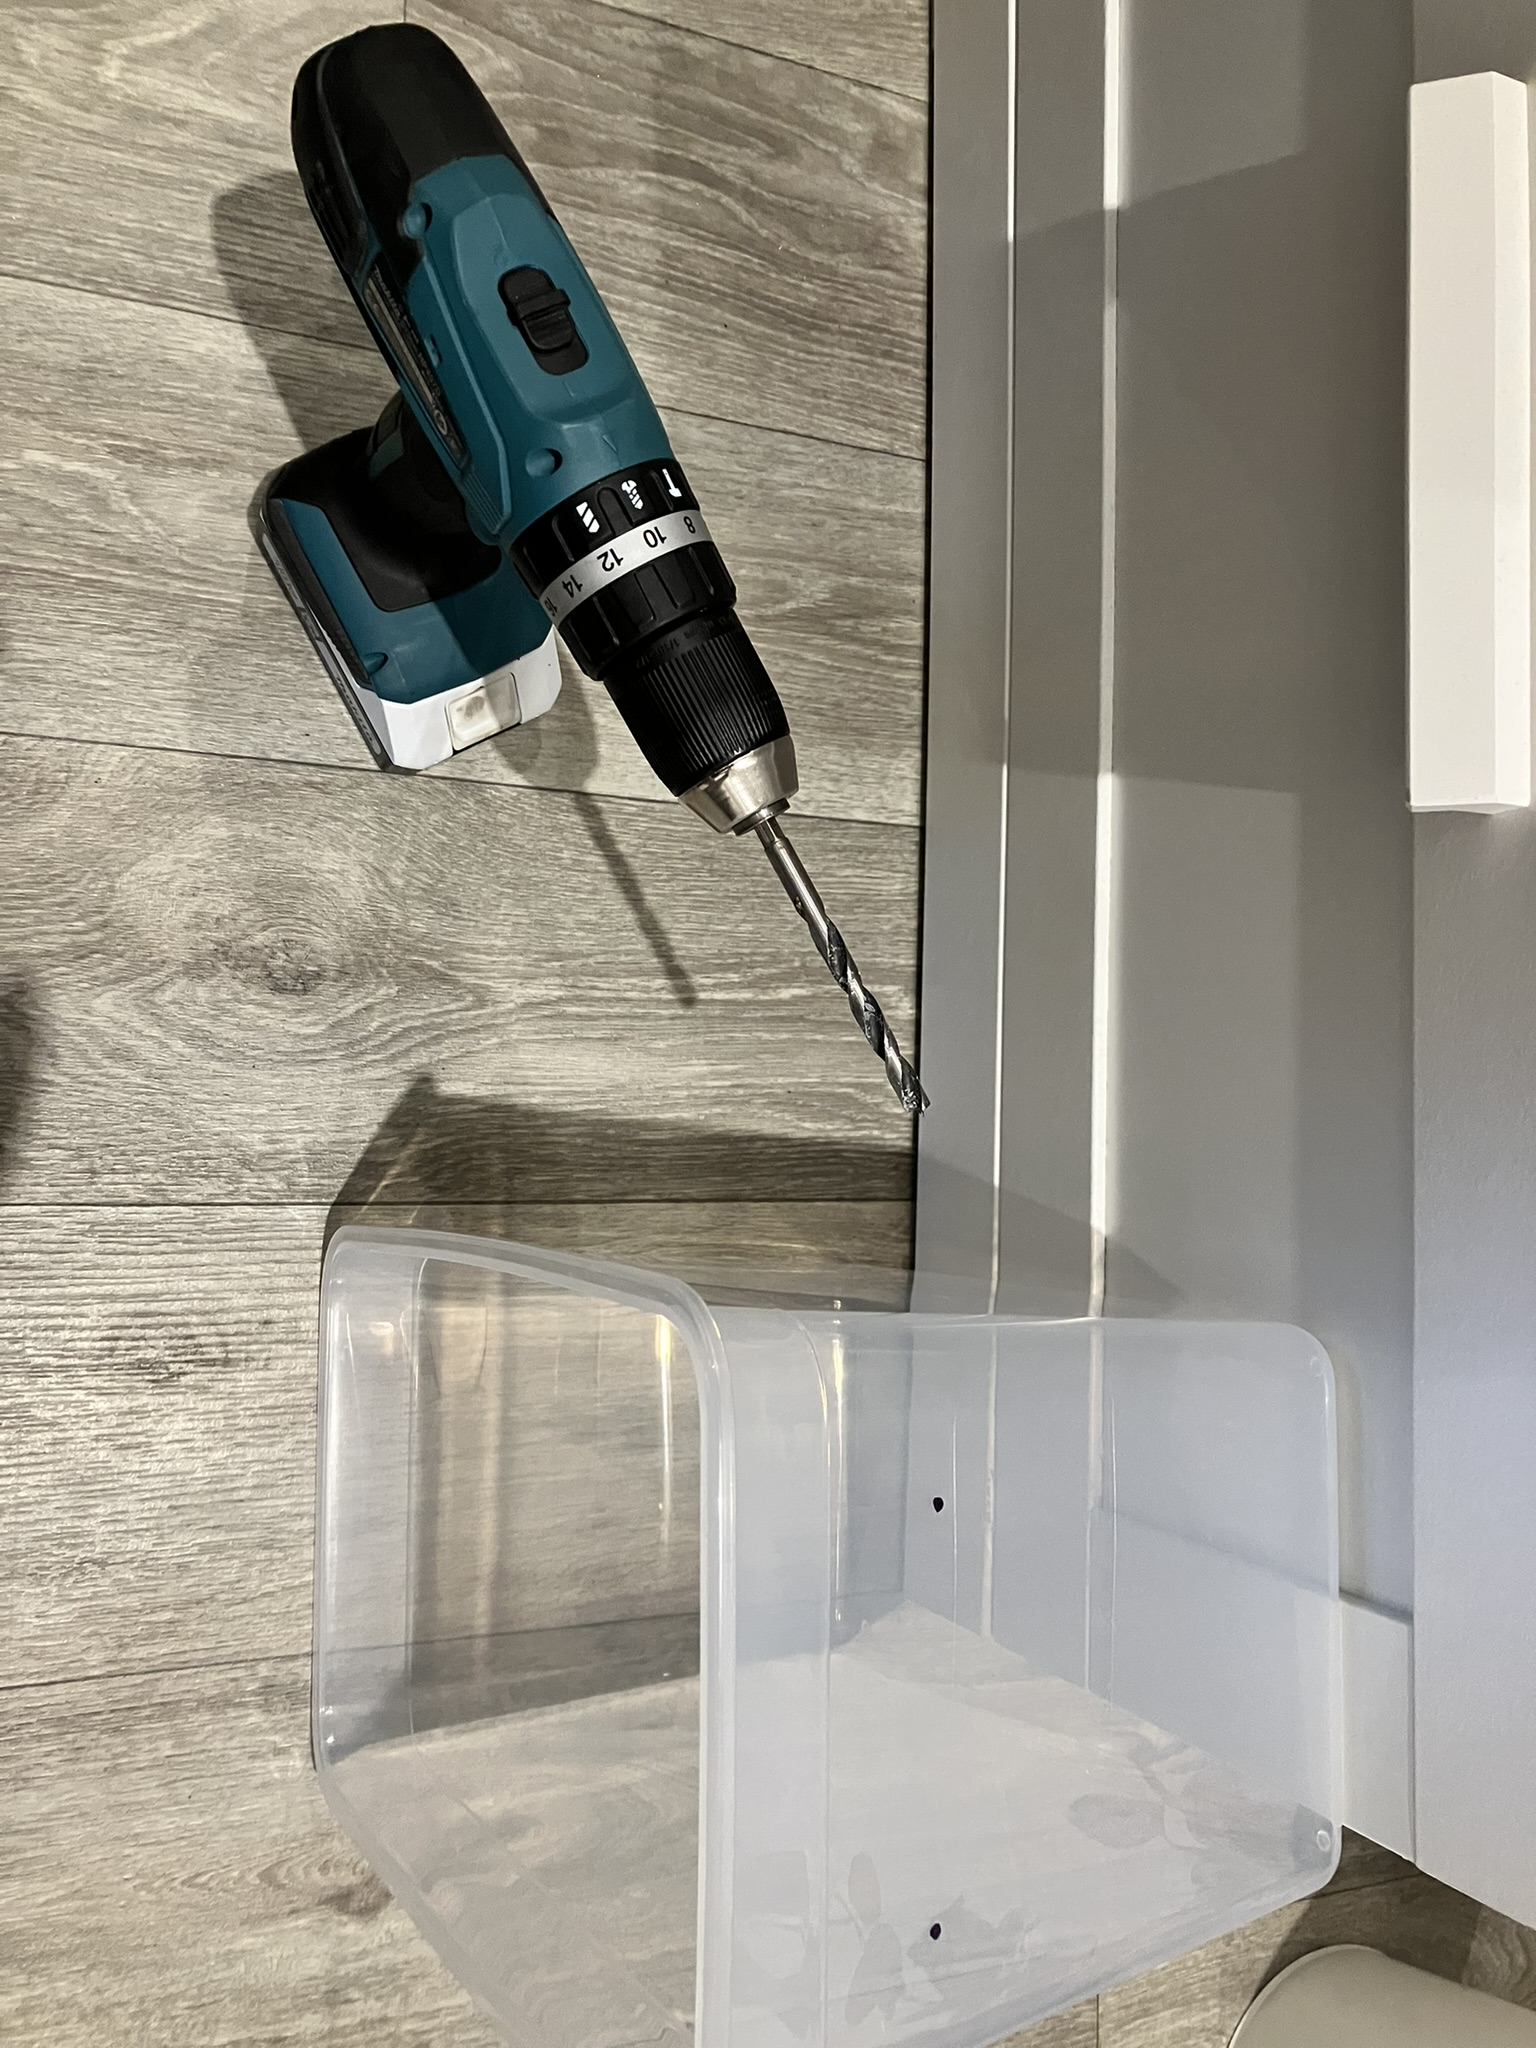
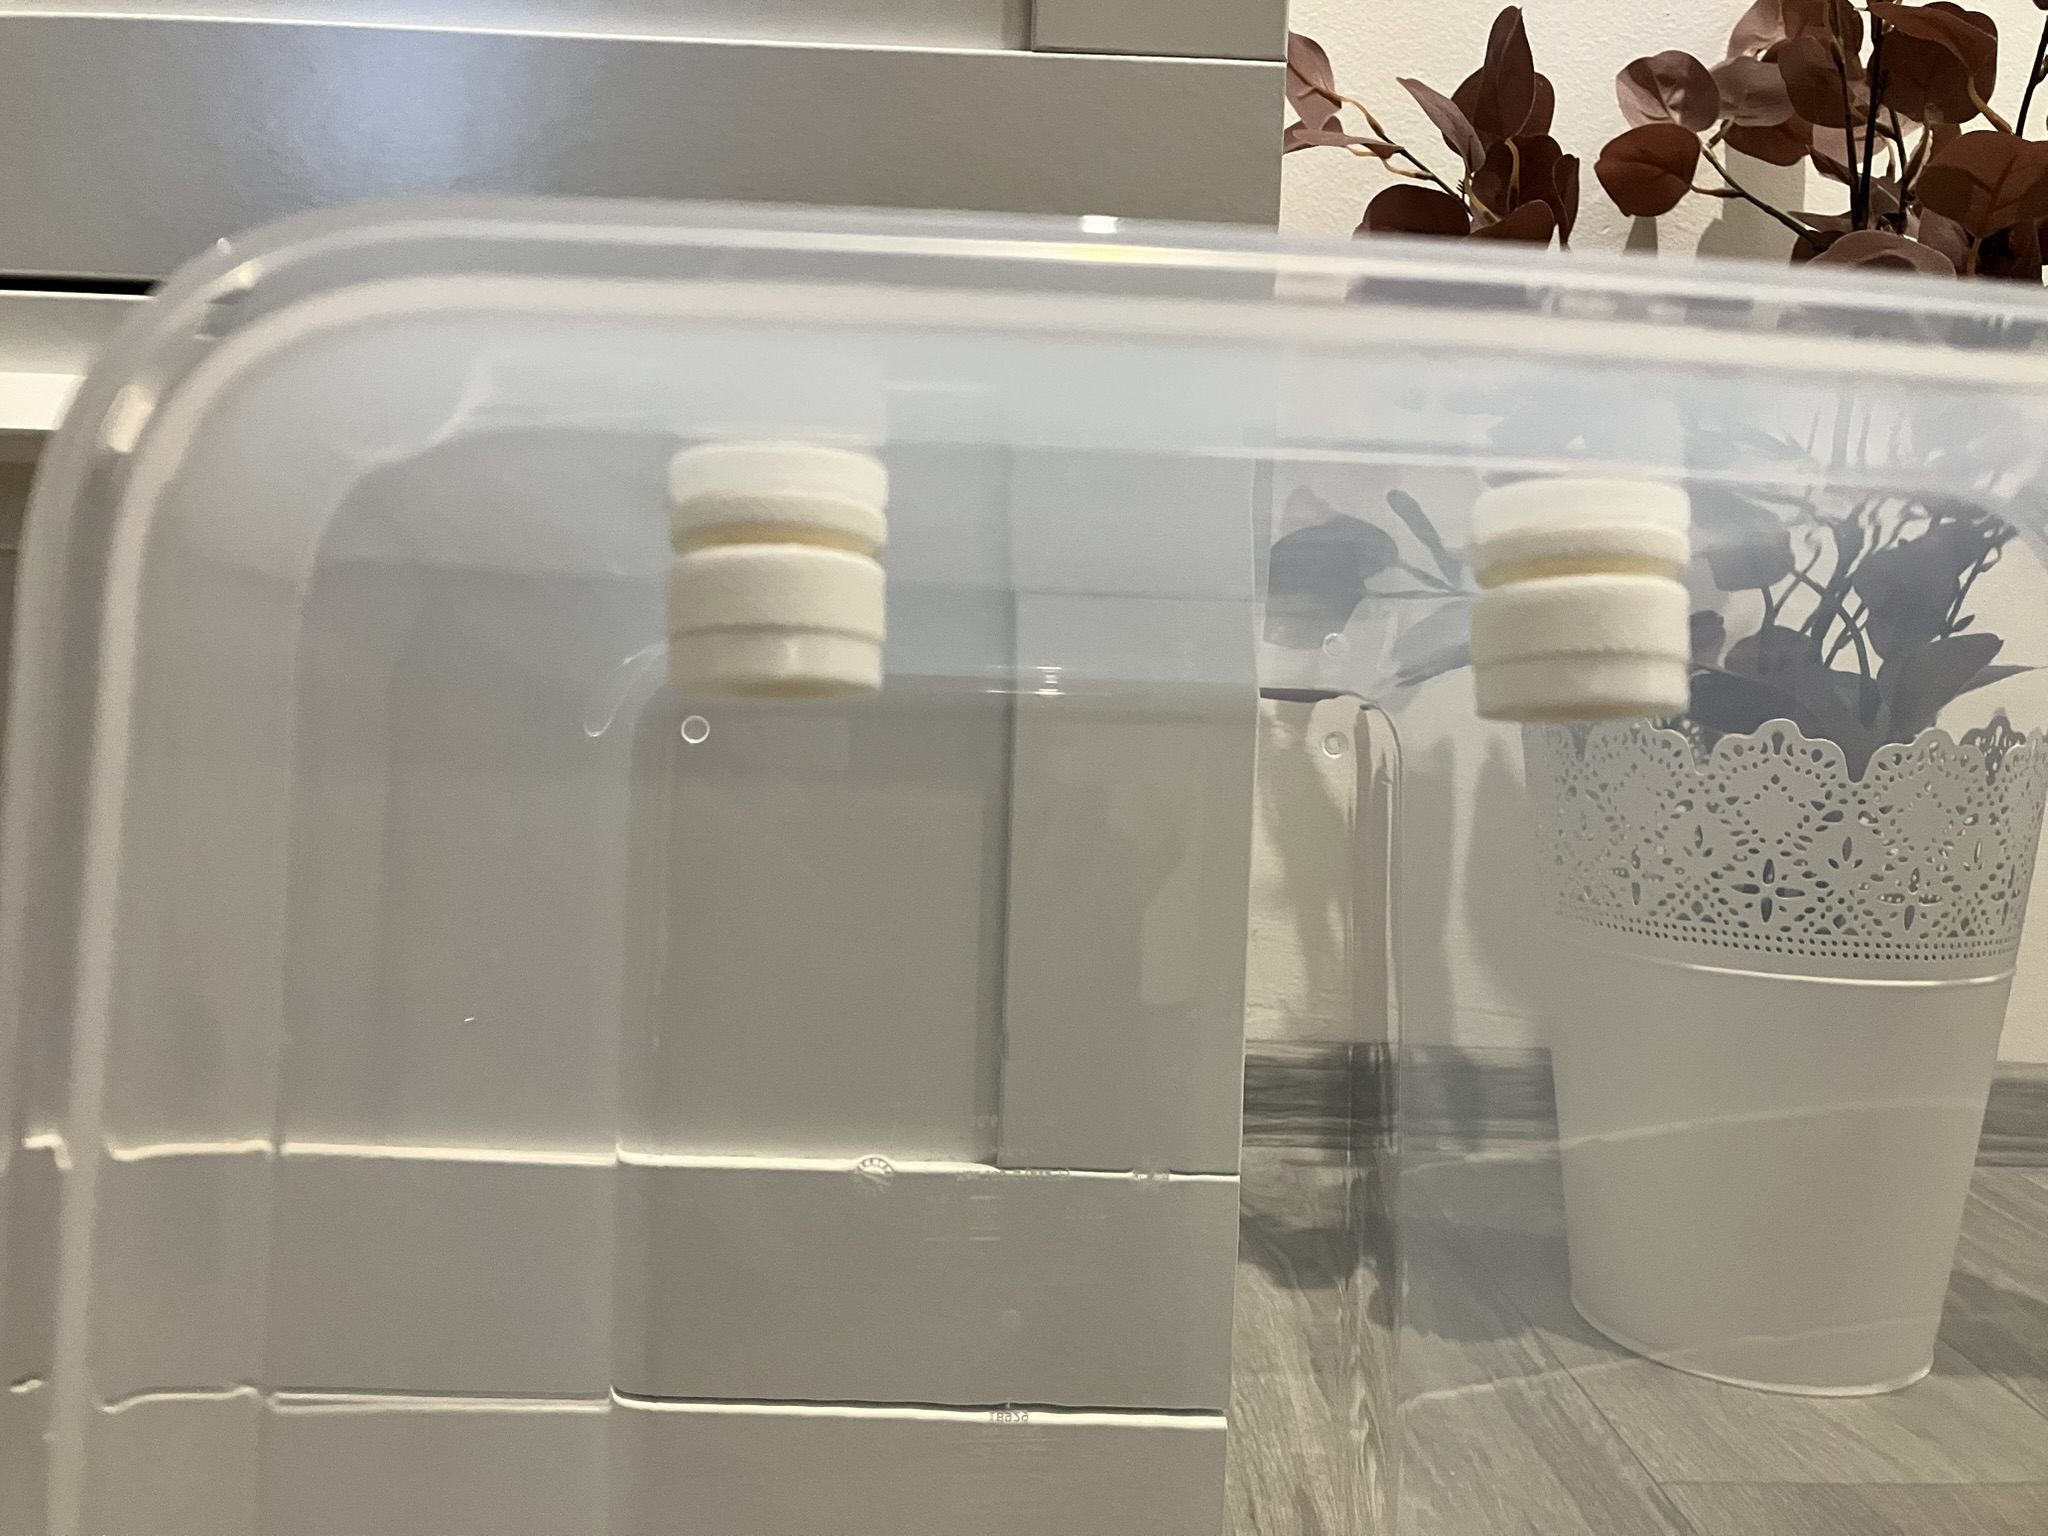
In this step, drill holes into the box using an 8 mm drill bit, approximately in the locations shown in the photo. Then, assemble two filament pass-throughs using the printed parts and insert the PTFE tubes. The tubes should extend about ¾ outward and only ¼ inward into the box.
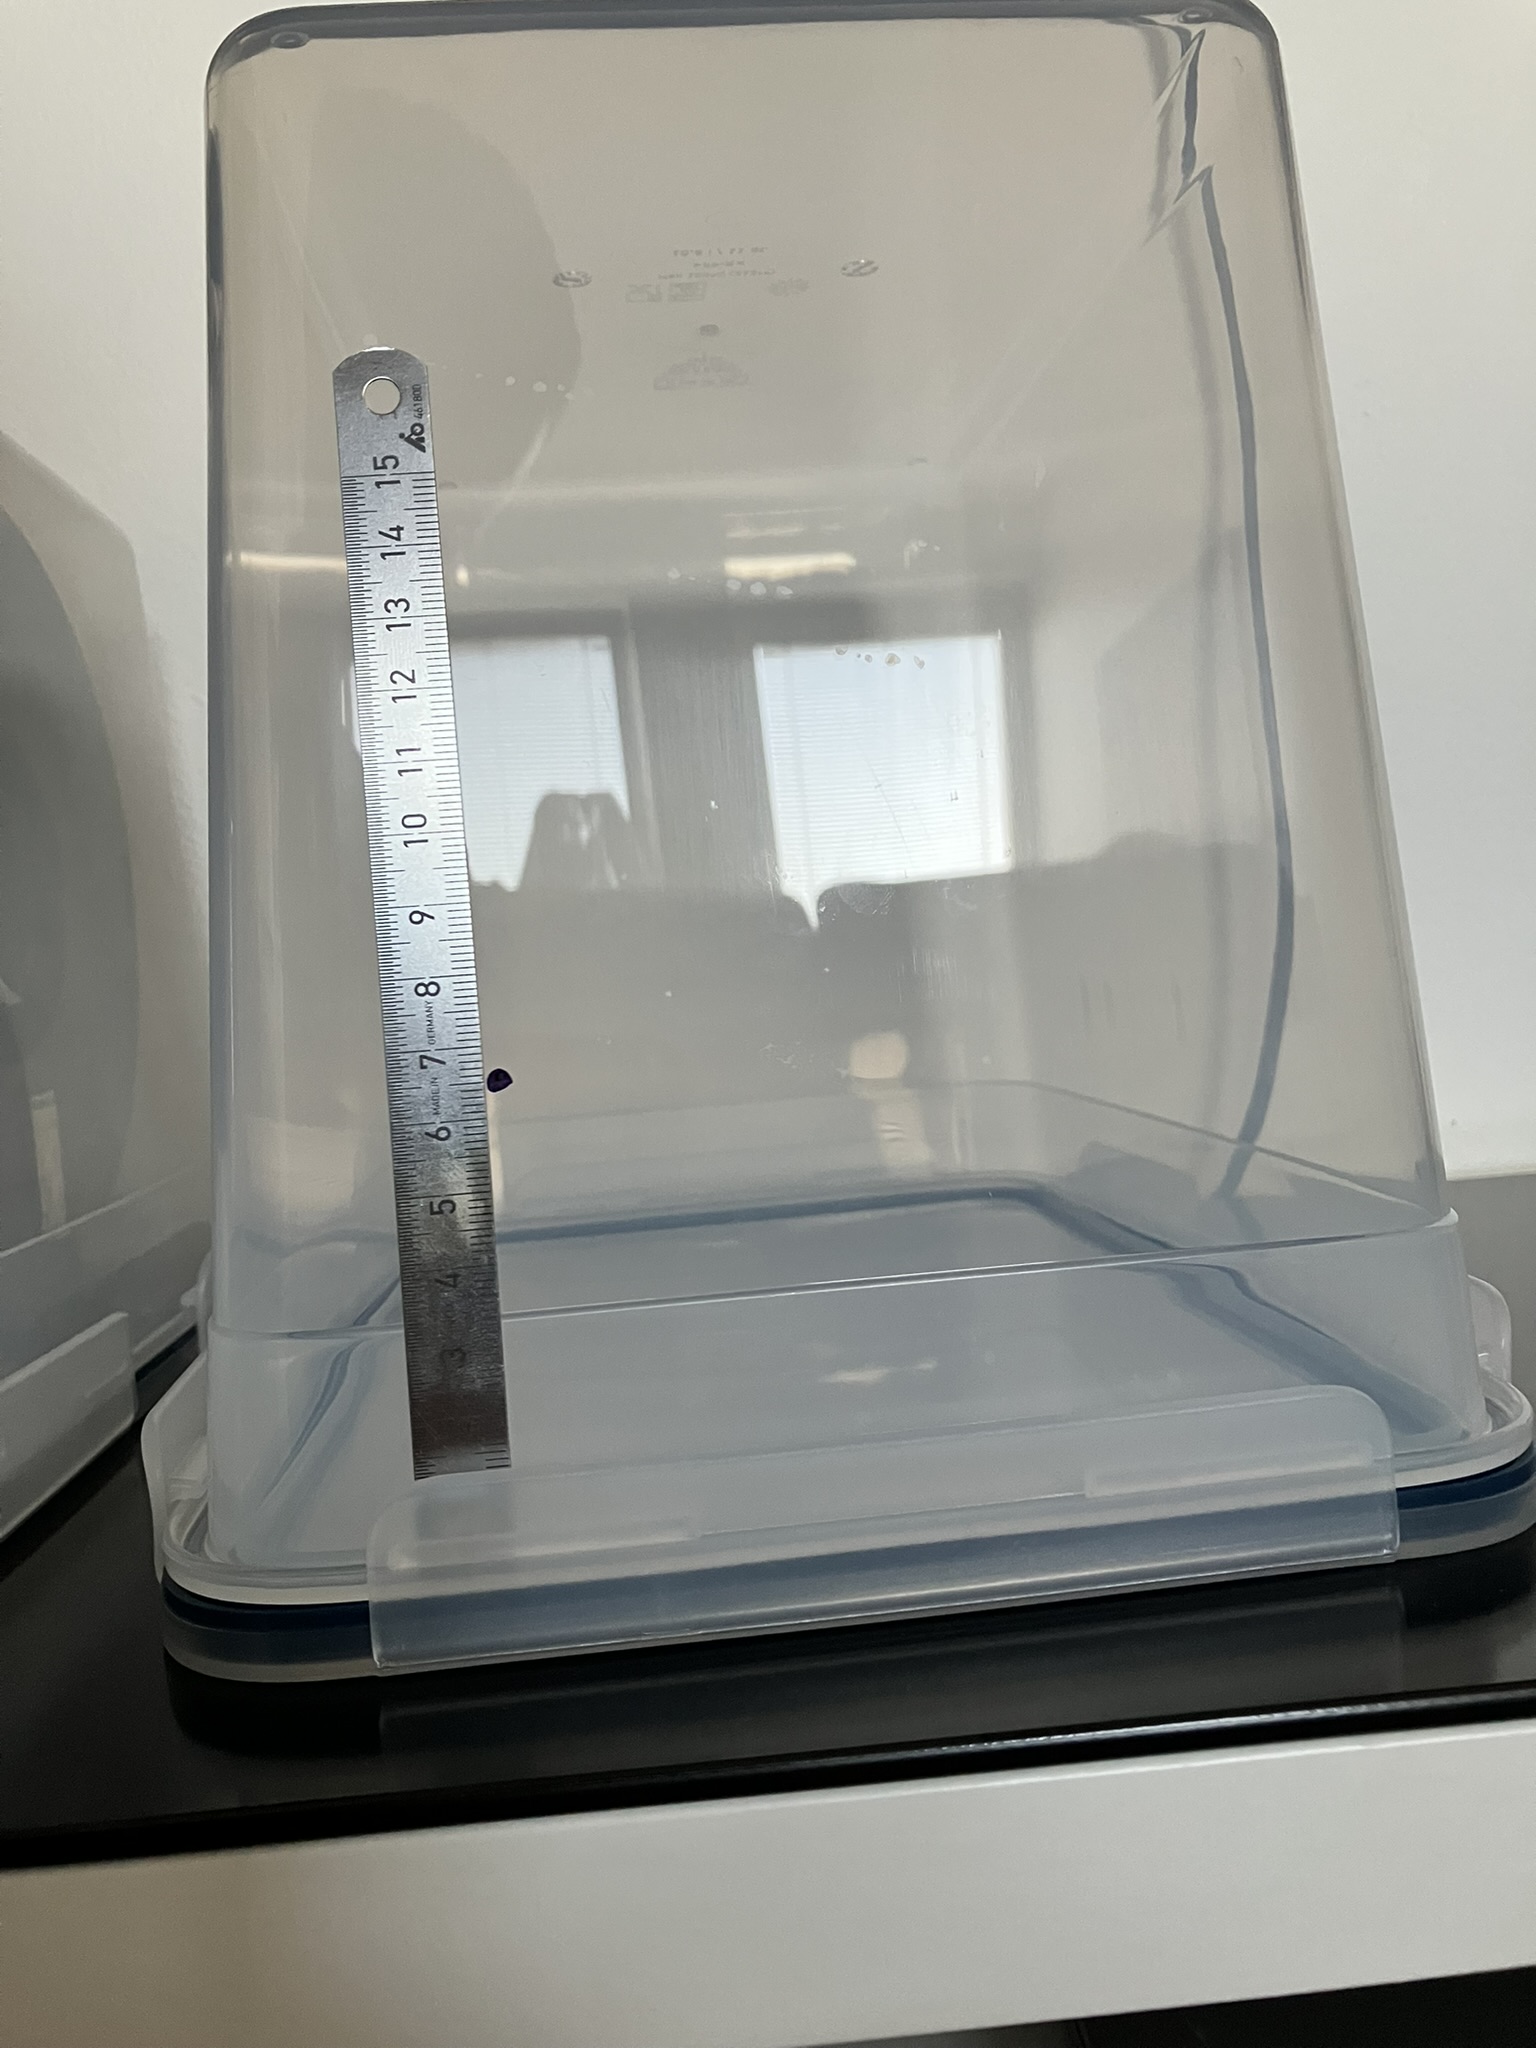
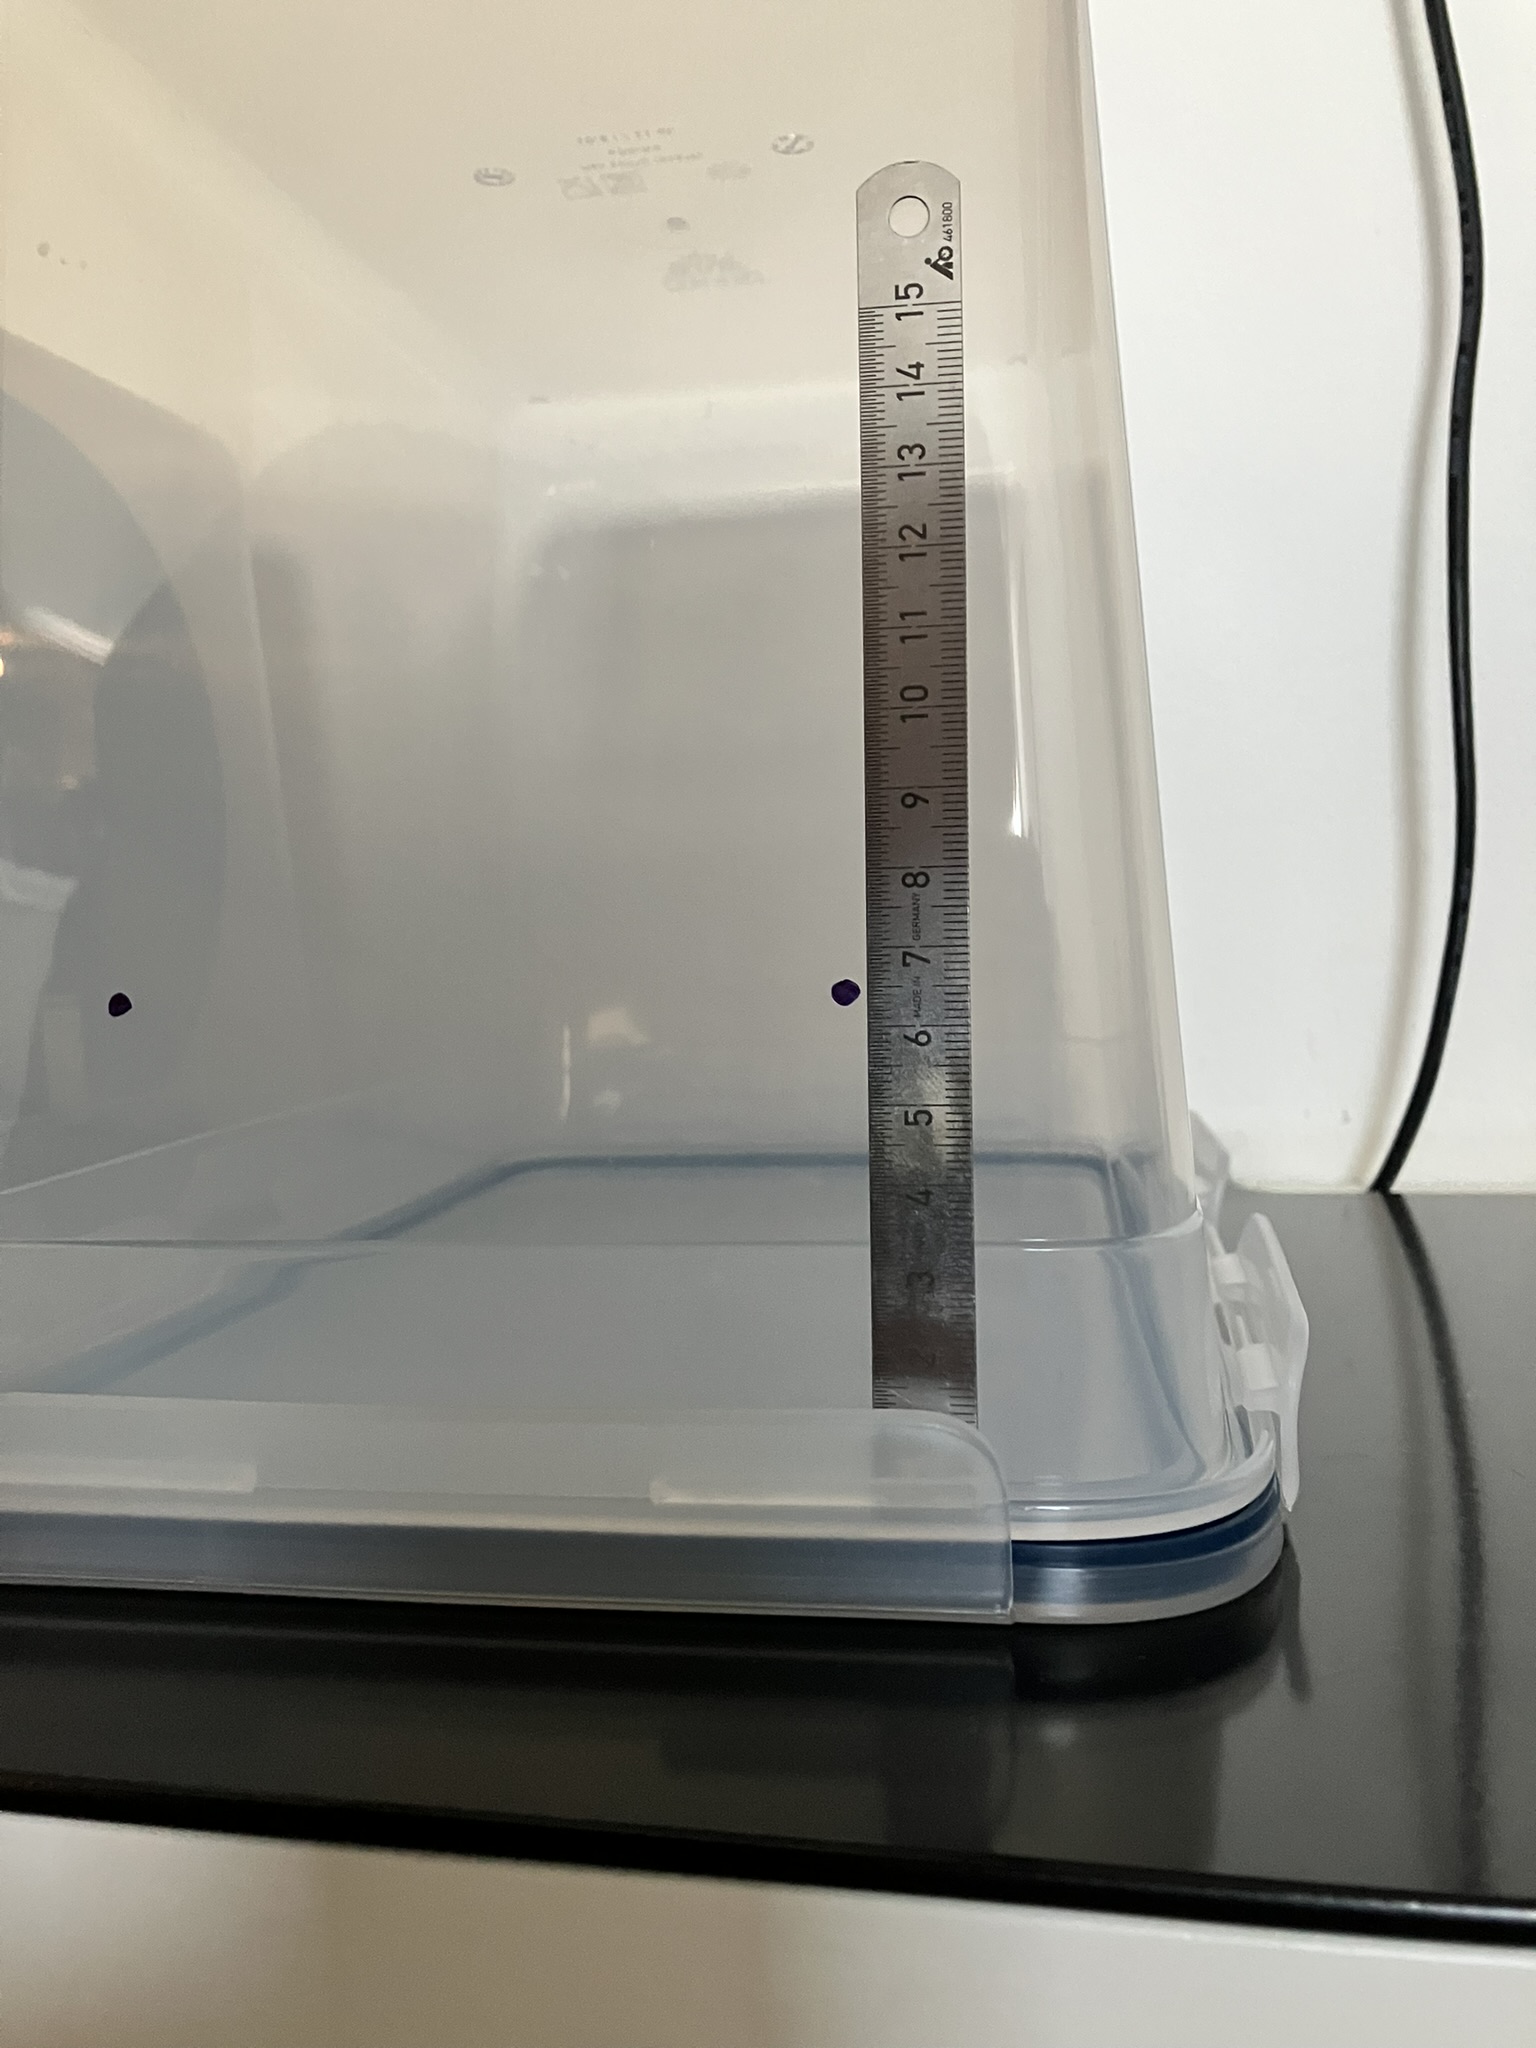
4 Step:
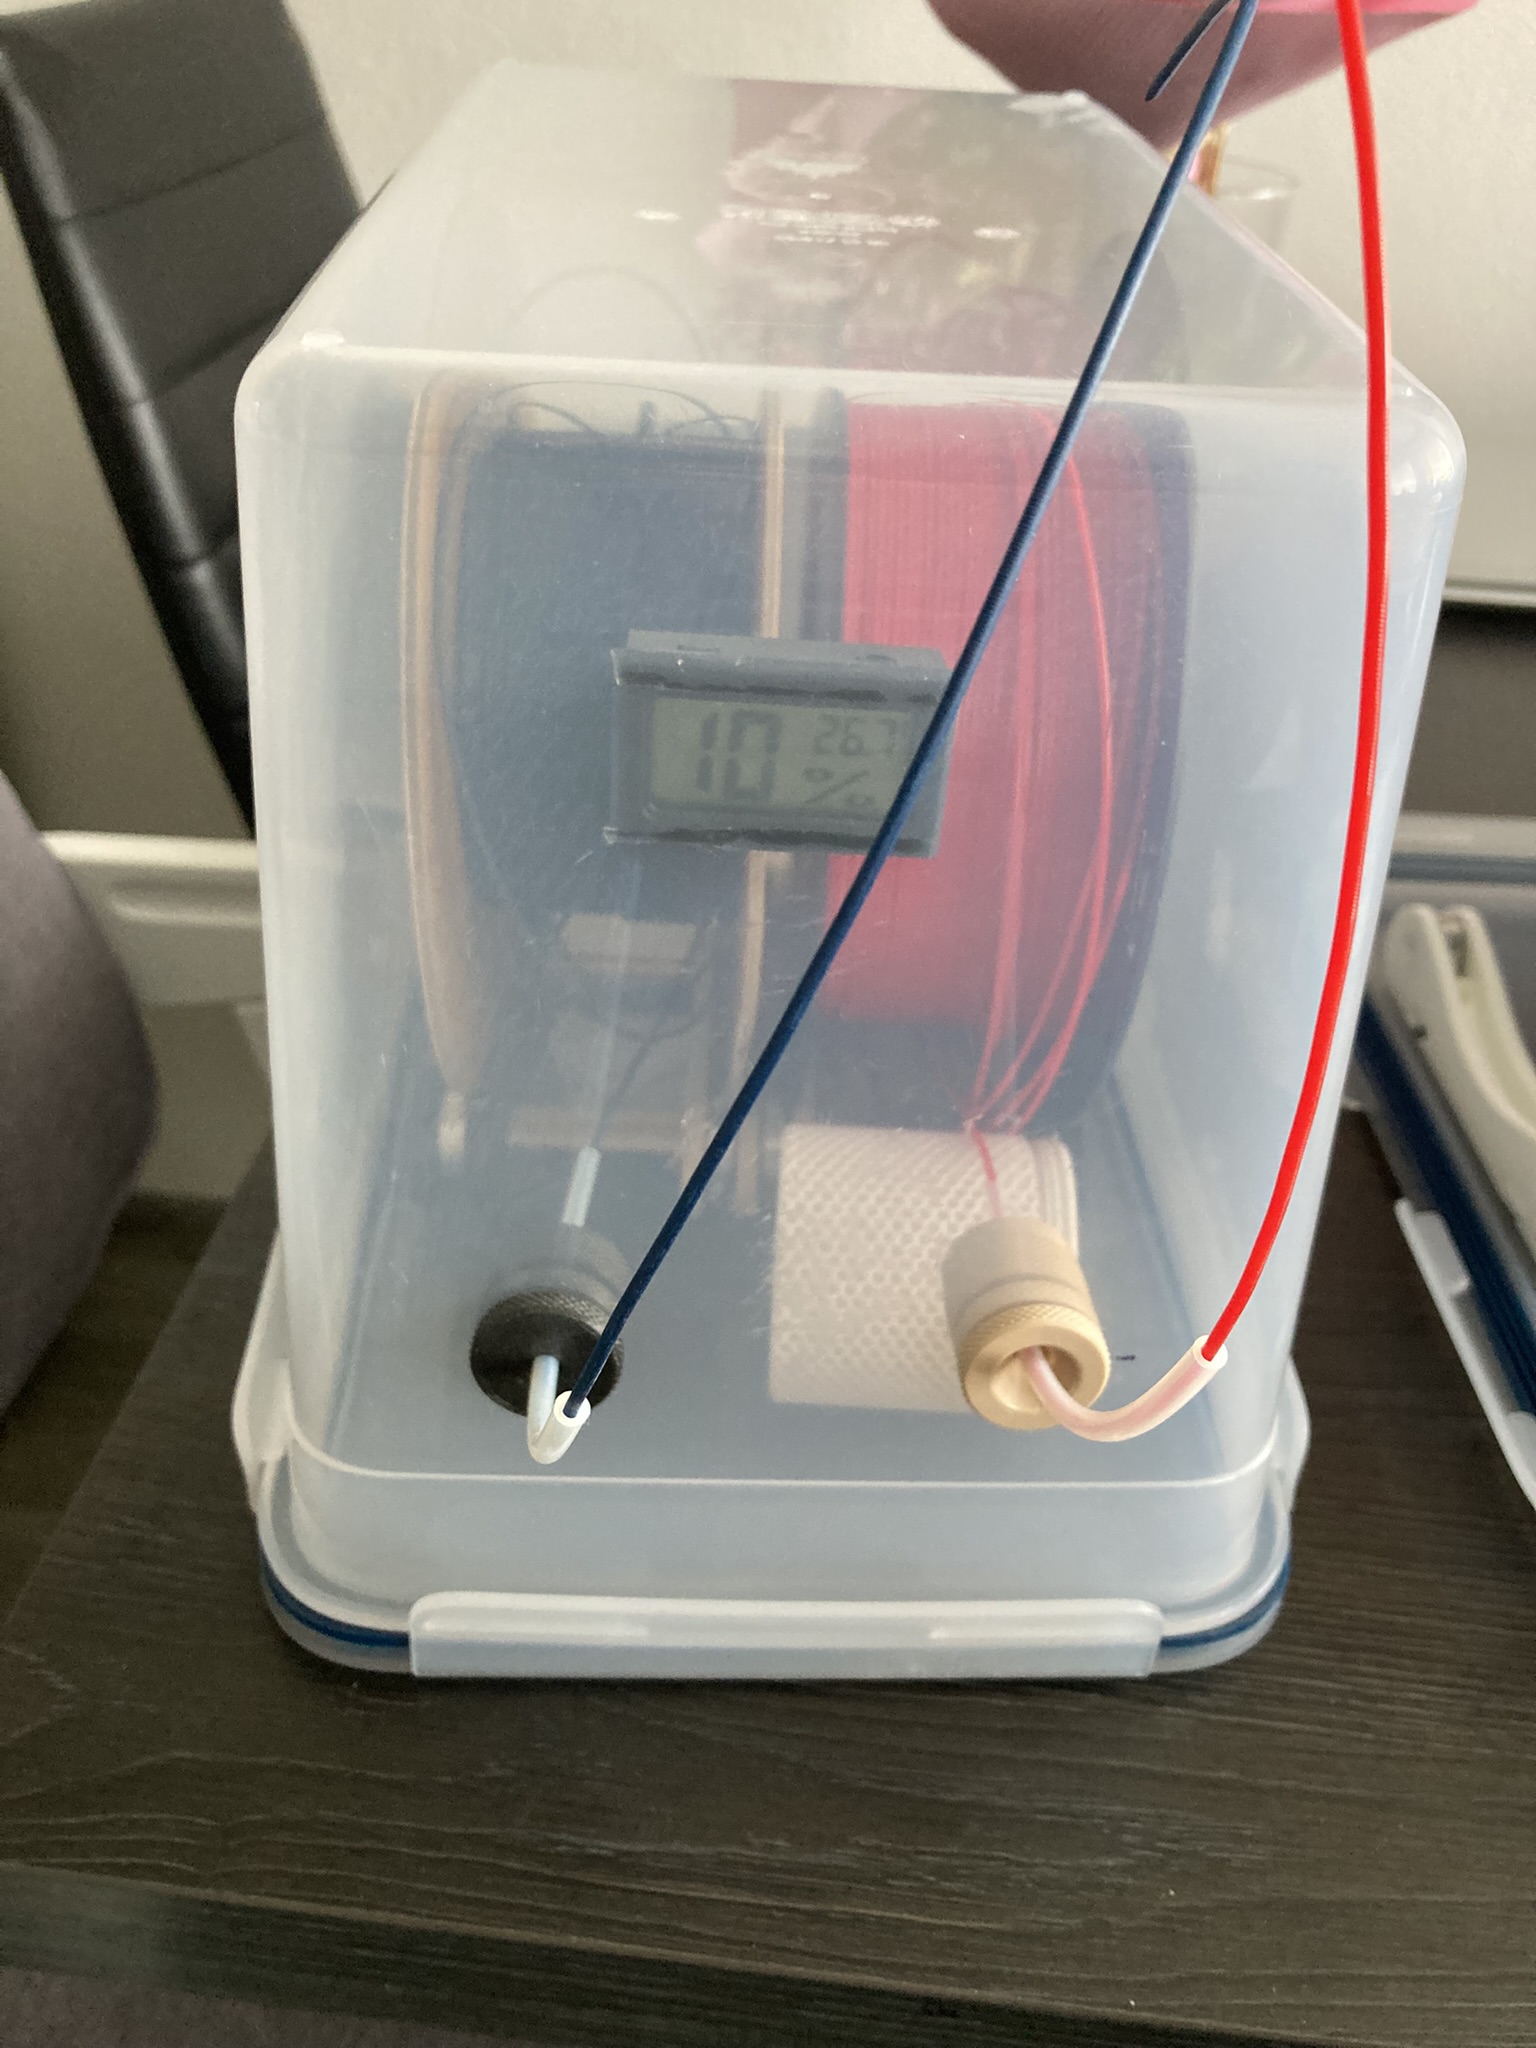
Stick the humidity meter to the inside of the box using double-sided tape. Pour silica gel into the printed container and place it freely inside the box. Insert the filament spools and guide the filament ends through the PTFE tubes to the outside. Finally, close the box—and you’re done!
Enjoy
Design by hvrkh on MakerWorld (license: BY-SA).