

French Cleat Cam Lock


French Cleat Cam Lock
- Made to order — 3D printed after you buy
- Free shipping on orders over $25
- Quality checked before it ships
- Questions? Contact us · Returns
Edit (Sept 2025):
“french-cleat-cam-lock-v16--metric.f3d” can be customized with Maker World's Parametric Model Maker.
- Use the ‘Customize’ button above.
- This system allows you to customize the model by editing dimensional parameters
- This system doesn't seem to allow parameters with mixed units. i.e. inches. The base unit of my model is mm, but I also had parameters specified in inches which Fusion 360 allows. So I converted all measurements to metric to make it compatible. If you want to enter measurements in imperial/inches, convert them to mm and enter that.
---------------------
This is to lock down items on a french cleat hanging system, which is a modular system often used in garages and other spaces to hang things on a wall. Items hung on french cleats can easily be moved by simply lifting them, but there lies a problem … they are also easy to knock off a wall.
There are many french cleat locking solutions out there, and I highly recommend looking at them and going with a simpler approach if that suits you. I list resources below.
This lock operates as a handle that you turn clockwise to lock. On the back is a cam, which engages with the underside of the cleat on the wall. Since is it a cam, it tightens and locks the item with no play.
The reason I designed my own:
- I wanted something that tightens and removes any play. Many other locking solutions don't do this, so while you can't knock an item off the wall with them, it will still rattle.
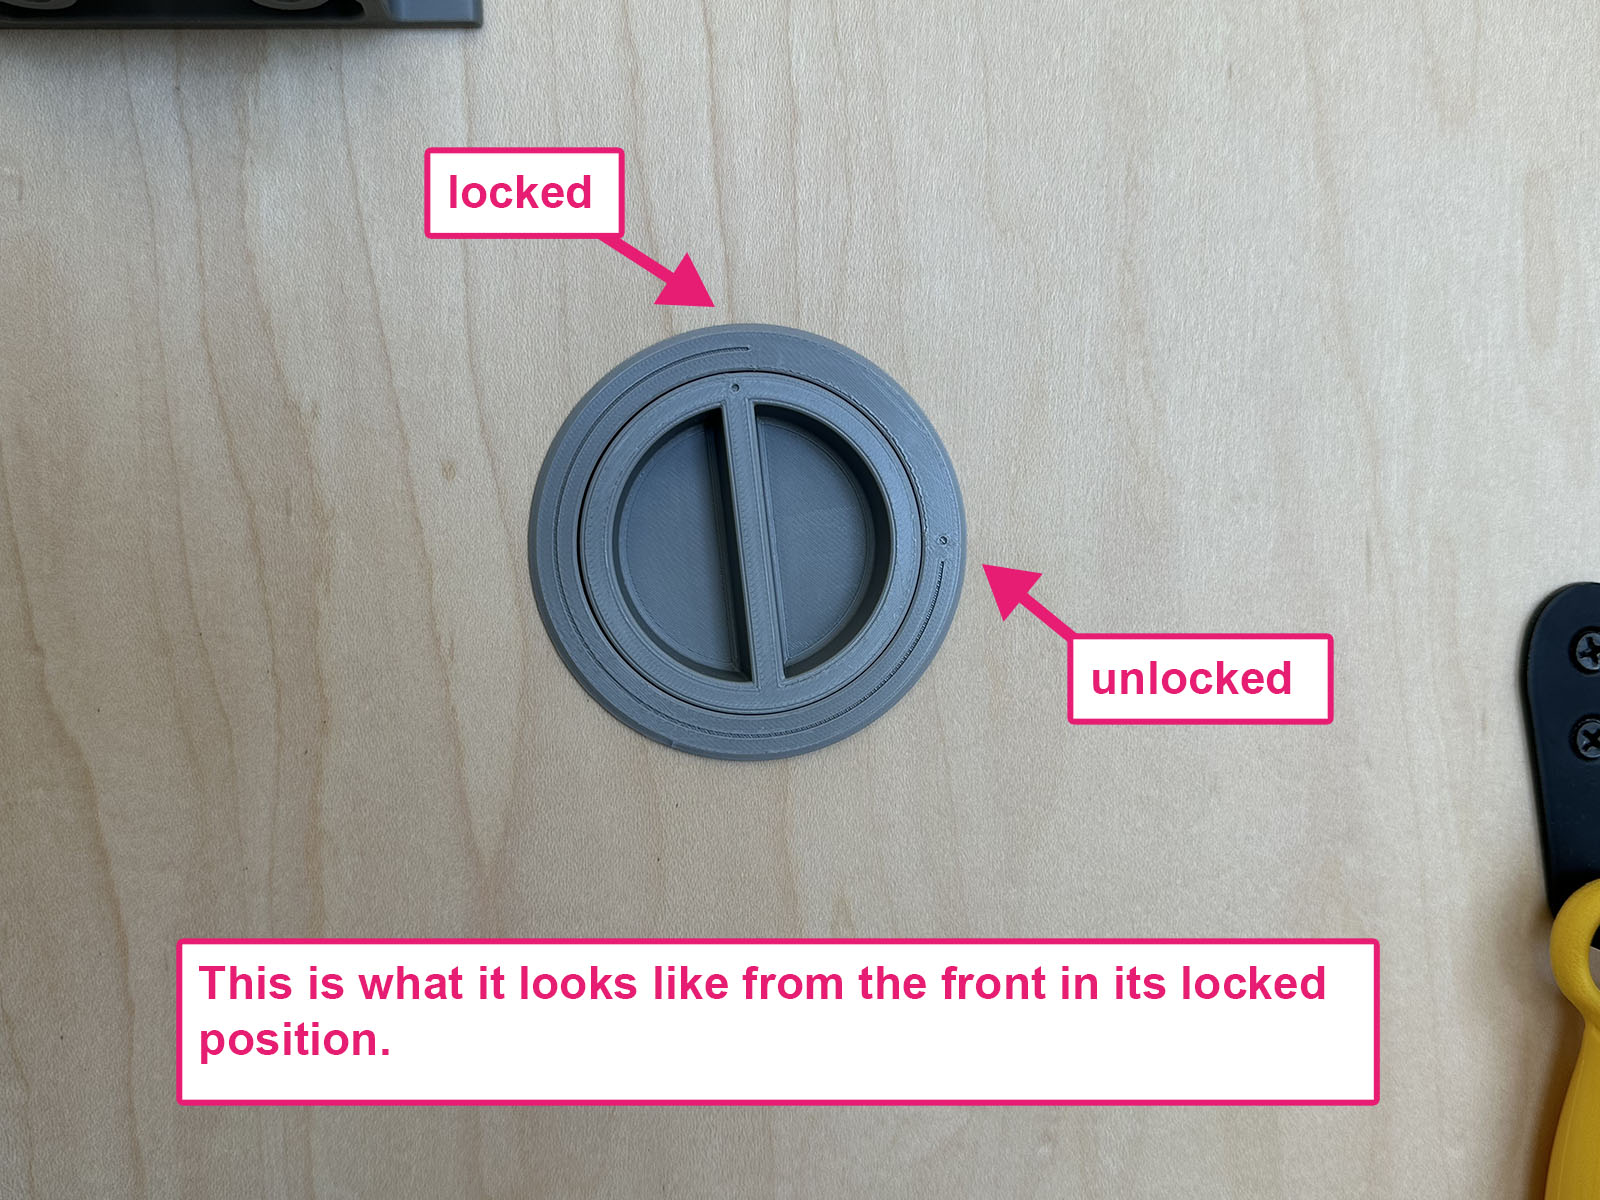
- I wanted something that is accessible and discoverable from the front, so its easy for anyone to remove an item. Many other locking solutions require side access or are hidden from behind.
- I wanted something that is fully integrated and avoid any loose bits that fall off the wall etc.
- I wanted the final product to look good.
- Easy to print and strong. No supports, no breaking at the layer lines.
AFAIK, no other locking mechanism has all of these.
Note: my design is heavily inspired by Milgaco's cam lock. Milgaco has a video on thingiverse that shows how his cam lock operates. Check that out, it explains how this works. My design is similar:
- https://www.thingiverse.com/thing:4679740
- https://www.printables.com/model/225733-french-cleat-cam-lock
Check out other ways to lock french cleats. Most are simpler and may be better for you: https://www.youtube.com/results?search_query=french+cleat+lock
Details:
The model comes as 4 pieces.
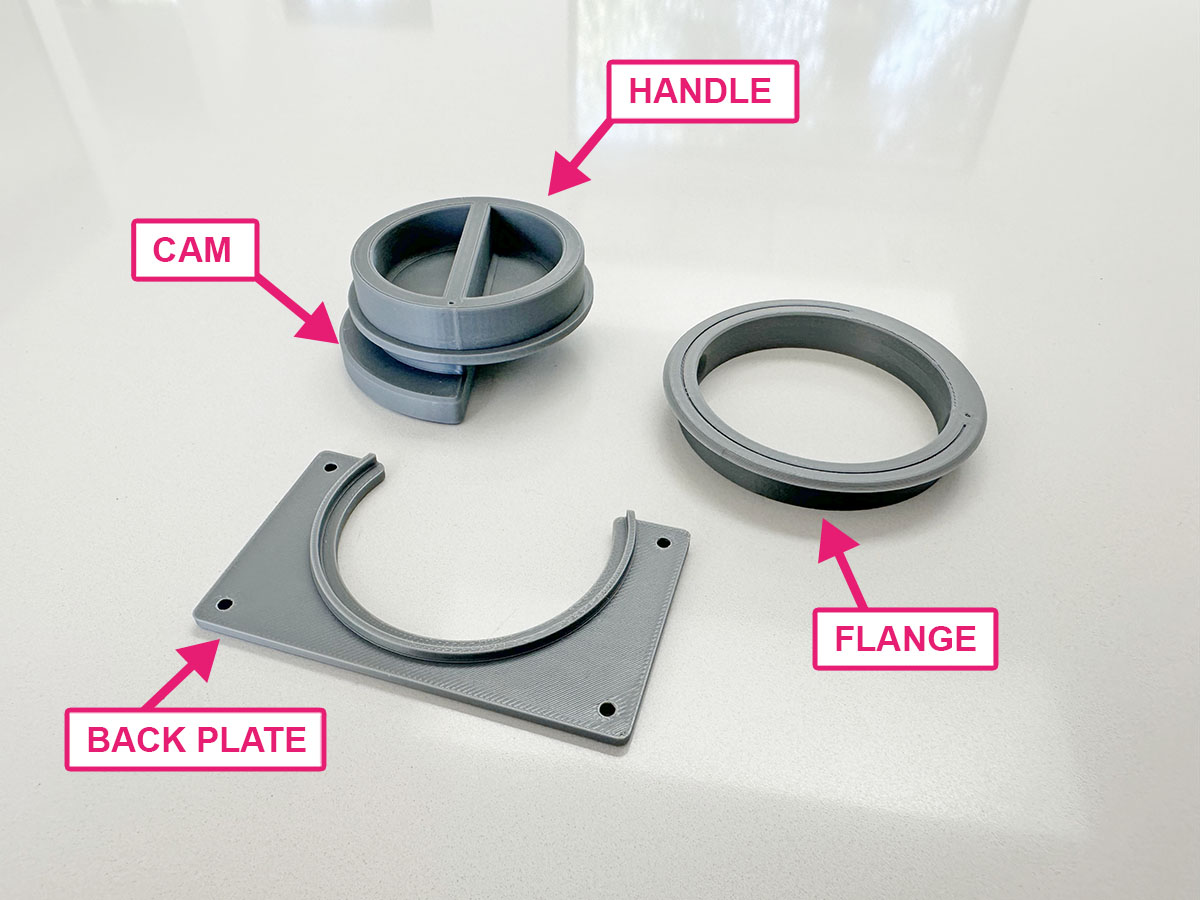
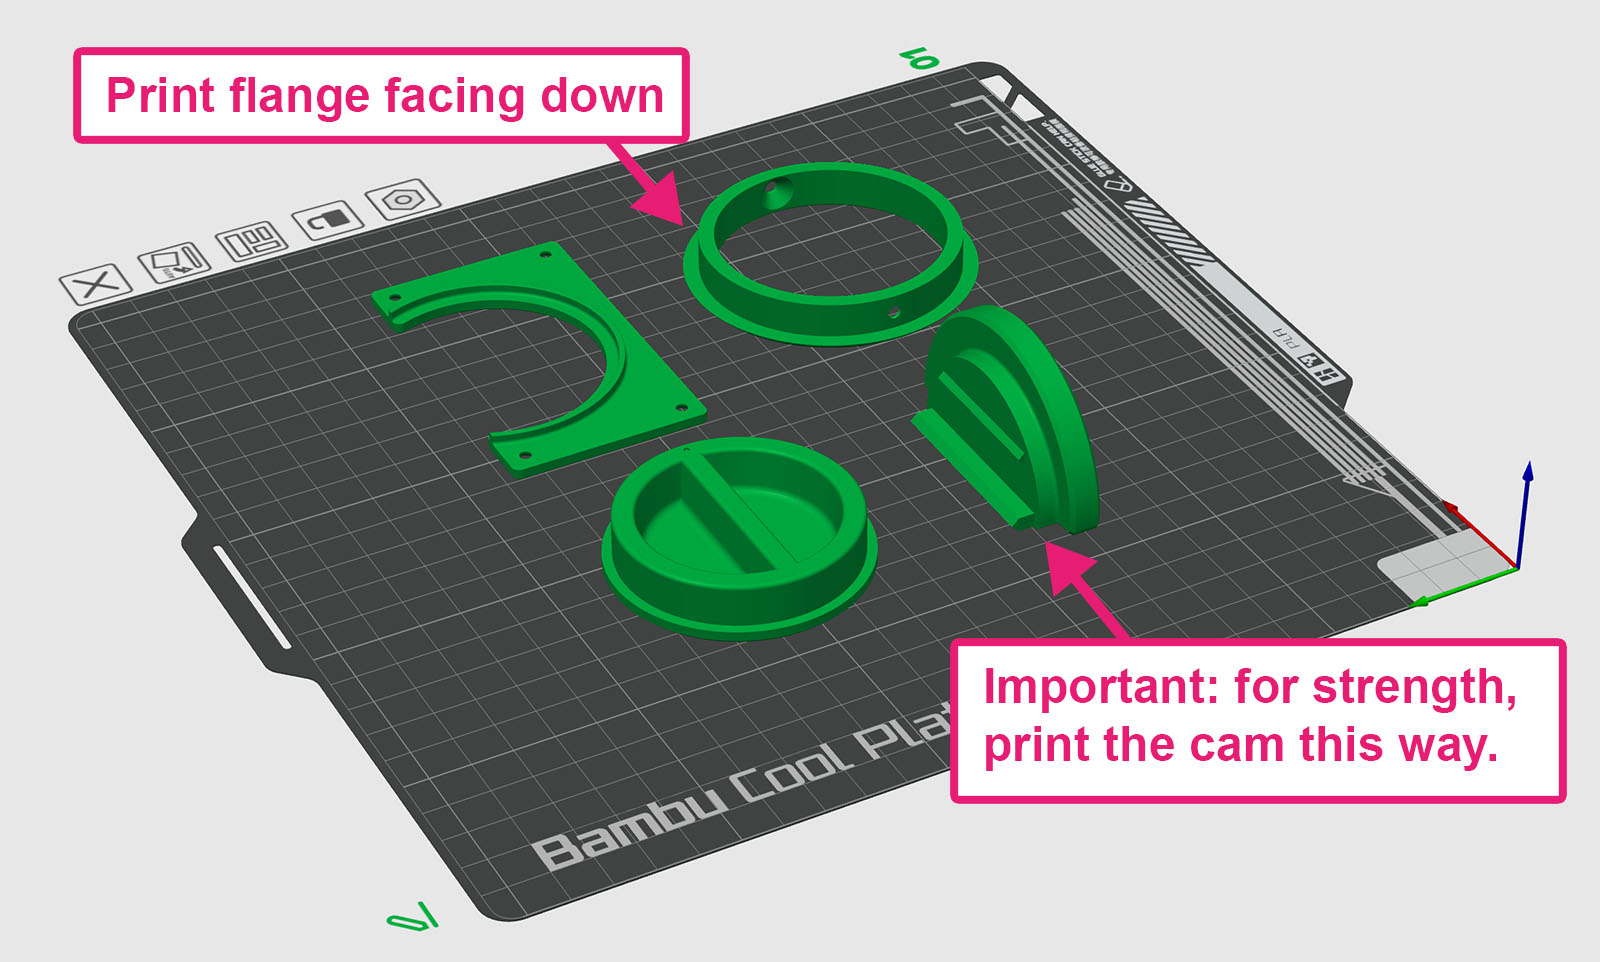
1. Separate the pieces and print in this orientation. Stress is applied to the handle and cam so print these with more wall loops and higher/stronger infill. No supports are needed.
2. The cam and handle are keyed to fit together. Use a little bit of CA glue in the mortices to permanently join them as pictured above.
3. Using a hole saw, drill a large hole into your piece so the top of the hole is about ¼" under the underside of a french cleat once it is mounted. It doesn't need to be precise - just as long as the cam engages. See end for hole sizing.
4. Secure the flange. This is tricky if you do it with tiny screws like I did. You'll need something like a Dewalt Maxfit Right Angle Attachment. You can alternatively use adhesive for this.
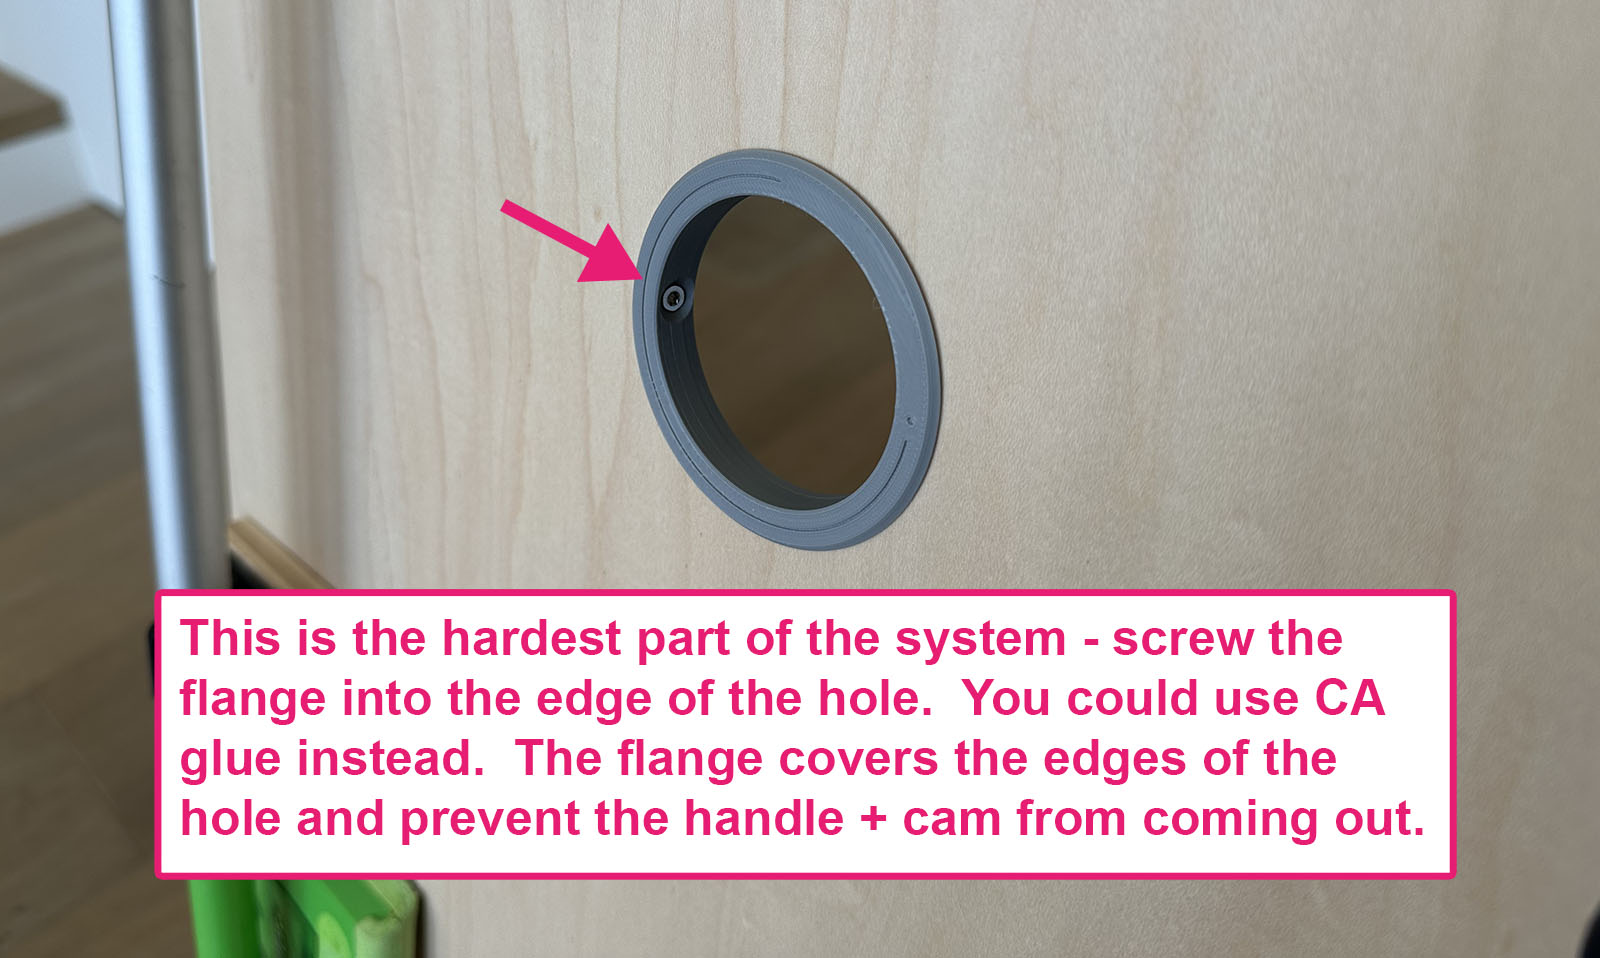
3. Insert the Handle + Cam (now glued together) from the back. The flange has a ledge to stop the handle coming through.
4. Attach the plate on the back with screws. It has a (delicate) lip just to key for alignment. This stops the handle from coming out. Loosen the screws a bit if the handle is hard to turn.
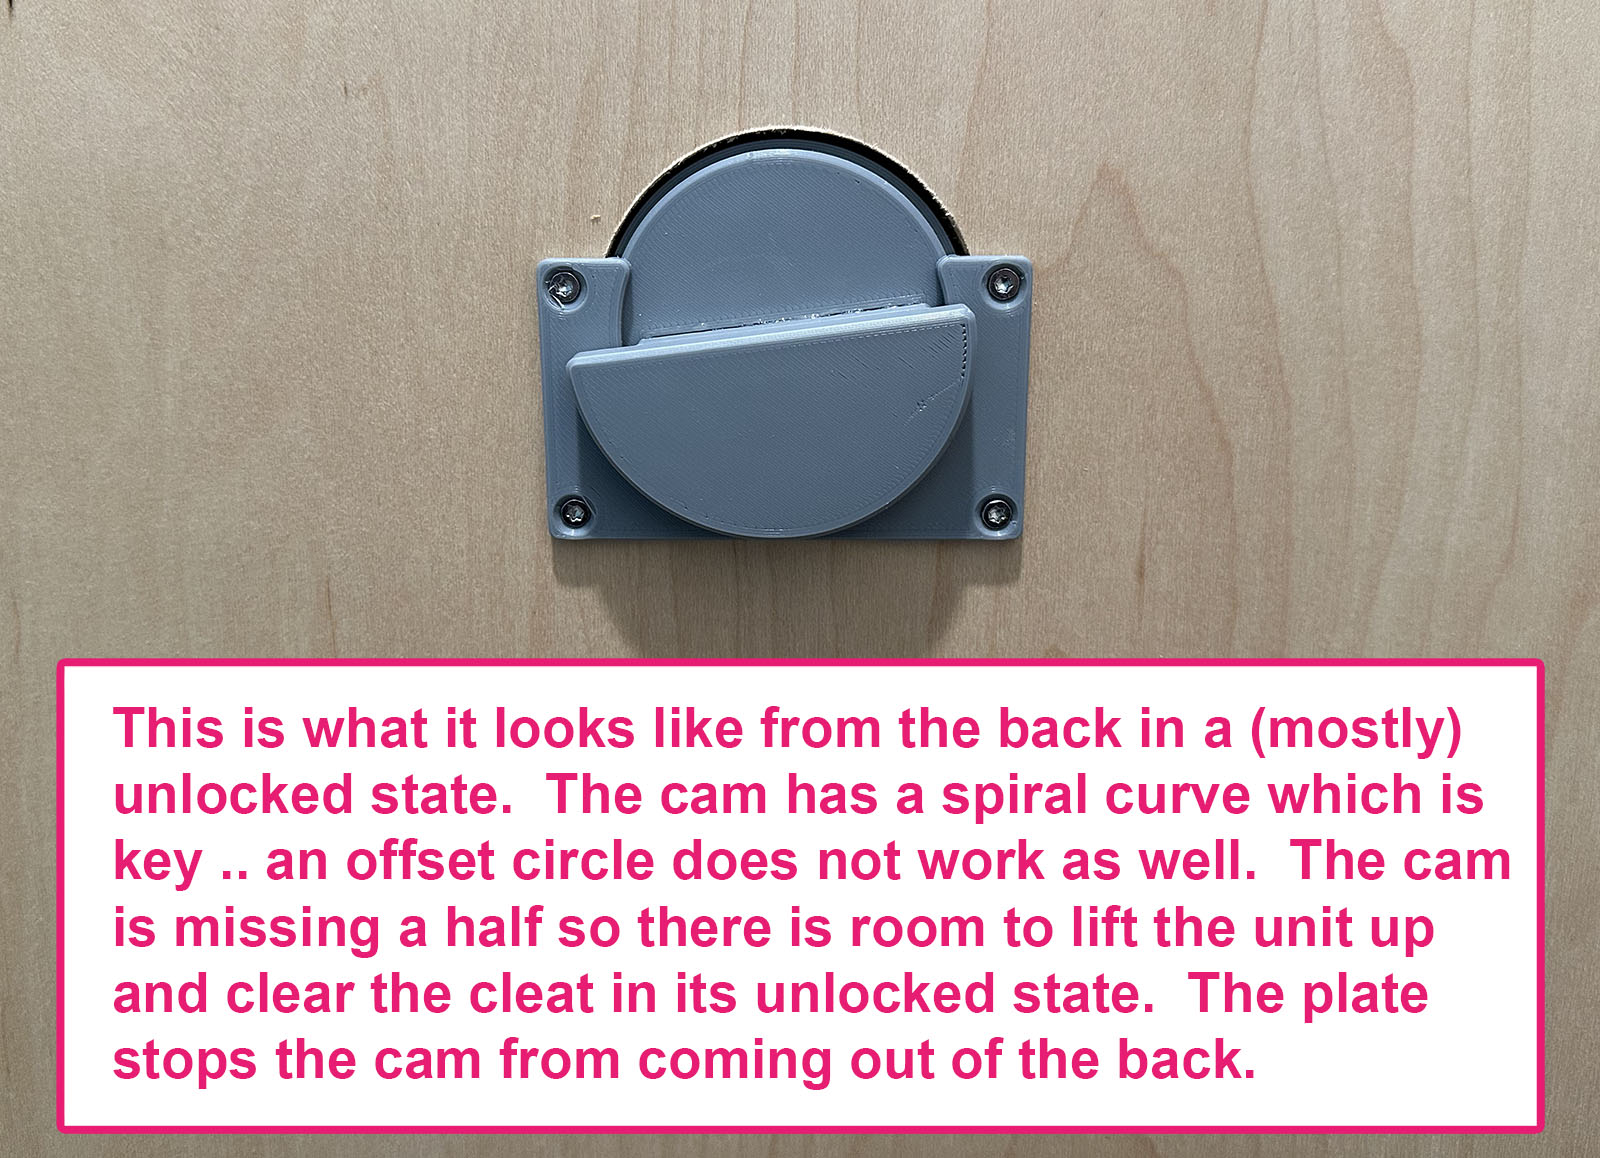
It's now ready to use. Mount your item to your french cleat wall in the unlocked position and feel an intense amount of satisfaction as you gently turn the handle and lock it down.
Important:
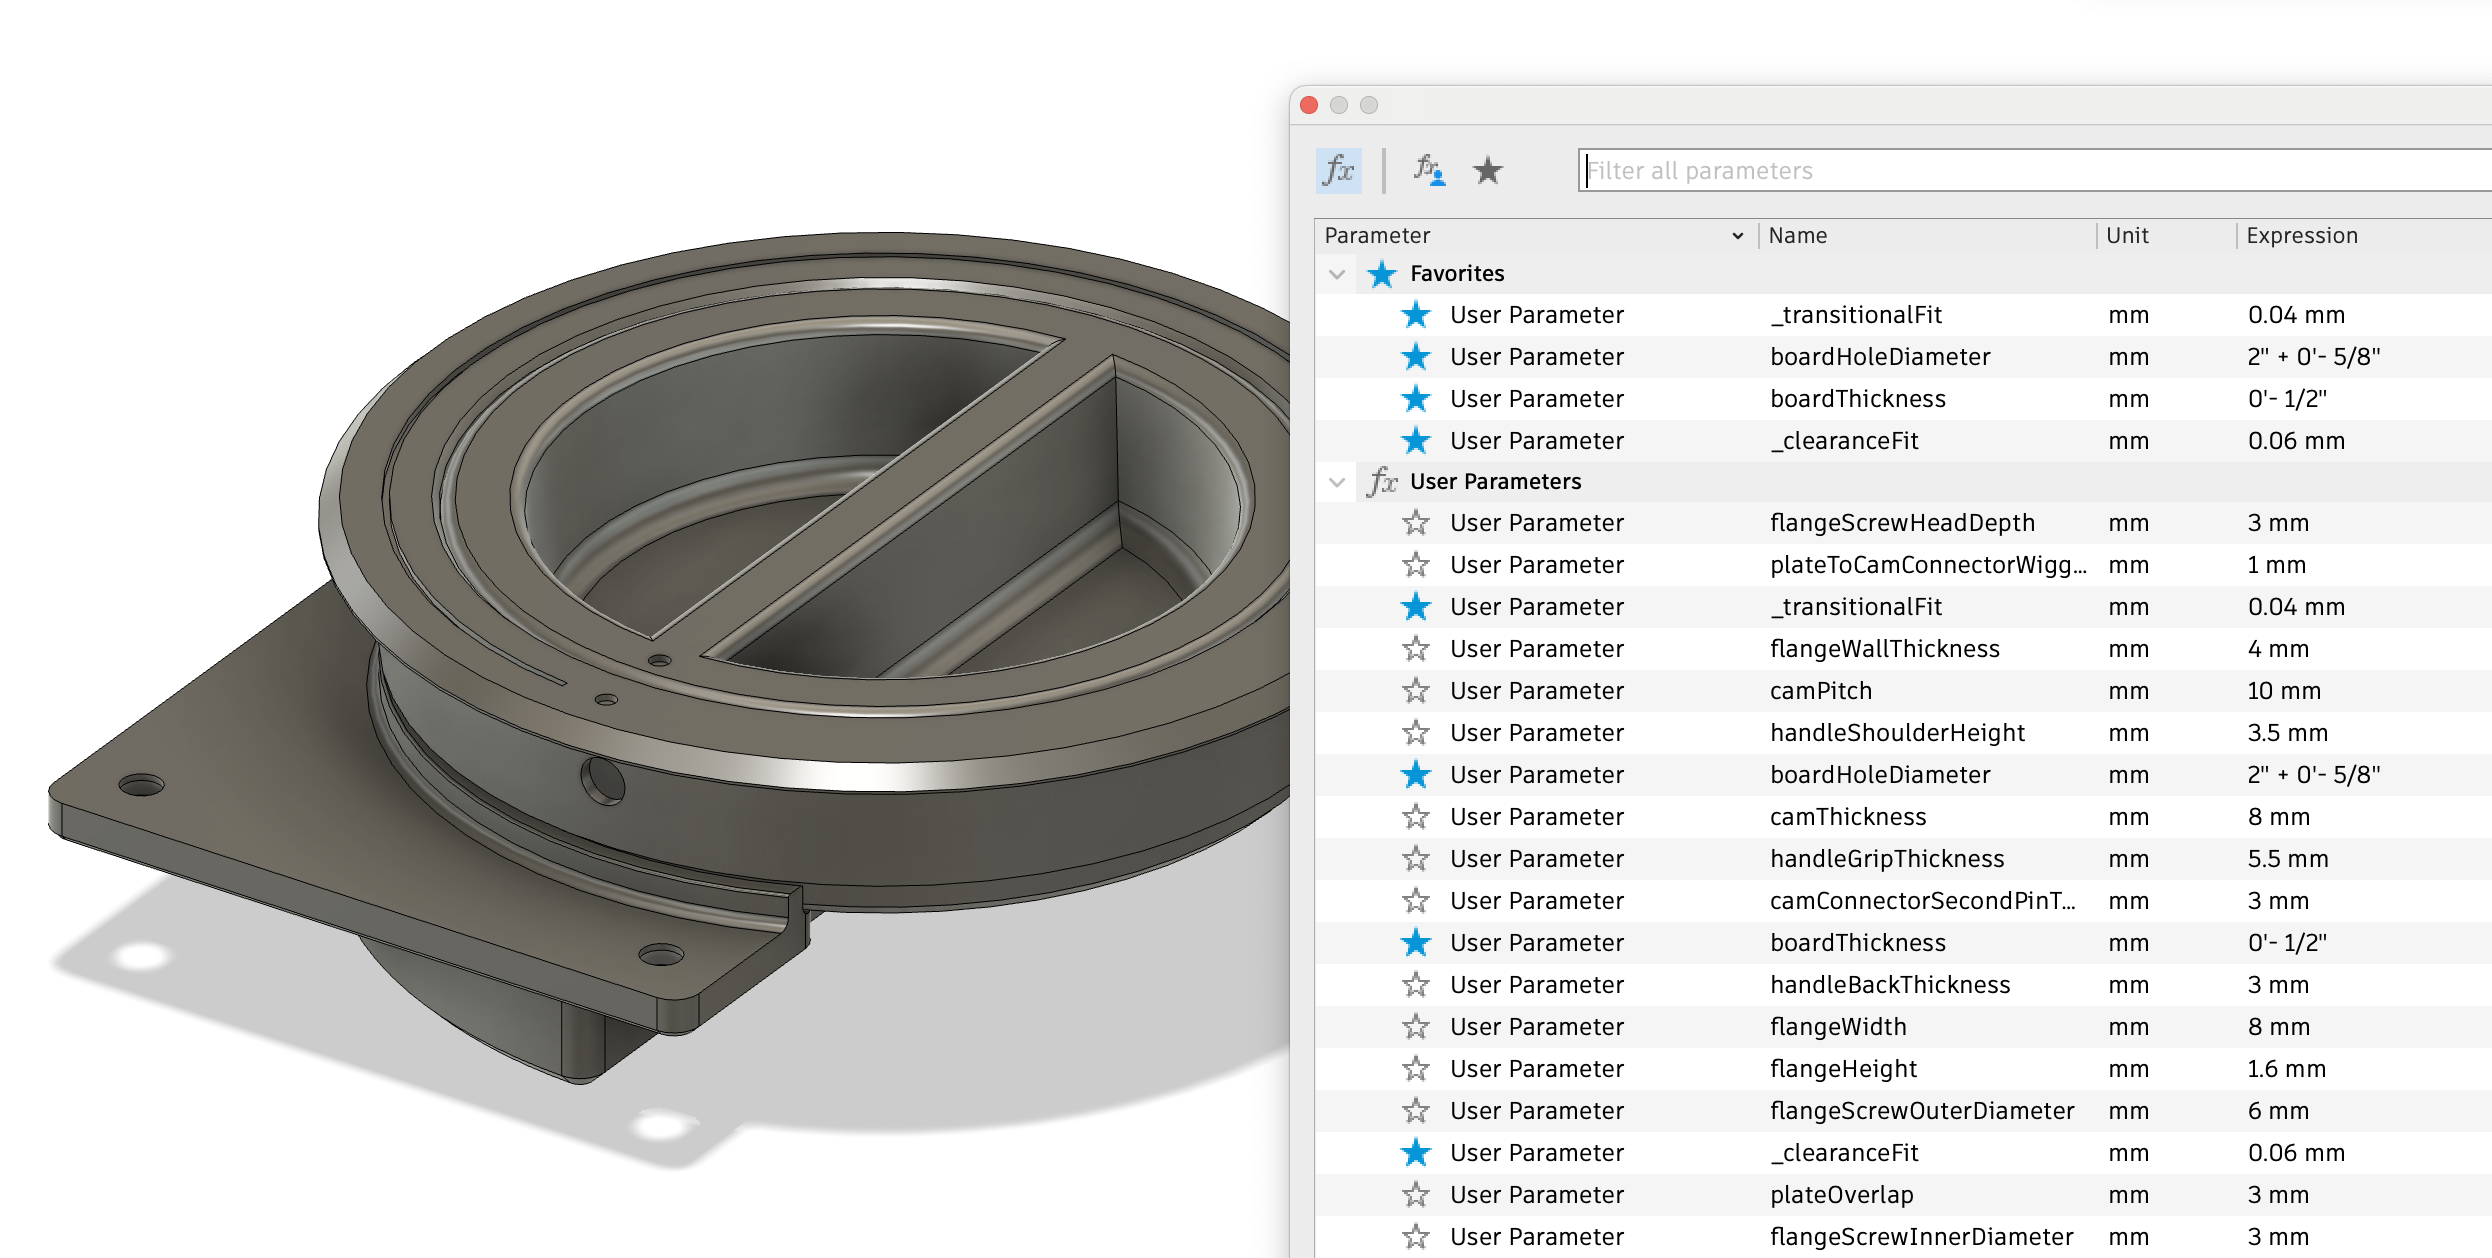
- The model must be tailored to the thickness of the board you are using, and the diameter of the hole you drill.
The models I uploaded assume you are using a ½" thick board and you will drill a 2-5/8" diameter hole. That's just the settings I used. Let me know if you need me to upload a different setting.
If you can navigate around Fusion 360, every detail is parameterized in the included Fusion 360 file, so you can customize this yourself. The key settings are found in favorites under Modify > Change Parameters:
This is my first design in both Fusion 360 and 3D printing. It's more complex than I wanted. Let me know what I could do better.
Design by glen on MakerWorld (license: BY-SA).